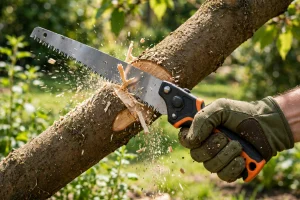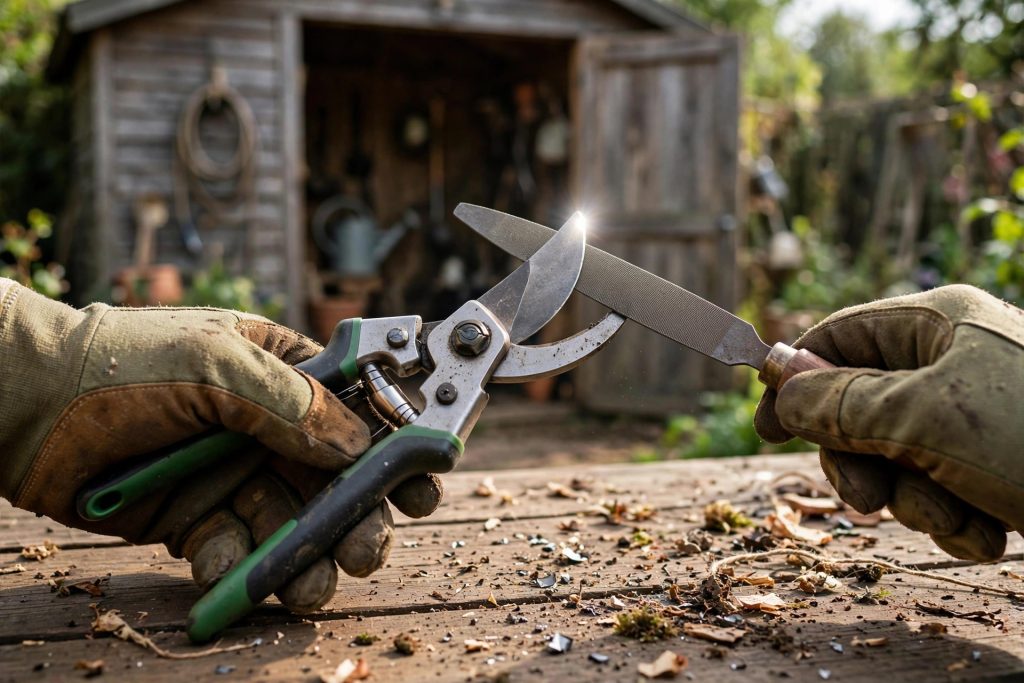

A dull pair of shears does not just slow you down. It crushes stems instead of slicing them, it leaves ragged wounds that heal slowly, and it turns a ten minute pruning job into a wrestling match with your own tools. Learning how to sharpen pruning shears is the single cheapest upgrade in the garden, because the tool you already own is usually the right tool, it just needs an edge.
The same is true for loppers and hoes, though each one wants a slightly different touch. Shears and loppers need a fine, careful edge for clean cuts on living wood. A hoe needs a tougher edge that can hit soil, stones, and roots all day without chipping. This guide covers all three, step by step, with the safety habits that keep a sharpening session from ending in a cut finger.
You do not need a workshop full of gear. A file, a stone, gloves, and a steady surface will cover almost every hand tool in the shed. Work slowly, file in one direction, and test as you go. A sharp edge is a quiet edge: it slices with little force and leaves a smooth, pale cut surface behind it.
Quick Answer: Which Tool Gets Which Treatment
| Tool | Sharpen this side only | Best first tool | Angle guide | Touch-up rhythm |
|---|---|---|---|---|
| Pruning shears (bypass) | The beveled cutting blade only | Diamond file or fine sharpening stone | Match the factory bevel already on the blade | After heavy pruning days, and once a season in full |
| Loppers (bypass) | The beveled cutting blade only, following its curve | Mill file, finished with a fine stone | Match the factory bevel already on the blade | Once a season, plus touch-ups when cuts start to crush |
| Garden hoe | The beveled edge on the working face | 10 inch mill file | Match the existing bevel; about 30 degrees when forming a new edge on a stamped blade | When the blade drags through soil instead of slicing it |
If you remember only one rule from this guide, make it this one: sharpen the beveled side, and leave the flat side flat. The flat side gets one light pass at the end, only to remove the burr. Filing a bevel onto the flat side is the fastest way to ruin a bypass blade, because the two blades will no longer meet cleanly.
Signs Your Tools Are Dull
You rarely need a gauge to tell you a tool is dull. Your hands tell you first, and the plant tells you second.
Watch for these signs. If two or more show up, stop and sharpen before the next job, not after it.
- You have to squeeze much harder than you did last season for the same stem.
- Cuts on green stems look crushed, frayed, or torn instead of smooth.
- The blade skids or slips off a stem instead of biting into it.
- A hoe drags and bounces over soil, or it pushes weeds over instead of severing them.
- Loppers leave a ragged, splintered end on a branch, or they need two hands for a branch they used to cut with one.
- You find yourself reaching for a saw for branches your shears should handle, simply because the shears will not cut.
A dull blade is also a safety problem, not just a plant problem. Extra force means less control, and a slipping blade is the one that finds a finger. Extension guidance makes the same point in plain terms: a dull blade demands extra force, and that extra force is what leads to accidents.
Safety and Setup Before You File
Sharpening is safe work when it is slow work. Most sharpening cuts happen in a hurry, with a loose tool, a bare hand near the edge, or a file stroke aimed at the body. Set up properly and those risks mostly disappear.
Wear sturdy gloves and eye protection. Gloves protect against slips and metal filings, and glasses protect against the small chips that fly off a rusty or nicked edge. Work in good light so you can actually see the bevel, not guess at it. A shaded bench or a cloudy corner of the yard is a poor place to judge an edge.
Clamp the tool whenever you can. A small bench vise is ideal, but a tool held firmly against a bench, or with its handle tucked under a heavy board, is far better than a tool wobbling in your lap. If you must hold a small tool in your hand, keep the hand holding the tool behind the cutting edge, never in front of it, and file away from your body.
Keep the file strokes in one direction only, and lift the file on the return. Files cut on the push stroke. Dragging a file backward over the edge dulls the file, scratches the blade, and teaches your hands a sawing motion that is hard to break. One direction, steady pressure, full length of the edge, every time.
Finally, keep children and pets out of the sharpening area, and put tools down blade away from you when you pause. A freshly sharpened blade is sharper than the one you picked up, and it deserves that respect from the first minute.
What You Need
You can buy a drawer full of sharpening gadgets, but most gardeners need only this short list. Start here, and add a specialty stone only when a real tool asks for it.
- A 10 inch mill file, single cut, for hoes and loppers. This is the workhorse for larger edges.
- A smaller diamond file or a fine sharpening stone for pruning shears, where control matters more than speed.
- A fine stone or ceramic hone for finishing, and for removing the burr.
- Fine steel wool or a stiff brush, for rust and dried sap.
- A rag, warm soapy water, and a small bottle of light oil for cleaning and protecting the blade.
- Cut resistant or sturdy leather gloves, eye protection, and a bench vise or clamp if you have one.
- A scrap piece of paper and a thin green twig, for testing the edge when you finish.
Do not buy a power grinder for your first sharpening job. A grinder is fast, but it is also easy to overheat an edge, and overheated steel loses its temper and goes dull again quickly. A hand file is slower, cheaper, and far more forgiving, which is exactly what a beginner needs.
How to Sharpen Pruning Shears, Step by Step
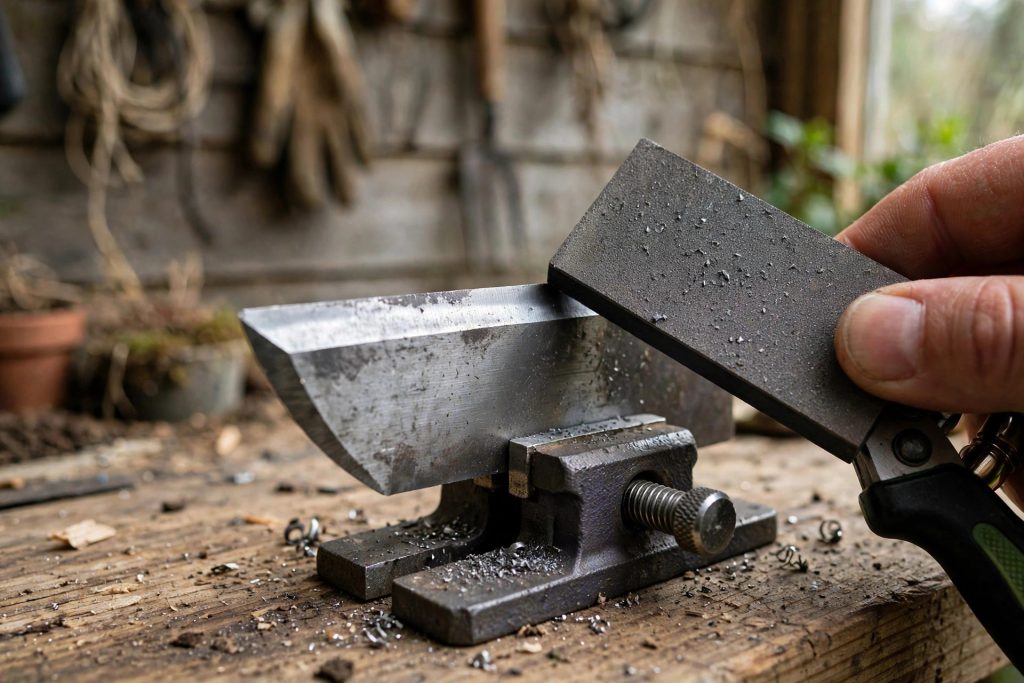
Step 1: Clean the blade first
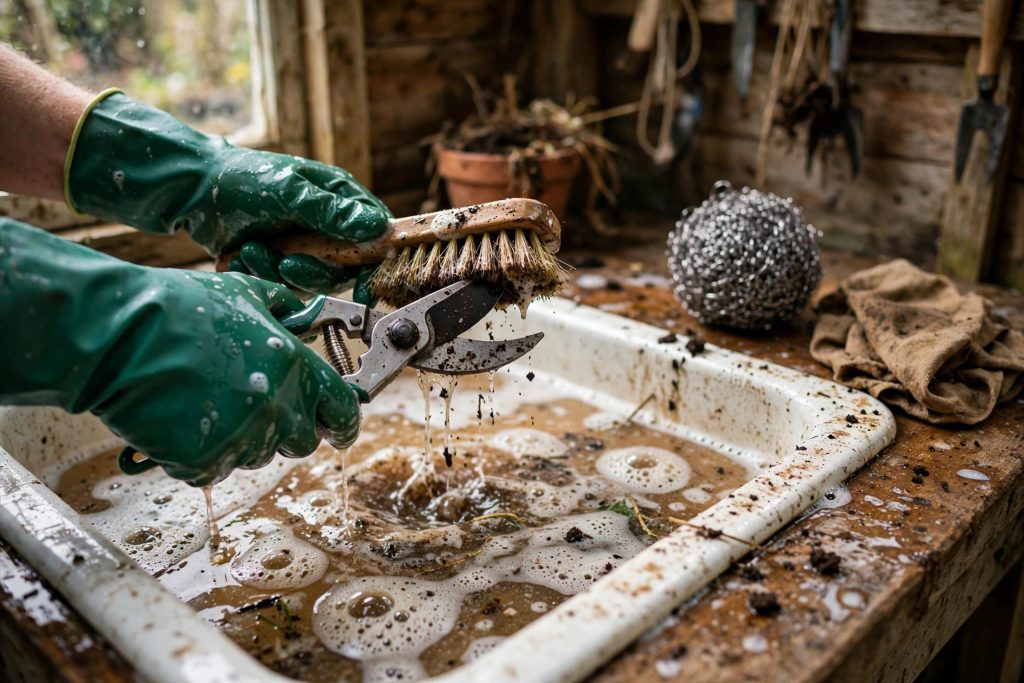
Never sharpen a dirty blade. Sap, soil, and grit hide the true edge, clog the file, and scratch the steel. Wash the blades with warm soapy water, scrub off sap and soil with a brush or steel wool, and dry the tool fully. If the blades are rusty, work the rust off with fine steel wool until you can see clean metal along the bevel. This is also the moment to check the tool itself: a loose pivot bolt, a cracked handle, or a blade with a deep chip may need repair before sharpening is worth the effort.
For tools that come apart, take them apart for a full sharpening. The University of Minnesota Extension notes that tools that can be disassembled should be, for regular maintenance, because it is far easier to reach the whole blade that way. Keep the small parts together in a dish so nothing rolls away.
Step 2: Find the bevel, and do not invent a new one
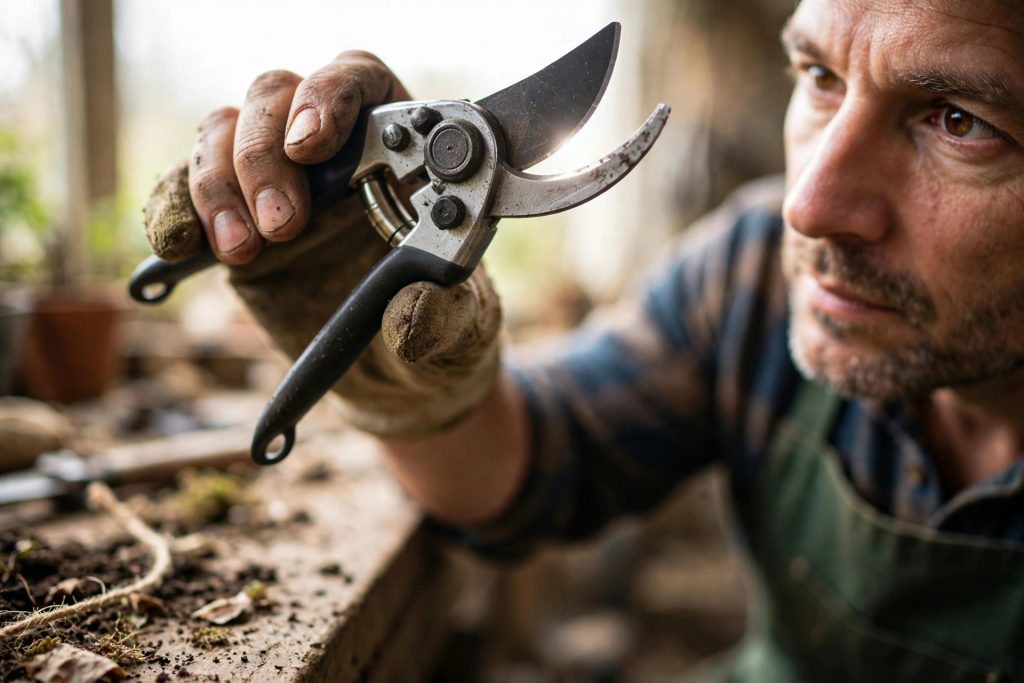
Hold the cutting blade up to the light and look at its edge from the side. The bevel is the angled surface that runs along the cutting edge. On a bypass shear, only the cutting blade has this bevel. The other blade, the hook or counter blade, is flat and is not sharpened.
This matters because sources quote different bevel angles, and beginners often panic over the numbers. Minnesota Extension describes a natural bevel of about 10 to 20 degrees for hand shears and loppers, while the maker FELCO gives 23 to 25 degrees for its own high quality bypass pruners. Both can be right, because different makers grind different bevels. Your job is not to pick a number from a chart. Your job is to lay the file or stone flat on the bevel that is already there, and keep it there. Matching the existing bevel restores the factory edge. Inventing a new angle grinds away good steel and changes how the blades meet.
Step 3: File in one direction, base to tip
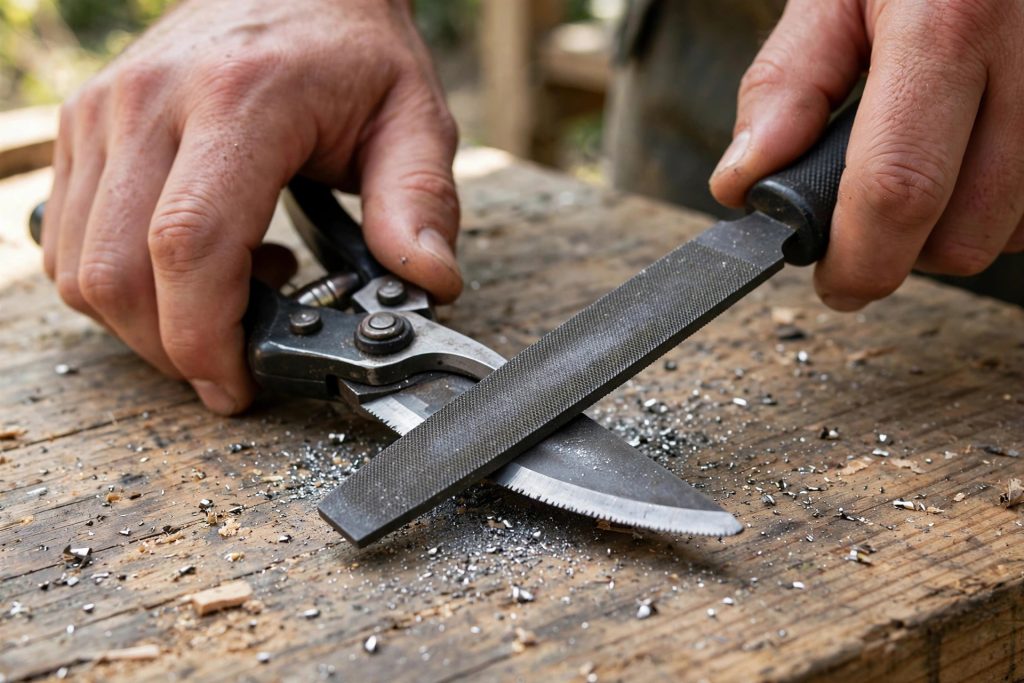
Hold the tool steady, bevel up. Lay the file or stone flat against the bevel so it touches the whole angled surface, not just the edge. Push in one smooth stroke from the base of the blade, near the pivot, toward the tip. Lift the file, return to the base, and repeat. Use steady, moderate pressure, and let each stroke run the full length of the edge so the edge stays even.
How many strokes? For a routine touch-up, five to ten strokes often restores a working edge. For a blade that has been neglected for a season, expect more, and check often. Wipe the blade with a rag every few strokes and look at the bevel: it should turn bright and even along its length. If one section stays dark or rough, that section still needs work. Stop as soon as the edge is bright and even. Over filing thins the blade and shortens its life for no gain.
Step 4: Remove the burr, lightly
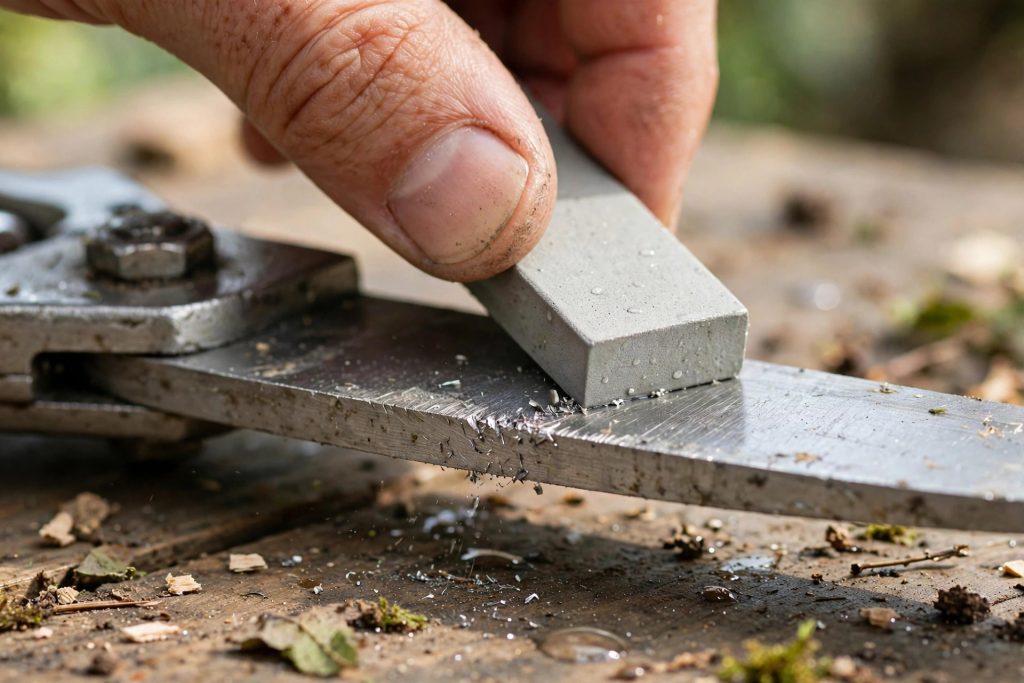
Sharpening pushes a thin ridge of metal, called a burr, onto the flat side of the blade. You can feel it by running a fingertip very carefully across the flat side, away from the edge, never along it. To remove it, lay a fine stone completely flat against the flat side and make one or two very light passes from pivot to tip. That is all. You are breaking off the burr, not sharpening the flat side. If you file the flat side at an angle, you create a second bevel, and the blades will leave a flap of tissue on every cut instead of a clean slice.
Step 5: Oil, reassemble, and test
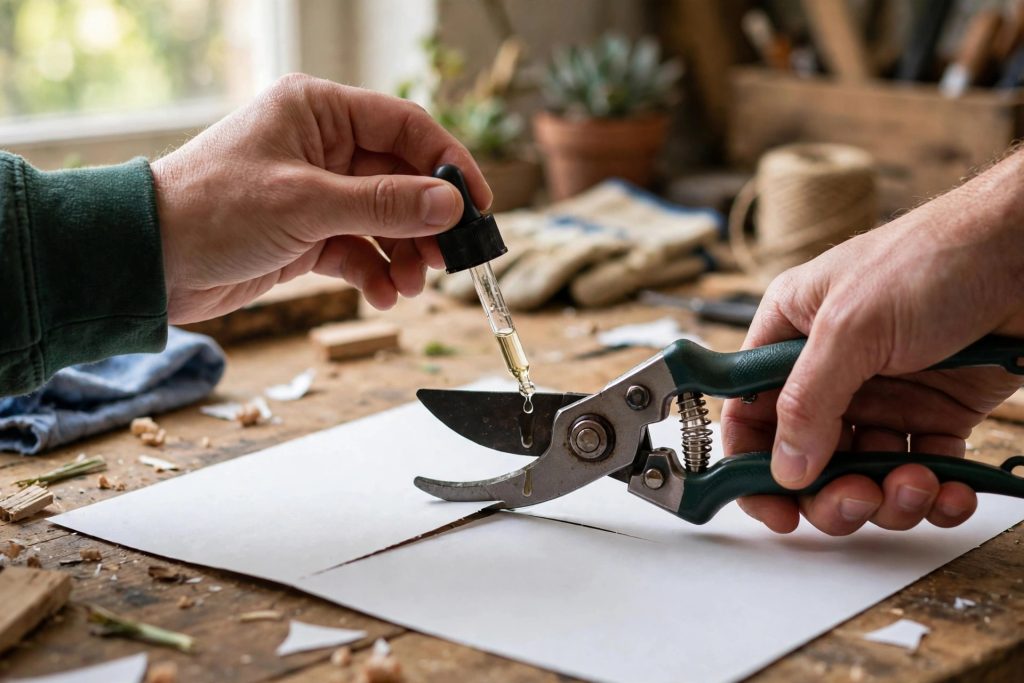
Put a few drops of light oil on the pivot and the spring, work the blades open and closed a few times, and tighten the pivot nut until the movement is smooth with no wobble. Wipe a light coat of oil over the blade to guard against rust, especially on carbon steel.
Test the edge on paper first, then on a thin green twig. A sharp shear slices paper cleanly without tearing it, and it cuts a twig with a smooth, pale surface and little effort. If the cut still crushes or tears, the burr may still be there, or one section of the edge still needs a few strokes. Go back, check the burr, and file only the dull section.
For a closer look at choosing and using the shears themselves, see our pruning shears guide, linked below in the internal links section of this article.
How to Sharpen Loppers
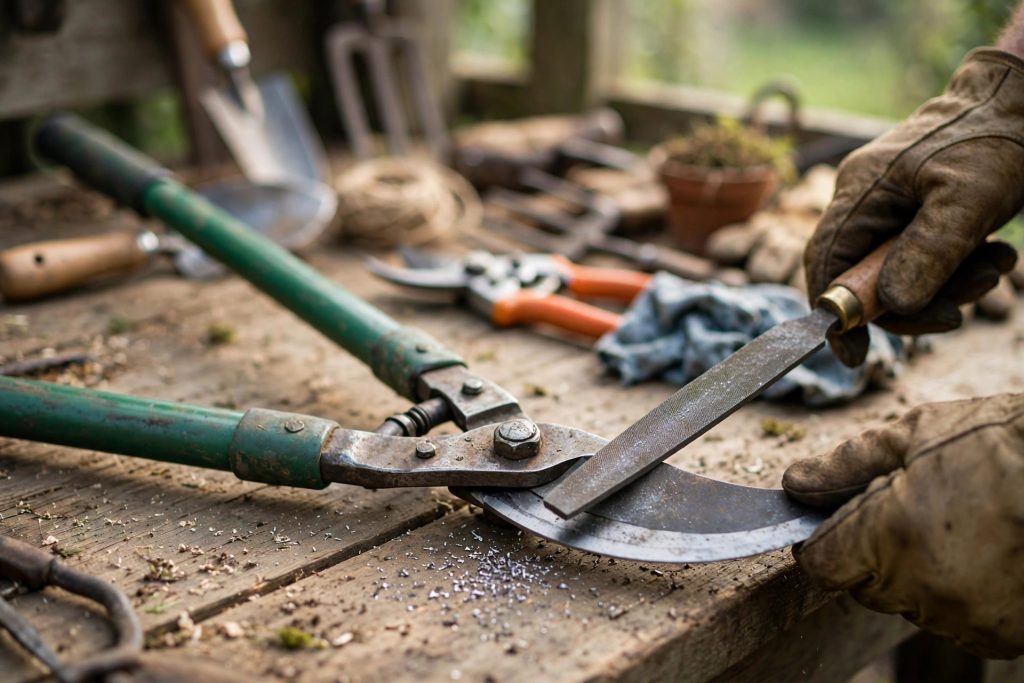
Loppers are shears with long handles, and the method is the same, with two differences: the blade is longer and often curved, and the leverage means a dull lopper can do more damage to a branch before you notice. Work through the same sequence: clean, find the bevel, file in one direction, deburr, oil, and test.
Start by cleaning the blades and checking the pivot. Lopper pivots work hard, and a loose or gritty pivot feels like a dull blade even when the edge is fine. Tighten and oil the pivot before you judge the edge.
File the beveled cutting blade only, following the curve of the blade as you go. A flat mill file works well on straighter sections, and a smaller diamond file or a tapered file helps on the curved tip. Keep the file flat on the bevel, push from base to tip in one direction, and let the stroke follow the arc instead of cutting a straight chord across it. Five to ten strokes per section is a good starting point, with checks in between.
Deburr the flat side with one light pass of a fine stone, exactly as with shears. Then test on a green branch about as thick as your thumb. A sharp lopper cuts it in one smooth squeeze, leaving a clean face. If the branch crushes, splits, or needs a second squeeze, the edge or the burr still needs attention.
One warning from the shed: do not sharpen the anvil plate on an anvil lopper. The anvil is the flat surface the blade closes against, not a cutting edge. Filing it changes the gap between blade and anvil and makes every cut worse. If the anvil has small nicks, smooth them very lightly with a fine file, and leave the rest alone.
How to Sharpen a Garden Hoe
A hoe is not a pruner, and sharpening it like one is a common mistake. A hoe edge lives in soil, so it needs to be tougher and less delicate than a shear edge. It does not need to shave hair. It needs to slice weeds and soil cleanly, and keep doing it after hitting a stone.
Clean the hoe first, knocking off caked soil and brushing the blade. Clamp the hoe head in a vise if you can, blade up, or hold it firmly on a bench with the edge facing away from you. A full length hoe is awkward in a small vise, so many gardeners clamp just the head, or work with the hoe on the ground, the handle held steady under a foot or a heavy board. Whatever you choose, the blade must not move while you file.
The most commonly used sharpening tool for shovels and hoes is a 10 inch mill file, and the rule for files applies here too: they cut on the forward stroke, so do not press on the return stroke. Hold the file with both hands, match the angle of the existing bevel, and push away from your body in long, steady strokes across the full width of the blade. Keep the angle and pressure even, and work until the edge is smooth and bright along its whole length.
If your hoe is a cheap stamped blade, it may have arrived with almost no bevel at all, just a blunt, square edge. In that case you must form the edge first, and extension guidance for digging tools puts that new edge at about 30 degrees, with the freshly filed metal about twice as wide as the blade is thick. That sounds technical, but in practice it means: file a clear, even bevel, not a razor thin one. A very sharp, thin hoe edge feels wonderful for ten minutes and then folds over in the soil. A slightly stouter edge lasts the season.
Finish by flipping the hoe over, clamping it again, and removing the burr with a light, flat stroke, just as with shears. Wipe the blade, oil it lightly, and test it in soft soil. A sharp hoe slices a young weed at the soil line with a light push. A dull hoe drags, bounces, and leaves the weed standing.
Bypass vs Anvil: Do Not Treat Them the Same
This is the section that saves more tools than any other, because bypass and anvil tools look similar and sharpen differently.
A bypass blade passes beside a counter blade, like scissors. It has a single bevel, and only that bevel is sharpened. The flat side stays flat. Bypass tools give the cleanest cuts on live, green wood, which is why they are the usual choice for roses, shrubs, and fruit trees.
An anvil blade closes onto a flat plate. Minnesota Extension describes anvil blades as double beveled, while maker guidance for many anvil models says to sharpen the cutting blade and leave the anvil plate alone. The safe rule for a home gardener is simple: sharpen the cutting blade, following its own bevel, and do not file a new edge onto the anvil plate. Smooth a nicked anvil lightly if you must, but do not try to make it sharp. An anvil tool suits dead, dry wood, where a little crushing does no harm. On live wood, a bypass tool will almost always heal better.
If you are unsure which type you own, close the tool slowly and watch the blades. If one blade slides past the other, it is bypass. If one blade lands flat on a plate, it is anvil. Label the tool, or keep a note in the shed, so the next sharpening session starts with the right method.
Common Mistakes That Ruin a Good Edge
Most ruined edges come from habits, not from bad tools. Check yourself against this list before your next session.
- Sharpening a dirty blade. Grit and sap clog the file and hide nicks, so you file blind and uneven.
- Filing back and forth like a saw. Files cut one way. The return stroke should be a lift, not a cut.
- Sharpening the flat side of a bypass blade. This creates a second bevel and a gap between the blades.
- Chasing a number instead of the bevel. If the factory bevel is 20 degrees, filing at 30 degrees grinds away steel and changes the cut. Match what is there.
- Overheating the edge on a power grinder. Blue or straw colored steel has lost its temper. Dip often in water, or stay with a hand file.
- Over filing a good edge. Stop when the bevel is bright and even and the paper test passes. More strokes do not make a better edge, they make a thinner one.
- Putting tools away wet or dirty. Rust starts fast on carbon steel, and a rusty edge needs far more filing next time than a clean one does.
If you have already made one of these mistakes, do not throw the tool away. Most edges can be restored by going back to the factory bevel and working patiently, a few strokes at a time, with checks in between. Only a deeply chipped, cracked, or bent blade is truly beyond hand sharpening.
After Sharpening: Deburr, Oil, and Test the Cut
Finishing is not optional, and it takes about two minutes. First, deburr: one light, flat pass on the reverse side with a fine stone. Second, oil: a few drops on the pivot, the spring, and a light wipe over the blade. Third, test: paper, then a green twig, then a real cut in the garden.
For shears and loppers, also check the pivot tension. Too loose, and the blades wobble and tear. Too tight, and the tool binds and tires your hand. The right tension is smooth movement with no side play, and blades that pass each other without grinding.
For hoes, check the handle as well as the edge. A loose head, a cracked handle, or a splintered grip will undo good sharpening work, because you cannot control a tool you cannot hold safely. Tighten the head, sand rough wood smooth, and oil wooden handles occasionally to keep them from drying and splitting. Clemson Extension’s winter tool care advice makes the same pairing: sharpen the edge, then oil the blade and treat the wooden handles, so the whole tool is ready, not just the steel.
How Often to Sharpen, and When to Replace a Blade
There is no calendar date that fits every gardener, because use varies so much. A gardener who prunes roses every weekend needs touch-ups far more often than a gardener who prunes once in spring. Use the cut itself as your schedule.
As a practical rhythm, give shears a quick touch-up after a heavy pruning day, when you first feel resistance increase. Give all three tools a full clean, sharpen, and oil at least once a season, ideally at the end of winter pruning or before spring work starts, when the shed is quiet and you can take your time. Hoes get touched up whenever soil starts to drag instead of slice, which in weedy summer beds can be every few weeks.
Replace a blade, or the tool, when the steel itself is the problem: a deep chip that would need grinding away half the blade, a crack, a bent blade that will not sit true, or a pivot that will not hold tension after repair. Many quality shears and loppers also have replaceable blades and springs, which is worth checking before you buy a whole new tool. A tool with replaceable parts is cheaper to keep for a decade than a sealed tool that must be replaced whole.
For the wider kit, including how each hand tool earns its place, see our garden hand tools guide, linked below.

Final Thoughts
Sharpening is a small skill with an outsized payoff. Ten quiet minutes with a file gives you cleaner cuts, healthier plants, less strain on your hands, and tools that last years longer. Start with the shears, because they are the tool you reach for most, then work through the loppers and the hoe with the same patient routine: clean, match the bevel, file one way, deburr, oil, and test.
Do not chase perfection on the first try. A slightly imperfect edge that cuts cleanly is far better than a perfect looking edge that was over filed into thinness. Test, adjust, and test again. With one season of practice, sharpening stops feeling like a chore and starts feeling like part of gardening itself, a short, satisfying job that leaves every tool in the shed ready for real work.
References
- University of Minnesota Extension, Caring for winter pruning tools: bypass blades are single beveled and anvil blades double beveled, sharpen in one direction at the natural bevel, and disinfect with diluted bleach or 70 percent rubbing alcohol.
- FELCO North America, How to Sharpen and Maintain Pruning Tools: factory bevels of 23 to 25 degrees on high quality bypass pruners, 5 to 10 strokes in one direction, deburr with one light flat pass, and oil the pivot.
- Clemson Extension, Winter Tool Care: clean tools, sharpen before spring, wipe pruner blades with oil, and treat wooden handles with linseed oil.
- K-State Research and Extension, Johnson County, Garden Tool Care: dull blades need more force and are more likely to cause accidents, and sharpening can be done at home with a file.
- Virginia Tech Extension, November Tips: use a broad file for shovels and hoes, and avoid overheating edges on a power grinder, which makes metal prone to breaking.
Frequently Asked Questions
Do I sharpen both sides of a bypass pruning shear blade?
No. Sharpen only the beveled cutting side. The flat side stays flat, and gets one very light pass at the end only to remove the burr. Filing a bevel onto the flat side creates a gap between the blades and leaves a flap of tissue on every cut.
What angle should I use when I sharpen pruning shears?
Match the bevel already on your blade, rather than copying a single number. Minnesota Extension describes about 10 to 20 degrees for hand shears and loppers, while FELCO gives 23 to 25 degrees for its own bypass pruners. Lay the file flat on the existing bevel and keep it there, and you will restore the factory edge.
How often should I sharpen garden tools?
Touch up shears after heavy pruning days, when cuts start to need more force. Give shears, loppers, and hoes a full clean, sharpen, and oil at least once a season. Touch up a hoe whenever it starts to drag through soil instead of slicing weeds cleanly.
Can I sharpen an anvil pruner the same way as a bypass pruner?
Not quite. Sharpen the cutting blade on its own bevel, and leave the anvil plate alone. The anvil is a flat surface the blade closes against, not a cutting edge, and filing it changes the gap and makes cuts worse. Use anvil tools mainly for dead, dry wood, and bypass tools for live wood.
Why does my garden hoe go dull so fast?
Soil is abrasive, and every stroke drags the edge through grit, stones, and roots. A hoe edge is meant to be tougher than a shear edge, not razor thin, so a slightly stouter bevel lasts longer. Touch it up with a mill file as soon as it starts to drag, instead of waiting until it will not cut at all.
Can I use a power grinder to sharpen garden tools?
Yes, but with care. A grinder removes metal fast and can overheat an edge, which makes the steel lose its temper and go dull again quickly. Keep a bucket of water nearby, dip the blade often, and use light passes. For most home gardeners, a hand file is slower, safer, and easier to control.

Thesis Link : https://saulibrary.edu.bd/daatj/public/uploads/BAU200601_19-Pp_5.pdf
- How to Sharpen Garden Tools (Shears, Loppers, Hoes) - October 26, 2026
- How to Start Seeds Indoors - October 25, 2026
- Best Pruning Saws: 10 Top Picks for 2026 - October 25, 2026