
Your lawn can look fed and watered and still feel wrong underfoot. It feels spongy when you walk across it. Water sits on top after a shower instead of soaking in. The grass wilts fast on a dry afternoon, even though you watered two days ago. In many yards, the cause sits hidden just below the green blades: a thick layer of thatch.
Learning how to dethatch a lawn starts with a surprise for many homeowners. You do not start with a machine. You start with a measurement. Dethatch at the wrong thickness, at the wrong time of year, or on the wrong grass type, and you can tear up a lawn that only needed patience. Measure first, and the right method becomes obvious.
This guide walks through the signs, the wedge test that settles the question, the timing split between cool-season and warm-season lawns, and the three methods worth using. Follow the sequence and you will open the lawn up without stripping it.
What Is Thatch and Why a Thin Layer Helps
Thatch is the tightly interwoven layer of living and dead stems, roots and crowns that builds up between the green grass blades and the soil surface. It is a normal part of a growing lawn. Grass sheds old material all season, and soil microbes break most of it down.
A thin layer is useful. It cushions the crowns, the growing points of the plant, against foot traffic and mower wheels. It also slows moisture loss from the soil surface on hot days.
Problems start when growth outruns breakdown. Then the layer turns into a dense mat. Water, air and fertilizer struggle to reach the roots. Roots begin to grow inside the thatch itself instead of down in the soil, because that is where the moisture sits. That shallow rooting is why a thatchy lawn wilts fast in a dry spell, dries out faster than soil, and can freeze faster in winter. The mat also shelters insects and disease organisms, which makes a stressed lawn harder to rescue.
Some grasses build thatch faster than others. Kentucky bluegrass, creeping bentgrass and stoloniferous southern grasses such as Bermuda and zoysia produce side shoots that feed the layer. Buffalograss, by contrast, rarely needs dethatching at all.
Signs Your Lawn Needs Dethatching
You cannot judge thatch from the mower seat. Still, a lawn with too much thatch usually gives you several clues at once:
- The surface feels spongy or springy underfoot, like walking on a thin mattress.
- Water runs off or puddles instead of soaking in, even on soil that is not compacted clay.
- The lawn wilts quickly in dry weather and greens up poorly after feeding.
- You can grip the sod with your fingers and feel it shift or lift slightly. Healthy turf anchored in soil should not move.
- Bare or thin patches appear even though you mow, water and fertilize on schedule.
- Disease and insect damage keep returning in the same areas.
Treat these signs as a prompt to measure, not as proof. Sponginess can also come from wet soil, and runoff can come from compaction alone. The wedge test below separates a thatch problem from everything else in about two minutes.
How to Dethatch a Lawn Starts With Measuring Thatch
Cut a small triangular wedge or plug of turf, a few inches deep, from a typical part of the lawn. Look at the side of the plug. Between the green blades and the dark soil you will see a brown, fibrous layer. Press it gently with your fingers, the way it sits compressed in the lawn, and measure it.
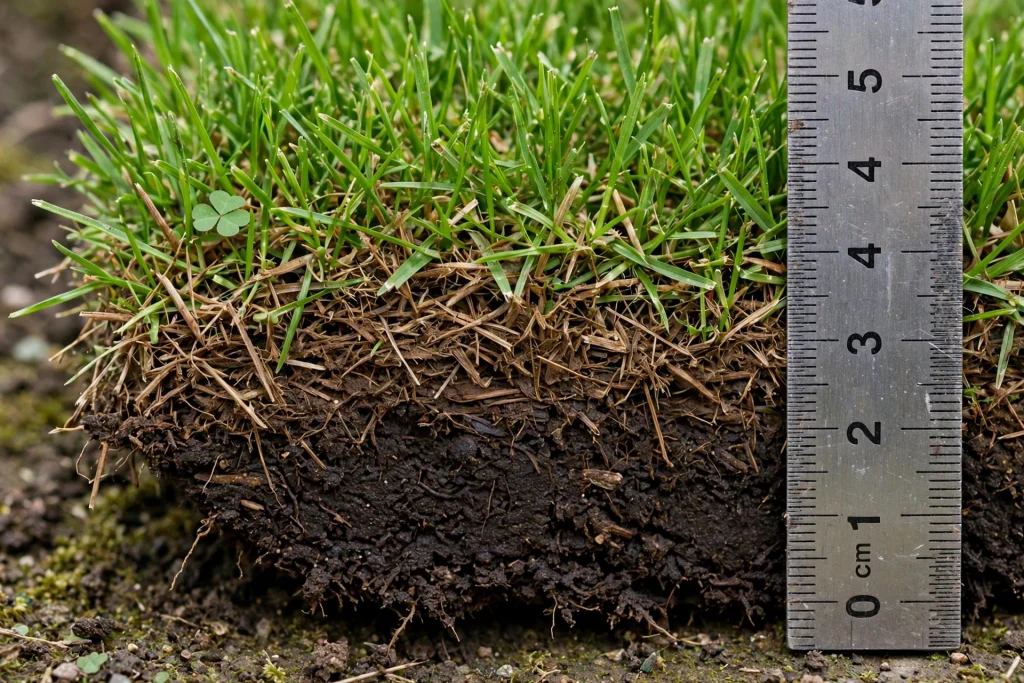
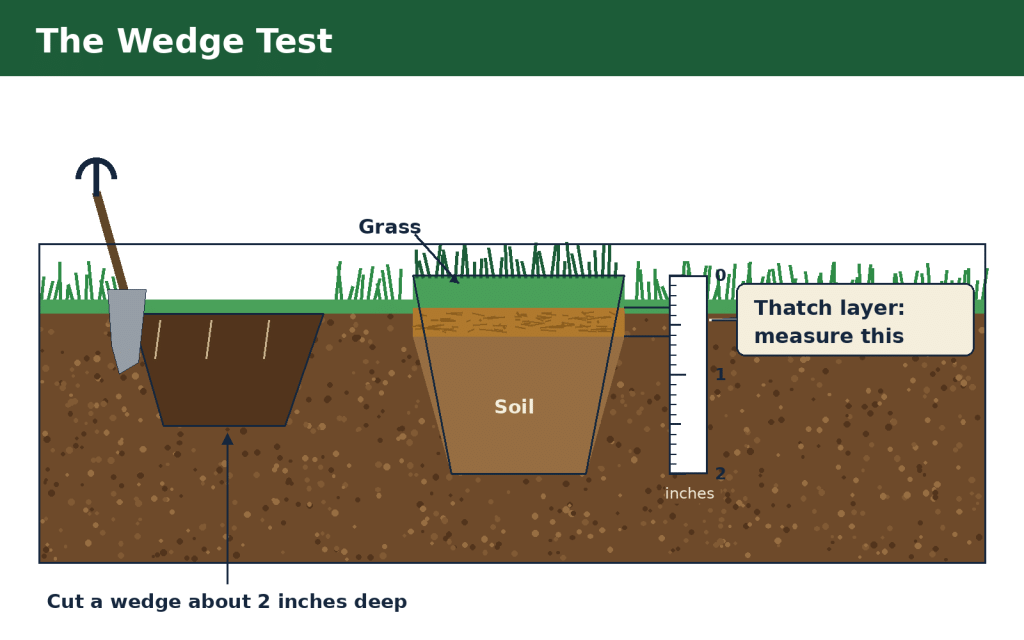
That one measurement decides the whole job:
| Thatch thickness | What it means | Best action |
|---|---|---|
| Under 1/2 inch | Healthy and protective | Leave it alone, no dethatching needed |
| 1/2 to 3/4 inch | Building up, roots may be shallowing | Core aeration first, soil from the cores helps the layer break down |
| Over 3/4 inch | Excessive, water and roots are blocked | Power rake or vertical mower, set just deep enough to lift thatch out |
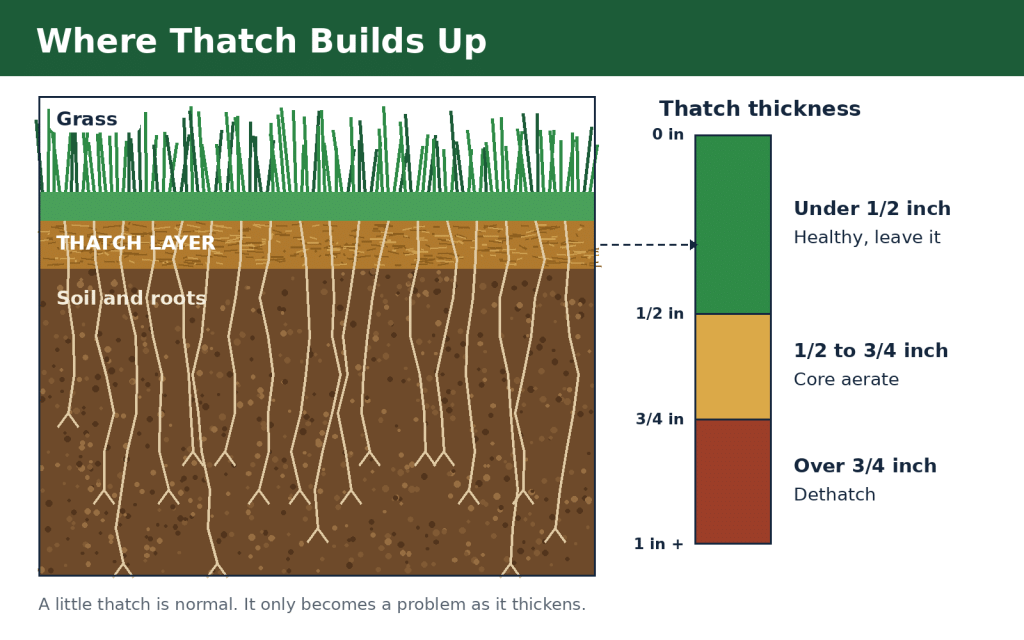
If your plug measures under half an inch, put the wedge back, water it in, and spend your weekend on something else. If it measures well over an inch, be honest about the scale of the job. Extension guidance is blunt on this point: in extreme cases it can be easier to strip the sod and re-establish the lawn than to rescue a mat that thick. Most home lawns sit in the middle bands, and those respond well to the methods below.
Check two or three spots, not one. Thatch is rarely even across a whole yard. Shaded corners and heavily fertilized areas near beds often run thicker than the open middle.
Best Time to Dethatch a Lawn
Dethatching thins the lawn and stresses it, even when you do it well. Timing is about giving the grass the best possible weeks to recover right after the work.
Cool-season lawns: fall first, early spring second
For Kentucky bluegrass, tall fescue and perennial ryegrass, early fall is the main window. The grass is growing actively, nights are cooling, weed pressure is dropping, and there are still weeks of growth left to knit the lawn back together. If you are reading this in October with a northern lawn, you are in the window now. Early spring is the second choice, once the grass is growing steadily and before summer heat arrives.
Fall dethatching also sets up the best overseeding moment of the year, covered in the aftercare section below.
Warm-season lawns: wait for late spring to early summer
For Bermuda, zoysia, centipede and St. Augustine, the rule flips. Dethatch only when the grass is growing vigorously and can fill back in fast, which means late spring into early summer. Kansas State guidance puts Bermuda and zoysia work in June through July. If your southern lawn measures thick in October, write it on the calendar for late spring and leave it alone for now. Dethatching a warm-season lawn as it heads toward dormancy opens it up with no growth left to repair the damage.
Times to never dethatch
Whatever your grass type, skip the work when the lawn is dormant, drought stressed, heat stressed, or wet. Wet soil turns blades into a tearing tool instead of a lifting one, and stressed grass cannot recover from the thinning. Wait for active growth and soil that is lightly moist and crumbles in your hand.
A seasonal plan helps you place this job alongside aeration, feeding and overseeding instead of guessing each year.
Choose Your Method: Rake, Power Rake or Core Aeration
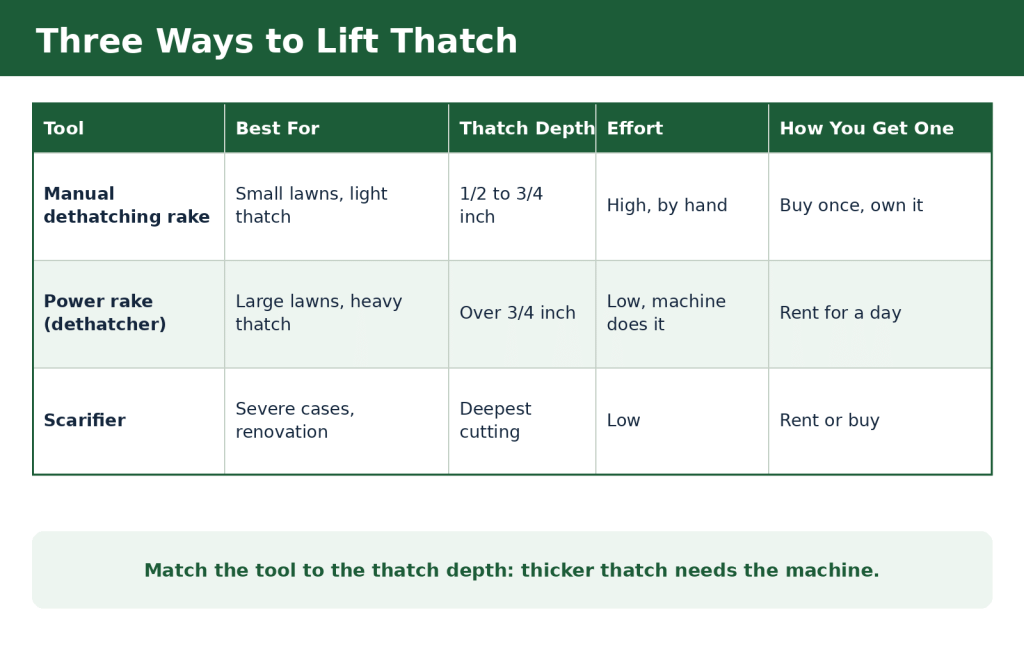
Match the tool to the measurement you took. Using a power rake on a half inch layer is damage with no benefit, and a hand rake on an inch of thatch is a weekend of pain for a poor result.
Manual dethatching rake for small areas and light layers
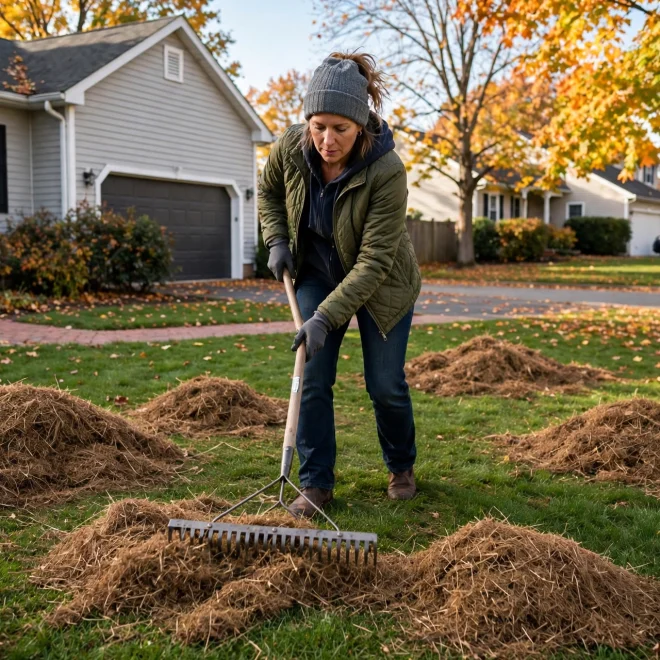
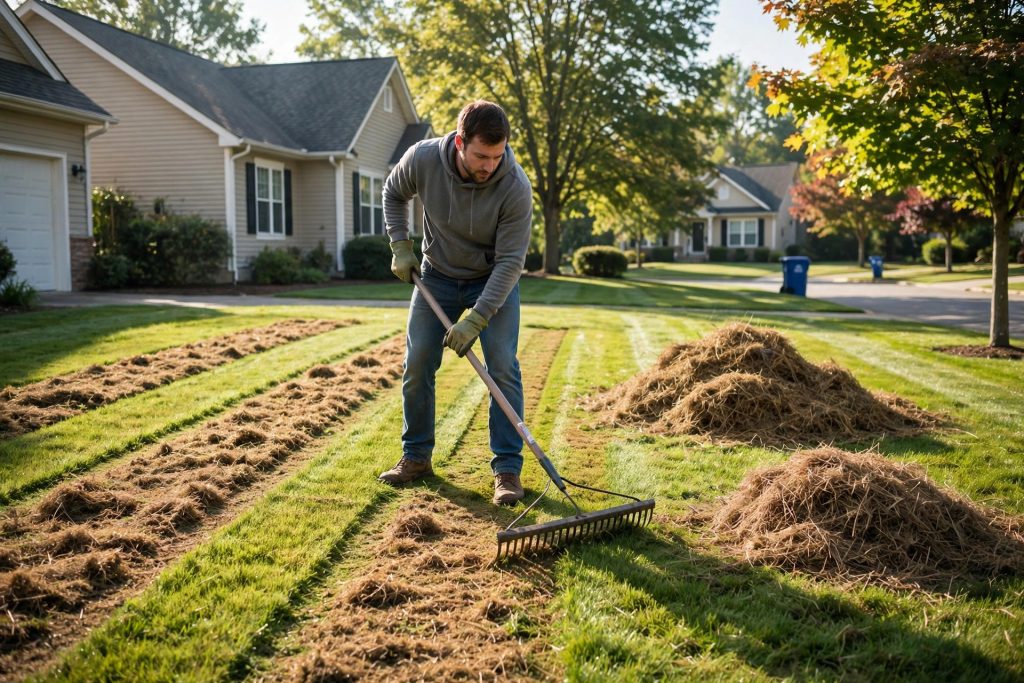
A dethatching rake has sharp, curved tines that slice into the mat and pull loose material to the surface as you pull the rake toward you. It is slow and physical, but it is precise. For a small patch, a thin layer, or a test area where you want to see how the lawn responds, it is the right tool. Work in short strokes, rake up the debris often, and expect a real workout on anything larger than a few hundred square feet.
If you are choosing a rake, our roundup of dethatching rakes compares manual options by handle, head width and lawn size.
Power rake or vertical mower for layers over 3/4 inch
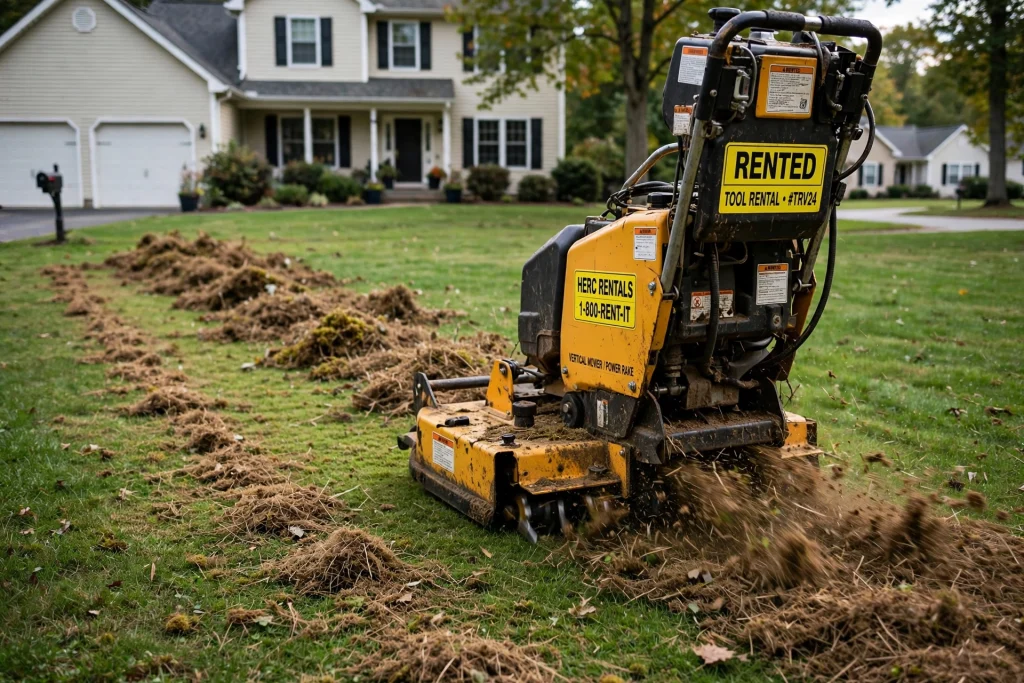
A power rake, also called a vertical mower or verticutter, uses vertically spinning blades to slice the thatch layer and pull material to the surface. Most homeowners rent one from a garden center or equipment outlet rather than buying. Set the blades only deep enough to lift thatch out and just touch the soil surface. Set them too deep and you can severely damage the crowns and roots you are trying to save.
Work in passes and do not try to remove the whole layer in one treatment. One pass in one direction, rake up the surprising volume of debris, then judge whether a second, lighter pass at a right angle is truly needed. On centipede and St. Augustine, keep blade spacing wider, around two to three inches, and limit the work to a single pass, because these grasses recover more slowly from aggressive slicing.
Core aeration for the middle band and compacted soil
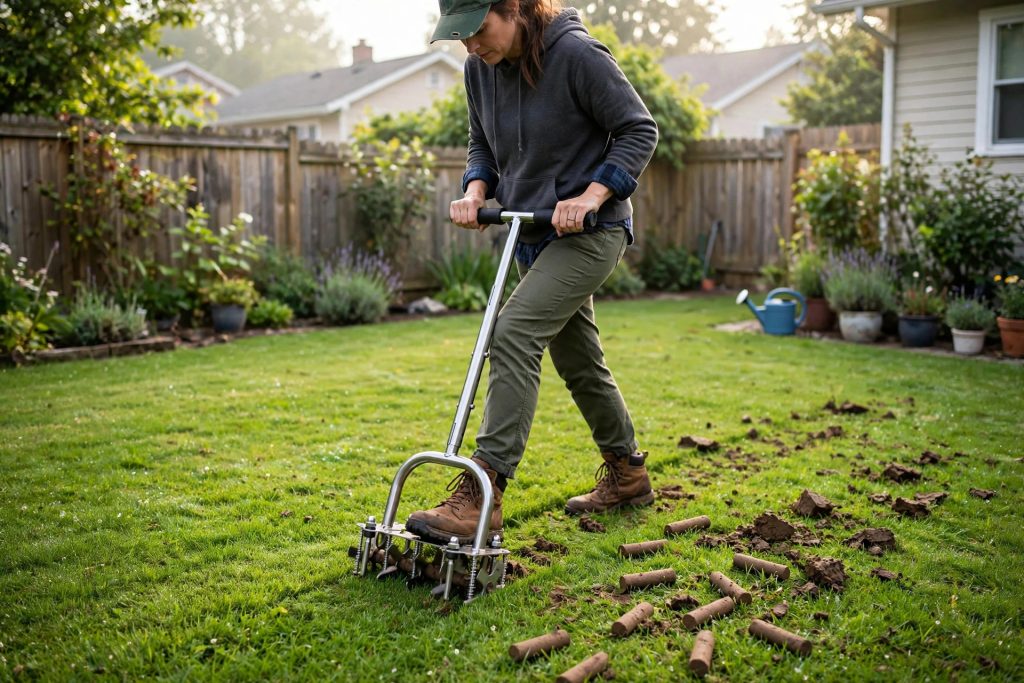
Core aeration is not dethatching, and this guide will not pretend otherwise. A core aerator pulls out small plugs of soil instead of slicing the mat. For the half inch to three quarter inch band, it is usually the better first move. The holes let air and water back in, and the soil cores that land on the surface carry microbes into the thatch, which helps the layer break down naturally.
Soil moisture matters here too. It should be moist enough to crumble, not wet and not bone dry, or the tines will not pull clean cores. For thatch work, go over the lawn enough times that holes end up roughly two inches apart. If compaction is your bigger problem, aeration may solve the runoff and wilting signs on its own, with no dethatching at all.
For tool choices and technique on compacted lawns, see our guide to manual lawn aerators.
Step by Step: How to Dethatch a Lawn Safely
With the measurement taken, the season right, and the method chosen, the work itself follows a simple order.
- Measure first. Do the wedge test in two or three spots and confirm the layer is actually past the threshold for your chosen method.
- Mow shorter than usual. Drop the mower a notch or two below your normal height so the tool can reach the mat. Bag or rake up the clippings.
- Mark hidden obstacles. Flag sprinkler heads, shallow irrigation lines, cables and invisible fence wires. A power rake blade finds them faster than you will.
- Check the soil moisture. Work when the soil is lightly moist, a day or so after rain or watering, never when it is wet or muddy.
- Run the tool in one direction. Walk at a steady pace and cover the lawn once, in straight passes, the way you would mow.
- Rake up the debris. You will pull up far more material than you expect. A thick lawn can fill several yard waste bags. That is normal.
- Judge the second pass honestly. Check the layer again with a fresh plug. If it is now near half an inch, stop. If thick bands remain, make one lighter pass at a right angle to the first.
- Finish clean. Rake or blow the surface clear so light and water can reach the soil, then move straight into aftercare while the lawn is open.
Aftercare: Overseeding, Watering and Recovery
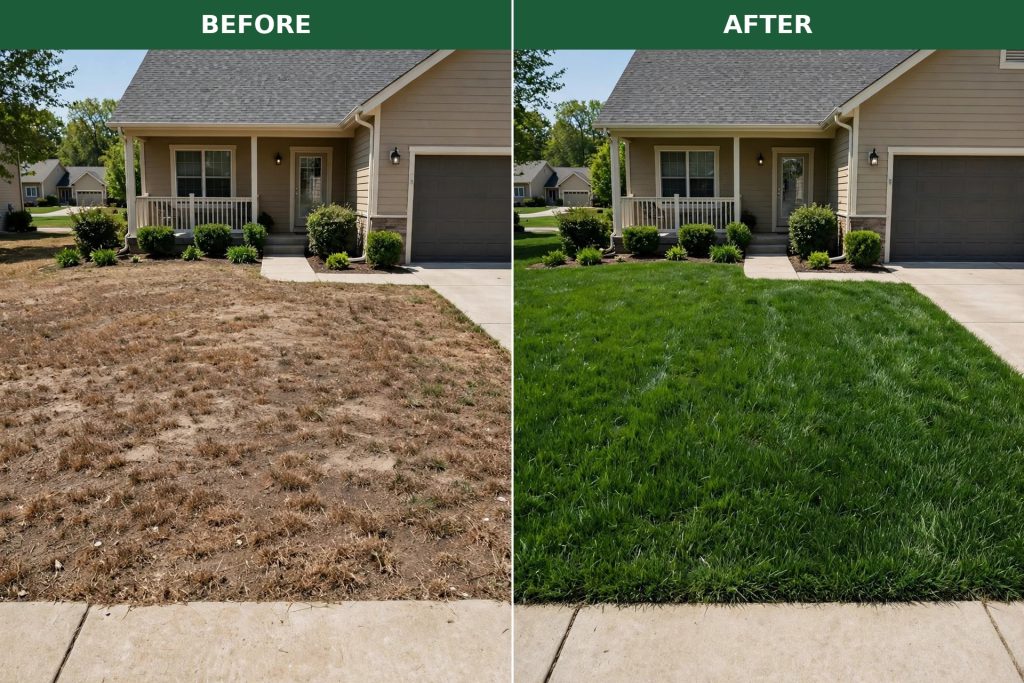
A freshly dethatched lawn looks rough. That is expected. You have removed a mat, not the grass itself, and the open surface you have created is an opportunity that only comes once in a while.
For cool-season lawns dethatched in fall, overseed right away. Seed that lands on exposed soil germinates far better than seed sitting on top of thatch, which is why this is the best seed to soil contact window of the year. Apply a starter fertilizer only as a soil test directs, rather than guessing at rates. For warm-season lawns worked in late spring, the grass usually fills in from its own runners, and overseeding is rarely part of the plan.
Water to keep the surface evenly moist while the lawn recovers and any new seed germinates. That means light, frequent watering at first, easing back to deeper and less frequent watering as roots establish. Keep foot traffic and mower passes to a minimum until the lawn has knitted back, usually a few weeks.
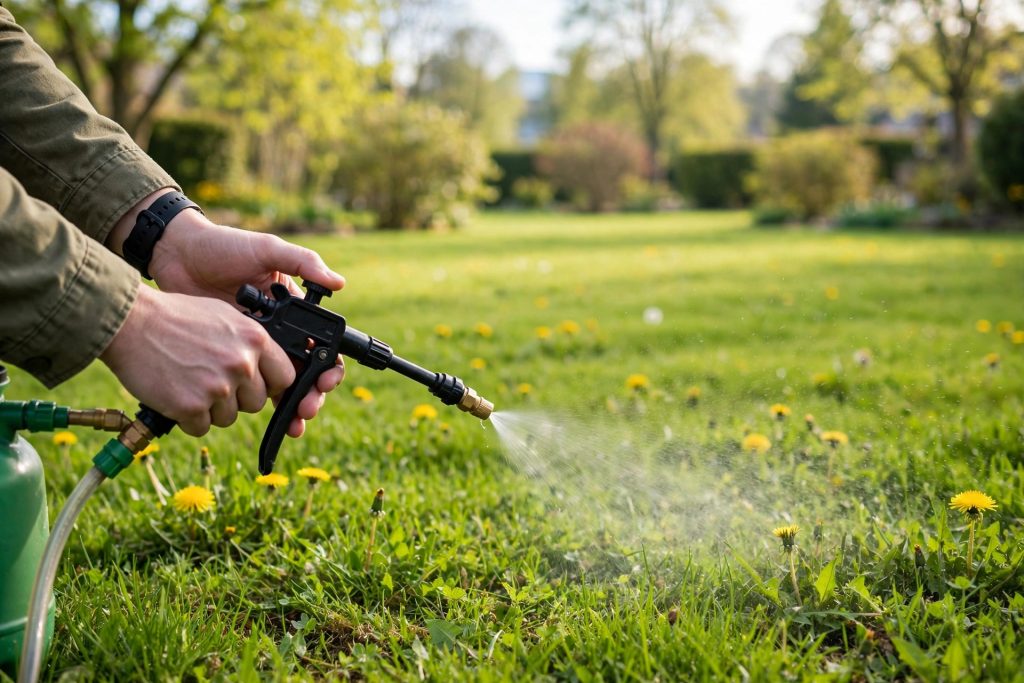
Watch the thinned areas for weeds in the weeks after the work. Open soil is an invitation, and fast action on young weeds is far easier than rescuing a patch later in the season.
For product guidance on open, recovering lawns, see our weed killer guide for lawns.
The Tools That Make Dethatching Work
The method matters less than the tool in your hands. A sharp, well set tool lifts thatch cleanly and leaves the living grass standing. A dull or wrong one tears crowns, scalps high spots and doubles the recovery time. Four tool decisions decide how this job goes.
A Dethatching Rake for Hand Work
On a small lawn, or anywhere the thatch sits between half an inch and three quarters, a purpose built dethatching rake is the control option. Look for an adjustable head so you can set how hard the tines bite, and work in short overlapping passes. It is slow, honest work, but nothing else lets you feel the moment the tines stop lifting brown thatch and start pulling green grass.
Renting a Power Rake: What to Check Before You Pay
Past three quarters of an inch of thatch, or past about 5,000 square feet, renting a power rake for a day beats a weekend of hand raking. Check four things at the rental counter. First, the tine type: spring tines are gentler for routine work, flail blades cut harder for severe thatch. Second, depth adjustment that moves in small steps, because a quarter inch too deep scalps the lawn. Third, working width, since a wider machine halves your passes on open ground. Fourth, transport: most power rakes weigh around 100 pounds and need a vehicle with a ramp or a second pair of hands. Run the machine on the dealer’s yard before you load it, and reject any unit with bent or missing tines.
A Lawn Aerator for the Follow-Up Pass
Dethatching and aerating solve different problems, and lawns with heavy thatch usually have both. Once the thatch is off, a core aerator pulls plugs that relieve the compaction underneath, and those holes become perfect channels for seed and water. If you rent one machine for the weekend, many lawns get more long term good from the aerator than from a second dethatching pass.
Grass Seed for the Ground You Expose
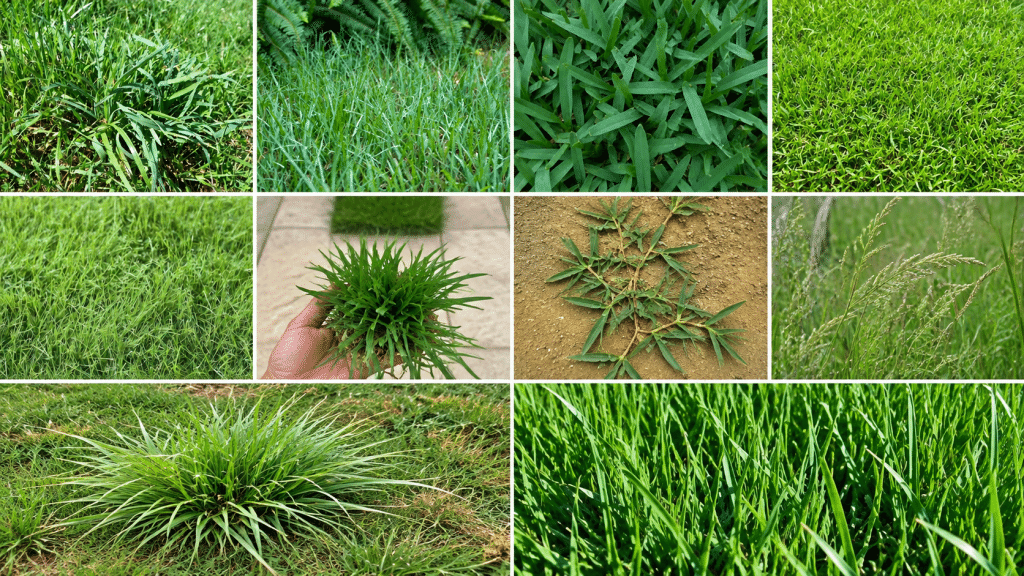
Dethatching always exposes soil, and bare soil left alone grows weeds, not lawn. Overseed the same day, while the seed can fall into the slots and holes the tools just opened. Match the seed to your existing grass type and to the sun the area actually gets, and keep it damp until it germinates. The seed choice matters as much as the raking did.
How to Prevent Thatch From Building Back
Dethatching treats the symptom. Prevention is slower and less dramatic, and it is what stops you renting a power rake every year.
- Do not over-fertilize with nitrogen. Excess nitrogen pushes lush, fast growth that builds thatch faster than microbes can break it down. Feed to a soil test, not to a calendar habit.
- Water deeply and only as needed. Frequent, light sprinkling keeps roots shallow, encourages thatch, and trains the lawn to wilt fast. Wet the full root zone, then let the surface dry between waterings.
- Core-aerate compacted lawns periodically. Aeration feeds the soil biology that digests thatch by improving air and water movement.
- Return short clippings to the lawn. Contrary to a stubborn myth, clippings do not cause thatch. Left in place, they feed the earthworms and microbes that keep the layer in balance.
- Keep soil pH near 6.5 where your grass allows it. Acidic, compacted soil suppresses the organisms that break thatch down, so lime only as a soil test recommends.
Build these habits and most lawns hold thatch near that healthy half inch on their own.
Common Mistakes That Damage Lawns
Most dethatching damage comes from enthusiasm, not from the tools. The mistakes below show up again and again:
- Dethatching on a fixed schedule. There is no annual rule. Measure every year or two and act only when the layer passes the threshold.
- Setting blades too deep. The goal is to lift thatch, not to till the lawn. Deep settings tear crowns and turn a thinning job into a reseeding job.
- Working wet soil. Blades tear instead of slicing, and the machine pulls up healthy turf in sheets.
- Dethatching out of season. A dormant or heat stressed lawn cannot recover. Wait for active growth, even if that means waiting months.
- Trying to remove everything at once. Leave a thin layer behind. It protects the crowns, and the lawn recovers far faster.
- Skipping aftercare. Dethatching without overseeding a thin cool-season lawn, or without steady moisture afterward, wastes the open surface you worked to create.
Final Thoughts on How to Dethatch a Lawn
How to dethatch a lawn is really a lesson in restraint. Measure the layer, respect the season for your grass type, pick the lightest method that fits the measurement, and let aftercare do the rest. A half inch of thatch is a friend. Three quarters of an inch and beyond is a problem you now know how to fix, step by step, without tearing up the lawn you are trying to save.
Do the wedge test this weekend if your lawn feels spongy. Two minutes with a trowel will tell you more than a season of guessing, and for many lawns the honest answer will simply be: not yet.
References
- Kansas State University, K-State Turf: Got Thatch?
- University of Massachusetts Amherst: What is Thatch?
- University of Georgia Extension, CAES Field Report: Dethatching Lawn Important, but Wait Until Summer
FAQ
How do I know if my lawn needs dethatching?
Cut a small wedge of turf and measure the compressed brown layer between the blades and the soil. Under 1/2 inch needs no work. Between 1/2 and 3/4 inch, core aeration is usually the better first step. Over 3/4 inch calls for a power rake or vertical mower. Spongy feel, runoff and fast wilting are clues, but the measurement is the proof.
What is the best time to dethatch a lawn?
Dethatch only while the grass is growing actively and can recover. Cool-season lawns are best done in early fall, with early spring as the second option. Warm-season lawns such as Bermuda and zoysia should wait until late spring to early summer, around June to July. Never dethatch a dormant, heat stressed or drought stressed lawn.
Is core aeration the same as dethatching?
No. Dethatching slices and lifts the thatch layer itself, while core aeration pulls small plugs of soil to relieve compaction. For a thatch layer between 1/2 and 3/4 inch, aeration is often the better choice, because the soil cores help microbes break the layer down. The two jobs solve different problems and sometimes work well together.
Can dethatching damage my lawn?
Yes, if it is done badly. Setting blades too deep, working on wet soil, dethatching out of season, or trying to strip the whole layer in one pass can all tear up healthy turf. Measure first, set blades just deep enough to lift thatch, and work only when the grass is actively growing.
Should I overseed after dethatching?
For a cool-season lawn dethatched in fall, yes. The opened surface gives seed direct contact with soil, which is the best germination window of the year. Rake clean, spread seed, apply starter fertilizer only as a soil test directs, and keep the surface moist until the seed establishes.
How often should you dethatch a lawn?
There is no fixed schedule. Check the thatch layer every year or two with the wedge test and dethatch only when it passes about 3/4 inch. Many lawns go years without needing it, especially when nitrogen use, watering and aeration are managed well.

Thesis Link : https://saulibrary.edu.bd/daatj/public/uploads/BAU200601_19-Pp_5.pdf
- How to Dethatch a Lawn: Signs, Timing and Methods - October 9, 2026
- 10 Best Lawn Edgers for Clean Lines - October 9, 2026
- 10 Best Broadcast Spreaders for Home Lawns - October 9, 2026