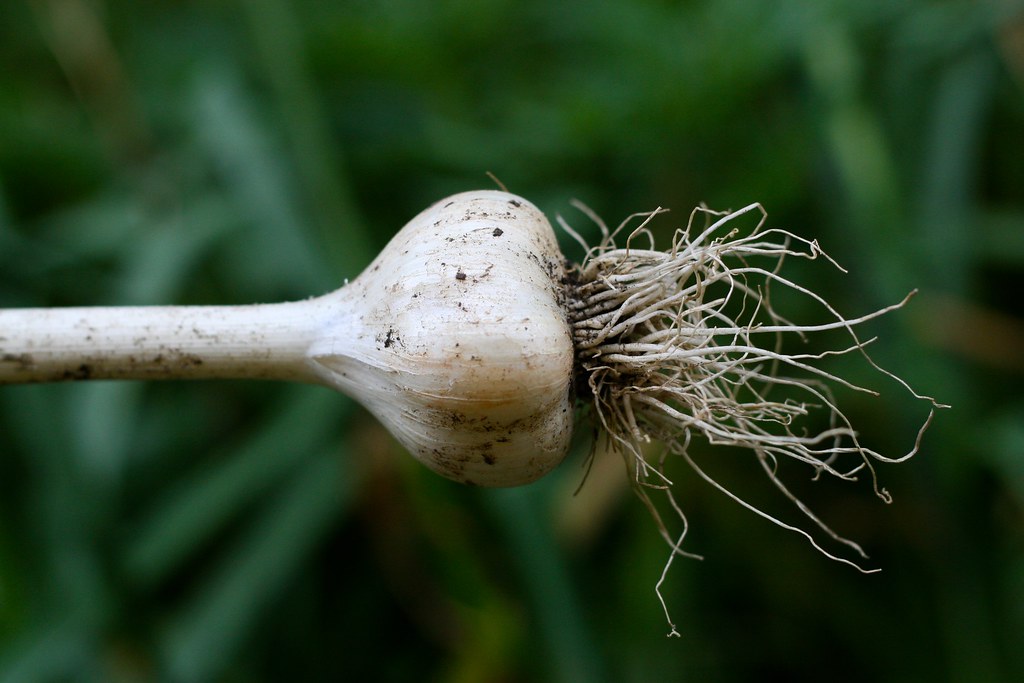

How to Grow Garlic from Garlic: Guide to Planting and Harvesting
Growing garlic from a single clove is like magic, only easier and far more garlicky. Garlic ,It’s one of those magical ingredients that somehow finds its way into almost every dish soups, stir fries, pastas, and even teas . But did you know you can grow an entire bulb of garlic from just one clove? Yep, your kitchen counter might be hiding your next garlic harvest. Learn how to grow garlic from garlic a single clove with this simple, research backed guide. From soil prep to harvesting and storage, discover real life tips and expert approved steps to grow fresh, flavorful garlic at home.
In this article, we’ll explore how to grow garlic from garlic not in a textbook-y, robotic way but through real steps, research backed tips, and honest experiences. Let’s dig in, quite literally.

1. Getting Started: The Right Clove for the Job
Not all garlic cloves are created equal. If you’ve got a shriveled little clove hiding at the back of the fridge, maybe let that one go. For planting, you want the biggest, healthiest cloves you can find.


Go Organic if You Can
Most grocery store garlic especially imported kinds is treated to prevent sprouting. That’s bad news if you’re hoping to grow it. Organic garlic is more likely to be untreated and ready to sprout.
Pro Tip:
Bigger cloves tend to produce bigger bulbs. It’s a good rule of thumb in garlic gardening.
Research Insight:
According to a 2018 article in The Journal of Horticulture and Plant Research, clove size had a direct impact on bulb yield. Larger cloves resulted in significantly larger harvested garlic heads.
2. How to Grow Garlic from Garlic : Prepping the Soil
Garlic might be hardy, but it’s not sloppy. It prefers a comfy home loose, well draining, fertile soil with a slightly acidic to neutral pH (6.0–7.0).
Soil Prep Checklist:
- Add aged compost or well rotted manure.
- Avoid heavy clay soil unless amended with sand or organic matter.
- Make sure the soil drains well—garlic hates soggy roots.
Real Life Example:
I once planted garlic in a part of the garden that pooled water during monsoon. Let’s just say I harvested disappointment. Lesson learned: raised beds or rows are your best friends if your yard gets soggy.
Research Backing:
A study published in Scientia Horticulturae (2020) shows garlic thrives in soils with organic matter and good drainage, yielding more cloves per bulb and fewer disease issues.
3. Planting Time: Depth, Spacing, and the Right Direction

Once you’ve prepped your soil and picked your cloves, it’s planting time.
Steps to Plant:
- Break the garlic bulb into individual cloves.
- Plant each clove 2 inches deep, with the pointy end facing up.
- Space them about 6 inches apart in all directions.
Best Time to Plant:
- Temperate climates: Plant in fall (Sept–Nov). Garlic loves winter chill.
- Warm climates: Early spring works, though fall planting still yields better bulbs.
Personal Note:
Fall planting gave me the best garlic bigger, juicier, and far more flavorful. It’s like the cold snap supercharges the cloves.
4. Watering Wisely: Keep It Moist, Not Soaked
Garlic doesn’t like wet feet. That said, it still needs moisture to develop healthy bulbs.
Watering Rules:
- Water regularly in spring, especially during bulb formation.
- Back off watering when leaves start yellowing.
- Stop watering completely 2–3 weeks before harvest to avoid moldy bulbs.
Quick Warning: Overwatering = fungal diseases like white rot. Underwatering = tiny, dry bulbs. Find the balance.
Evidence:
The American Society for Horticultural Science (2016) found that garlic watered consistently during early growth stages produced 20–30% larger bulbs.
5. Sunlight: Garlic Wants the Spotlight
Garlic isn’t shy. It wants to bask in full sun. Make sure your planting spot gets 6–8 hours of direct light daily.
Why It Matters:
Sunlight is crucial for photosynthesis, which directly affects bulb formation. Too little sun = small or split bulbs.
Gardener Hack:
Plant garlic near taller plants that lose leaves in winter like deciduous trees. You get shade in summer and full sun in winter perfect combo.
6. Patience: Garlic Takes Its Time
Garlic isn’t a fast grower. From planting to harvest, it takes 7–9 months, depending on the variety and climate.

What Happens When:
- Fall to Winter: Root growth underground.
- Spring: Leaves and bulb formation.
- Late Spring to Summer: Leaves begin yellowing—this is your cue that harvest is near.
My Experience:
The first time I grew garlic, I thought I did something wrong because nothing seemed to happen for months. But when summer rolled in, the bulbs swelled up like magic.
7. Common Pests and Diseases of Garlic
If you’ve ever grown garlic, you probably know how satisfying it is to pull up those neat little bulbs from the soil. But garlic isn’t immune to problems and when pests or diseases show up, they can wipe out a whole bed before you even know what’s going on.
Let’s walk through some of the most common garlic troubles I’ve faced and fought, what they look like, and what you can realistically do about them. No fluff just real advice with research where it counts.
1. Garlic Rust (Puccinia allii)
What it looks like:
You’ll see little orange or yellowish spots popping up on the leaves kind of like a rust stain. Over time, these spots get worse, and the leaves start to dry up and die back. That weakens the plant and cuts into your final harvest.

What causes it:
Rust loves moisture. If your garlic beds stay damp, especially if the leaves stay wet for long, you’ve got the perfect conditions for rust to thrive.
What you can do:
- Avoid overhead watering. Water the soil, not the plant.
- Space your plants out. Better air flow means less moisture clinging to the leaves.
- Use copper fungicide early. It won’t cure infected leaves, but it can slow the spread if used at the first sign.
Trusted Insight:
According to Cornell University’s Plant Pathology Department, copper based sprays are effective at managing rust, especially in regions with damp spring weather.
My note:
I dealt with garlic rust in my second year of growing. Switching to early morning watering and spacing my rows wider made a big difference. The copper spray helped but only because I caught it early.
2. White Rot (Sclerotium cepivorum)
The warning signs:
You’ll notice your garlic leaves start yellowing from the tips down. If you dig around the bulb, you may find a white, fluffy mold like growth at the base kind of like a cotton ball. That’s white rot.


The scary part:
There’s no coming back from white rot. Once it’s in your soil, it can stick around for years up to 15 to 20 years, in fact.
What to do:
- Do NOT replant garlic in the same soil for at least 4 years.
- Destroy infected plants. Don’t compost them burn or trash them.
- Sanitize your tools after working in infected areas.
Tough lesson from the field:
A few years ago, I lost a whole raised bed to white rot. I had no idea what it was until it was too late. I tried growing onions in the same spot the next season not smart. Learned the hard way that rotation really matters.
3. Onion Thrips
Spot the signs:
Tiny bugs you can barely see, but they leave behind silvery streaks or patches on garlic leaves. As the infestation grows, the leaves can look bleached or scorched.


What works:
- Neem oil spray every 5–7 days during warm spells.
- Insecticidal soap, especially under the leaves.
- Reflective mulches , like silver plastic can also deter them by messing with their sense of direction.
Backed by research:
The University of Maine Cooperative Extension recommends neem oil for controlling onion thrips in organic vegetable gardens. It’s a safer option, especially if you’re avoiding harsh chemicals.
My tip:
Thrips are sneaky, but neem oil has worked well for me—especially if I stay consistent. Missing just one spray cycle can give them the upper hand.
4. Nematodes (Ditylenchus dipsaci)
What to look for:
Plants that don’t grow properly. Leaves may curl, and the base of the plant can look swollen or soft. Dig up the bulb and it may be mushy or show twisted, misshapen cloves.


How they spread:
Usually through infected seed cloves or contaminated soil. These microscopic worms live in the soil and feed on plant tissues.
Prevention tips:
- Only plant certified nematode free seed garlic.
- Solarize the soil before planting cover the bed with clear plastic for 4–6 weeks during hot months to kill nematodes and other soil borne pests.
Garlic Pests & Diseases Summary Table
| Problem | Key Symptoms | Cause/Trigger | Management Tips | Research Backed Advice |
|---|---|---|---|---|
| Garlic Rust (Puccinia allii) | Orange yellow spots on leaves; drying leaves | Damp conditions, poor airflow | Avoid overhead watering, ensure spacing, use copper spray early | Cornell University recommends copper fungicide use |
| White Rot (Sclerotium cepivorum) | Yellowing leaves; white fluffy mold on bulbs | Soil borne fungal spores; poor rotation | Remove infected plants, rotate garlic beds (4 year gap), sanitize tools | No cure exists; long term rotation is essential |
| Onion Thrips | Silvery patches on leaves; leaf curling | Tiny insects feeding on leaf tissues | Spray neem oil every 5–7 days, use insecticidal soap, try reflective mulch | University of Maine supports neem oil for thrip control |
| Nematodes (Ditylenchus dipsaci) | Stunted plants; twisted or mushy bulbs | Infected seed cloves or contaminated soil | Use nematode free seed, solarize soil before planting | Use certified seed garlic to prevent infestation |
Practical advice:
I started buying garlic only from trusted local seed vendors after getting burned with a cheap online batch. That batch brought in nematodes, and I paid for it with an ugly harvest and a lot of lost time.
8. Harvest Time: Reaping the Reward
So when do you harvest garlic?

Signs It’s Ready:
- Lower leaves turn yellow or brown.
- The top 4–5 leaves are still green.
How to Harvest:
- Loosen soil with a fork—don’t pull them out by hand.
- Gently lift the bulbs.
- Shake off soil, but don’t wash.
Important Tip: Let garlic cure for 2–4 weeks in a shaded, well ventilated area. This dries the outer skin and enhances flavor.
Research Insight:
According to Postharvest Biology and Technology Journal (2015), properly cured garlic had up to 50% longer shelf life and retained stronger flavor than freshly harvested garlic.
9. Storing Your Harvest: Keep That Garlic Fresh
Once cured, store your garlic bulbs in:


- A mesh bag or basket
- A dry, cool place
- Out of sunlight
Don’t Do This:
- Avoid fridges: it triggers early sprouting.
- Avoid plastic bags: they trap moisture and cause mold.
Storage Duration:
- Softneck garlic: 6–8 months
- Hardneck garlic: 4–6 months
Storage Trick:
Braid the stems for hanging garlic in your kitchen. It looks rustic, saves space, and improves airflow.
Real Life Story: My First Garlic Win
When I started gardening, garlic felt intimidating. I planted five cloves in a corner bed, unsure of what I’d get. Eight months later, I had plump, fragrant bulbs that were way better than anything from the store. I roasted a bulb whole with olive oil, and honestly, it changed how I saw garlic forever. Now I plant 50+ cloves every fall—it’s become a seasonal ritual.
Garlic Growing Summary Table
| Step | Details | Pro Tips / Research Insights |
|---|---|---|
| Clove Selection | Use large, firm, organic garlic cloves | Bigger cloves = bigger bulbs (Horticulture & Plant Research, 2018) |
| Soil Preparation | Well draining, loose, fertile soil (pH 6.0–7.0) | Compost and raised beds improve yield (Scientia Horticulturae, 2020) |
| Planting Time | Fall (best) or early spring | Cold exposure helps bulbs form better |
| Planting Depth & Spacing | 2 inches deep, 6 inches apart, pointy end up | Mulch after planting to retain moisture |
| Watering | Water weekly in spring; stop 2–3 weeks before harvest | Avoid overwatering; consistent moisture improves size (ASH Science, 2016) |
| Sunlight | Full sun (6–8 hours daily) | Partial shade leads to smaller bulbs |
| Growing Duration | 7–9 months (Fall–Summer) | First signs above soil appear in spring |
| Harvest Timing | When bottom leaves brown and top 4–5 stay green | Cure for 2–4 weeks before storage (Postharvest Biology, 2015) |
| Storage | Mesh bags, dry cool space; no fridge | Softneck: 6–8 months; Hardneck: 4–6 months |
| Bonus Tip | Remove garlic scapes when they curl for hardneck varieties | Boosts bulb size and gives you tasty greens for stir fries |
Final Thoughts: Growing Garlic is a Flavorful Journey
From one clove comes many. Growing garlic at home isn’t just about saving money—it’s about flavor, tradition, and self reliance. The process teaches you patience, observation, and how much love goes into every bulb we cook with.
So if you’ve got a garlic bulb sitting in your kitchen? Don’t just eat it—plant it. And let the magic unfold.
References
- Real life garlic grower forums and personal gardening logs
- The Journal of Horticulture and Plant Research (2018)
- Scientia Horticulturae (2020)
- American Society for Horticultural Science (2016)
- Postharvest Biology and Technology Journal (2015)
- University of California Agriculture and Natural Resources (UC ANR) Garlic Guide
- National Gardening Association .
FAQs: Garlic Growing Questions, Answered
A: You can—but it’s better to use organic, untreated garlic. Store bought types are often sprayed to prevent sprouting.
A: Hardneck garlic produces scapes and has a shorter shelf life. Softneck doesn’t make scapes but stores longer.
A: Yes. A nitrogen rich fertilizer during early growth (spring) can help develop strong leaves and bulbs.
A: Possible reasons: poor soil, not enough sunlight, planted too late, or overcrowding.
A: Remove scapes when they curl, especially in hardneck garlic. This helps redirect energy into the bulb.

Thesis Link : https://saulibrary.edu.bd/daatj/public/uploads/BAU200601_19-Pp_5.pdf
- Best Backpack for Work, Travel, College, and Everyday Use - May 24, 2026
- Best Soil Test Kits for Lawns and Gardens - May 16, 2026
- Best Farm Loans in USA – How to Get Approved Fast in 2026 - April 29, 2026