How to Grow Onions: Beginner’s Gardening Guide
Ever wondered what makes those caramelized onions on your burger taste so amazing? Or that extra zing in your salsa? Well, onions are the magic ingredient, and they’re easier to grow than you might think. If you’re ready to say goodbye to store bought onions and grow your own, buckle up. Let’s dive into the world of how to grow onions with a mix of humor, pro tips, and a dash of science.Learn how to grow onions step by step. A natural, beginner friendly guide with tips, real life stories & expert advice. Start your onion garden today .
Why Grow Onions?
There’s something incredibly satisfying about pulling a big, healthy onion out of the soil you tended yourself. Store bought onions can be convenient, but when you grow your own, the flavor is fresher, the nutrition is richer, and the satisfaction is unbeatable.
Flavor Difference: Research from the University of California Agriculture and Natural Resources shows that homegrown onions retain more essential oils and sulfur compounds responsible for flavor.
Nutritional Value: According to the USDA National Nutrient Database, onions are a great source of vitamin C, B6, folate, potassium, and antioxidants like quercetin.
Cost Efficiency: A single $2 pack of onion sets can produce up to 20 pounds of onions.
Real Life Story: I remember planting my first onion sets in a small garden bed beside my kitchen. It was a messy, muddy experiment. But three months later, I pulled out a bright white onion the size of a tennis ball. It ended up in a stir fry, and I swear it was the best one I’d ever made.
Step 1: How to Grow Onions: Picking Your Onion Type
Just like people, onions come in all shapes, sizes, and personalities. Let’s meet the lineup:
1.Yellow Onions –

The all rounders. Great for cooking and super easy to grow.
2. Red Onions

Sweet, mild, and perfect for salads. These add that pop of color!
3. White Onions

The mildest of the bunch, and they shine in Mexican dishes.
Tip: Choose the variety that fits your cooking style and climate. Warm climate? Opt for short day onions. Cooler weather? Long day onions are your new besties.
Step 2: How to Grow Onions: Choose the Right Spot
Sunlight is king here. Onions are sun worshippers and need at least 6-8 hours of direct sunlight per day. Without proper light, onions might produce lush green tops but no bulbs.
Soil Requirements:
- Well draining and loose
- Rich in organic matter
- pH between 6.0 and 6.8
Research Insight: According to Cornell University, poor drainage is one of the top reasons onion bulbs fail to develop.
Personal Experience: The first time I planted onions, I didn’t think twice about the soil. The patch was soggy and packed from foot traffic. The result? Mushy, underdeveloped bulbs. Lesson learned: soil prep matters.
Step 3: How to Grow Onions: Prepare the Soil
Let’s be honest onions aren’t exactly divas, but they do care about where they live. You can’t just toss them into any patch of dirt and hope for gourmet results. The right soil makes a big difference in flavor, size, and overall plant health. Think of it as setting the stage for their underground performance.
Loosen the Soil – Let the Roots Breathe
Start with loosening the soil to a depth of at least 8–10 inches (20–25 cm). Onions are shallow rooted, but they need enough space for their bulbs to expand without hitting compacted soil.
Why it matters:
According to the University of Georgia Extension, onions thrive in loose, friable soil that allows air, water, and nutrients to reach their developing roots. Compacted or heavy clay soils can lead to bulb deformation and waterlogging.
Tip: Use a garden fork, broadfork, or even a small tiller if the area is large. Avoid turning the soil into fine dust just loosen and aerate.
Add Compost – Organic Goodness for Growth
Here’s where the magic happens. Compost improves soil structure, enhances microbial activity, and adds essential nutrients especially nitrogen, which onions love during early growth.
Backed by Research:
A study published in the journal Scientia Horticulturae (2020) found that integrating organic compost into onion beds significantly improved bulb size, leaf number, and overall yield compared to chemical fertilizers alone.
What to use:
- Aged compost well rotted, not raw
- Vermicompost worm castings
- Decomposed leaf litter or manure
Mix 2–3 inches of compost into the top 6 inches of soil.
Real life story: I once skipped compost on one side of my garden . That half had puny onions. The composted side? Plump, glossy bulbs that stored longer and tasted better. Never skipping again.
pH Balance – Not Too Sour, Not Too Alkaline
Onions prefer a slightly acidic to neutral pH, ideally between 6.0 and 6.8. If your soil is too acidic below 6.0, onions may struggle to absorb nutrients like calcium and magnesium.
How to test it:
You don’t need a fancy lab. Use an at home soil test kit available online or at garden centers. They’re cheap and reliable for pH and basic nutrient checks.
What to do if the pH is off:
- Too acidic? Add garden lime calcium carbonate.
Rough guide: 2–3 pounds per 100 sq. ft. can raise pH slightly. - Too alkaline? Add elemental sulfur or organic materials like pine needles or peat moss.
Research Insight:
The University of California Agriculture and Natural Resources notes that a balanced pH is crucial for sulfur metabolism in onions, which affects both bulb development and flavor.
Optional Soil Boosters
Want to give your onions the VIP treatment? Here are a few extras that serious growers swear by:
- Bone meal – Adds phosphorus for stronger roots
- Wood ash – Adds potassium
- Biochar – Improves long term soil fertility and water retention
Step 4: How to Grow Onions: Planting the Onion Sets or Seeds
Okay, now that your soil is prepped and ready, it’s time to introduce the stars of the show—your onions. Whether you’re starting from seed or using sets, this is where the underground magic kicks off.
Option 1: Seeds – For the Patient and Ambitious Gardener
Growing onions from seeds gives you a bit more control, especially when it comes to selecting specific varieties. Plus, they tend to store longer than those grown from sets. But here’s the trade off it takes more time and attention early on.
Backed by Research:
According to the University of Illinois Extension, onion seeds should be started indoors 8–10 weeks before the average last frost date. This gives the seedlings enough time to mature before transplanting outdoors.
Here’s how to start seeds right:
- Use a well drained seed starting mix in trays or shallow pots.
- Sow seeds about ¼ inch deep.
- Keep the growing environment warm (70–75°F or 21–24°C) and moist.
- Provide 12–14 hours of light daily grow lights work great in winter months.
Transplanting tip: Harden off your seedlings about a week before transplanting by gradually exposing them to outdoor conditions.
Pro Tip: Choose day length appropriate varieties based on your location:
- Short day onions for southern zones like Texas, Florida
- Long day onions for northern zones like New York, Minnesota
- Intermediate day for those in between areas
(Source: Texas A&M AgriLife Extension)
Option 2: Onion Sets – Easy Mode for Beginners
If you’re new to onion growing or just want quick results, onion sets small, dormant bulbs are the way to go. They’re nearly foolproof and sprout fast once planted in the right soil.
How to plant onion sets correctly:
- Plant the sets 1 inch deep, with the pointed tip just below or barely peeking through the soil.
- Space each set 4 inches apart to give bulbs enough room to expand.
- Space rows 12–18 inches apart for easier weeding and airflow.
Why spacing matters:
According to a study in Scientia Horticulturae (2019), proper spacing significantly affects bulb size, shape, and yield. Crowded onions tend to stay small and compete for nutrients, while well spaced onions develop uniform, healthy bulbs.
Real life lesson: I once planted a bunch of sets too close to “save space” the result? Marble sized bulbs that didn’t store well. Learned my lesson.
Quick Recap – Seeds vs. Sets
| Feature | Seeds | Sets |
|---|---|---|
| Growing Time | Longer (10–12 weeks till transplant) | Shorter (ready to plant in soil) |
| Skill Level | Intermediate to Advanced | Beginner friendly |
| Storage Quality | Often better | Slightly lower |
| Variety Selection | More options | Limited |
| Cost | Cheaper per plant | Slightly more expensive |
Spacing Alert: Give Them Room to Breathe
- 4 inches between onions = ideal for average sized bulbs
- 6 inches spacing = great for large bulb production
- 3 inches or less = likely to produce small or misshapen bulbs
Pro Insight: The University of California Cooperative Extension recommends 4–6 inches as the standard spacing for home garden onions. Denser planting can work for green onions , but not for full size bulbs.
Step 5: How to Grow Onions: Watering and Fertilizing
Onions aren’t thirsty all the time, but they do appreciate regular drinks especially in their early and mid growth stages.
General Guideline: 1 inch of water per week
This includes rainwater and irrigation combined. Use a rain gauge or a simple tuna can in your garden to track how much water your onions are getting each week.
Backed by Research:
According to the University of Georgia Extension, onions perform best in soils that stay evenly moist. Fluctuations like letting soil dry out completely and then drenching it can stress the plants and stunt bulb formation.
Why Overhead Watering Isn’t Ideal:
Sprinkling from above not only wastes water but also encourages fungal diseases like downy mildew or botrytis leaf blight, especially in humid conditions. Stick to drip irrigation or water at the base of the plants.
Pro Tip: Water deeply but less frequently. This encourages deeper root systems and better drought resistance.
Reduce Water When Tops Begin to Fall
This is one of the most important and most overlooked stages. Once the onion tops begin to yellow and fall over naturally, it means the plant is entering maturity and the bulbs are close to harvest.
At this point:
- Reduce watering gradually over 1–2 weeks.
- Stop completely about a week before harvesting.
Why? Dry soil helps cure the outer skin and concentrate flavors. Continuing to water can cause mold or soft spots during storage.
Fertilizing Onions – The Right Nutrients at the Right Time
Onions are moderately heavy feeders. They need a steady supply of nutrients especially nitrogen during the early vegetative stage, but too much late in the game can hurt bulb formation.
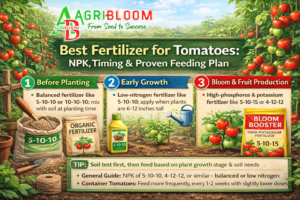
Use a balanced fertilizer: 10-10-10 or 12-12-12
These numbers refer to nitrogen (N), phosphorus (P), and potassium (K) content. Balanced fertilizers ensure leafy growth, root health, and bulb development.
University Based Research:
According to soil fertility trials by the University of Georgia, consistent nitrogen application in the early season helps onions build strong, healthy tops, which directly correlate with bulb size. However, continuing to apply nitrogen after bulbs begin to swell leads to excess leaf growth and smaller bulbs.
Fertilizing Schedule:
- First feeding: 2 weeks after planting sets or seedlings
- Repeat every 2–3 weeks until bulb formation begins
- Stop fertilizing completely once you see the base of the onion thickening around 60–70 days in .
Fertilizer Schedule Table for Onion Cultivation
| Stage | Days After Planting | Fertilizer Type | Application Rate | Method | Notes |
|---|---|---|---|---|---|
| Pre planting | 0 (before sowing/sets) | Well rotted compost or manure | 2–4 kg/m² (4–8 tons/acre) | Mix into top 6–8″ of soil | Adds organic matter, improves texture and microbial life |
| Early vegetative | 10–15 days | Balanced NPK (10-10-10 or 12-12-12) | 20–25 g/m² (50–60 kg/acre) | Side dress or broadcast | Supports initial green growth and root development |
| Mid vegetative | 30–35 days | Nitrogen focused (e.g., Urea or Compost Tea) | 10–15 g/m² (if urea) or 1L compost tea/plant | Side dress or foliar spray | Boosts leaf development; healthy tops = bigger bulbs |
| Bulbing stage begins | 50–60 days | Stop nitrogen; switch to low-N, high-K | Bone meal or wood ash: 50–80 g/m² | Apply near base of plants | Avoid excess N now—it will delay bulbing and reduce size |
| Bulb expansion | 70–90 days | Potassium boost (if needed) | Sulfate of Potash: 20–30 g/m² | Light top dress | Encourages firm bulb formation, flavor, and storage life |
| Pre harvest | Last 2–3 weeks | None | — | — | Stop all fertilizers and irrigation to promote curing and skin setting |
Real life story:
I once got carried away and continued fertilizing all summer. The tops were jungle thick, but the bulbs? Ping pong balls. It was a classic beginner mistake more isn’t always better.
Organic Alternatives to Chemical Fertilizers
If you prefer the natural route and your onions will love you for it, try these:
- Compost tea: Gentle and full of micronutrients
- Fish emulsion: A nitrogen rich liquid option
- Bone meal: Great source of phosphorus
- Wood ash: Boosts potassium but use sparingly to avoid raising soil pH
Always apply organic fertilizers around the base of the plant and water them in gently of Georgia show that onions thrive in soil with consistent moisture and moderate nitrogen.
Step 6: Weed, Pest, and Disease Management
Onions hate competition. Weeds steal nutrients and harbor pests.
Weeding:
- Weed by hand or use mulch to suppress growth
Common Pests:
- Onion maggots: Use floating row covers


- Thrips: Spray with neem oil


Diseases:
- Downy mildew: Prevent with spacing and airflow


- Neck rot: Caused by poor curing


Integrated Pest Management: Rotate crops every 2-3 years. Don’t grow onions where garlic or leeks were last year.
Step 7: Harvesting and Curing

When to Harvest
- Tops begin to yellow and fall over
- Bulbs reach desired size
How to Harvest
- Loosen soil gently
- Pull onions by the base
- Avoid bruising or cutting the bulb
Curing
- Lay onions in a warm, dry place with good air circulation for 2-3 weeks
- Trim tops and roots after curing
Storage Tip: Store in mesh bags in a cool, dry, dark place. Ideal storage temps: 32-40°F with 60-70% humidity.
Farmer Note: One season, I skipped the curing step and lost half my harvest to mold. It was heartbreaking. Take your time and do it rightd keeps them fresher for longer .
Summary Table for “How to Grow Onions“:
| Stage / Aspect | Key Details | Tips & Notes |
|---|---|---|
| Best Planting Time | Late winter to early spring | In warm climates, plant in autumn for an early summer harvest |
| Soil Requirements | Loose, well drained, fertile soil with pH 6.0–7.0 | Enrich with compost before planting |
| Planting Method | From sets, seeds, or transplants | Sets give faster harvest; seeds take longer |
| Spacing | 4–6 inches apart in rows 12–18 inches apart | Too close spacing leads to smaller bulbs |
| Watering | Regular, even moisture; about 1 inch per week | Avoid overwatering to prevent rot |
| Fertilizing | High nitrogen early in growth | Switch to balanced fertilizer as bulbs form |
| Sunlight | Full sun (6–8 hours daily) | More sun = bigger, sweeter onions |
| Weeding | Keep beds weed free | Shallow roots—weed carefully |
| Pest & Disease Control | Watch for onion maggots, thrips, fungal rot | Use crop rotation & avoid overwatering |
| Harvest Time | 90–120 days after planting | Tops will yellow and fall over when ready |
| Curing & Storage | Cure in warm, dry, airy place for 2–3 weeks | Store in a cool, dry place for months |
Final Thoughts
Growing onions is like cooking a great stew: simple ingredients, lots of love, and patience. From choosing the right variety to pulling your first cured bulb, every step is a small win. Whether you have a backyard or a balcony, onions are a fantastic crop for beginners and seasoned gardeners alike.
Remember, even if things don’t go perfectly, you’re learning, growing, and feeding yourself. And that’s what gardening is all about.
References
- USDA National Nutrient Database
- Cornell University Horticulture Program
- University of California ANR
- University of Georgia Extension
- American Society for Horticultural Science
FAQs for How to Grow Onions
Yes, just use deep containers (10-12 inches) and space the onions properly.
They’re bolting. Use them quickly; they won’t store well.
Likely too much nitrogen or not enough sunlight.
Yes, You can regrow green onions from the root end.
About 2-3 weeks before harvesting to help the bulbs dry.

Thesis Link : https://saulibrary.edu.bd/daatj/public/uploads/BAU200601_19-Pp_5.pdf
- Best Backpack for Work, Travel, College, and Everyday Use - May 24, 2026
- Best Soil Test Kits for Lawns and Gardens - May 16, 2026
- Best Farm Loans in USA – How to Get Approved Fast in 2026 - April 29, 2026