

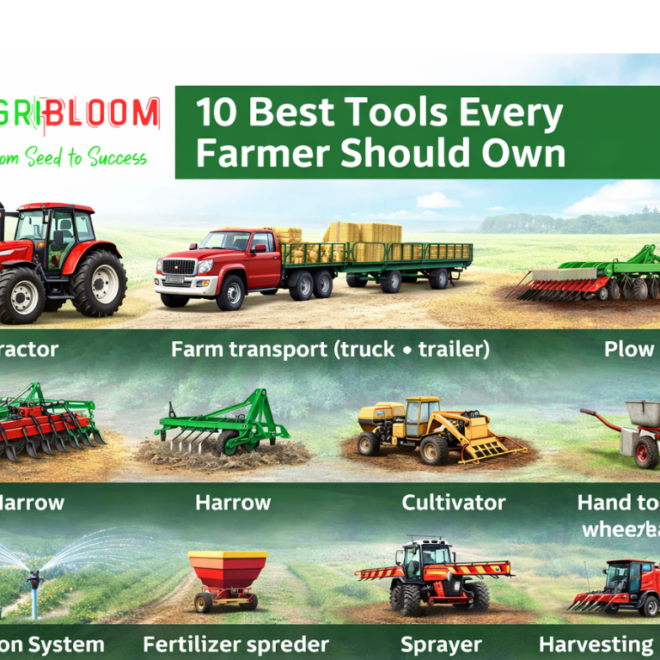

10 Best Tools Every Farmer Should Own
Farming is one of those jobs that looks straightforward until you actually do it. There’s always another task waiting, soil prep, planting, repairs, weeds, water management, pest control, harvesting, hauling, storage… and somehow it all lands on the same pair of shoulders. 10 Best Tools Every Farmer Should Own , essential farm tools for big and small farms alike. From tractors to irrigation, boost productivity .
That’s why the right tools matter so much. Not the flashy “nice to have” stuff, but the dependable gear that saves you hours, protects your body, and helps you get more out of the land with less waste. Whether you’re running a large operation in the U.S. or Europe, or managing a small plot in India as a side project or family farm, a strong tool lineup changes everything. You move faster, make fewer mistakes, and stay safer, especially during busy seasons when time is tight and weather doesn’t wait.
Why these tools make such a difference
Good tools don’t just reduce labor. They make your work more consistent. Even small upgrades, sharper cutting tools, better measuring, safer lifting, reliable watering can lift your results because you’re not constantly improvising. When farms step up from manual work to more complete mechanization, productivity usually jumps in a noticeable way: tasks get done on schedule, planting and cultivation become more uniform, and harvest losses often shrink. The gap between regions is also real highly mechanized areas can operate with far fewer hands, while many developing regions still rely heavily on manual or semi-mechanized methods, leaving a lot of potential gains on the table.
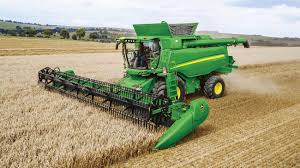
Picture a modern four wheel drive tractor: it’s basically the symbol of that shift. In places where machinery is common, one operator can cover land that would take a team days to work by hand. But tractors are only part of the story. A farm runs on a mix of heavy machines and “boring” hand tools and the boring tools are the ones you reach for every single day.
The “10 tools” idea and what you’ll get from this guide
In the sections ahead, we’ll break down 10 must have tools that belong on almost any farm from core equipment that handles big work, to everyday hand tools that keep things moving. For each one, you’ll get:
- what the tool is best used for
- why it earns a spot on this list
- practical tips so it actually improves your workflow
If you invest in the right essentials, you’ll be prepared for the full cycle of farm life: prepping soil, planting, irrigating, protecting crops, harvesting, and storing what you produce. The goal isn’t to buy everything at once it’s to build a toolkit that makes your farm easier to run and harder to derail.
Now, let’s get into the 10 best tools every farmer should own the ones that pay you back season after season.
1. Tractor
If you could only pick one machine to keep on a farm, it would be the tractor. It is the tool that turns long, exhausting jobs into work you can finish before the weather changes. With the right setup, a tractor can prepare soil, pull loads, mow grass, run a sprayer, move manure, and help with harvest handling.

What makes a tractor so useful is that it is not just a pulling engine. It is also a power source. Many implements connect through the power take off, which transfers engine power to tools like rotary tillers, balers, pumps, and shredders. PTO systems are standardized so tractors and implements can match correctly, including common PTO speeds such as 540 rpm and 1000 rpm.
Why it belongs at the top of the list
A tractor improves farm results in a very practical way: tasks get done on time. Timeliness matters in farming. Missing the right window for land prep, planting, weeding, or harvesting can cost yield. Mechanization is widely recognized for reducing hard labor and improving the timeliness and productivity of farm operations.
Picking the right tractor without overbuying
A common mistake is buying too small and struggling, or buying too large and paying for capacity you never use.
Start with two questions:
- What is the heaviest job you must do every season
- What is the largest implement you plan to run
Horsepower ranges vary by category, but compact tractors are often in the 25 to 50 horsepower range, while utility tractors are commonly larger, and row crop machines can go well beyond 100 horsepower depending on the operation.
Two wheel drive or four wheel drive
If your land stays dry, flat, and you mostly do lighter pulling, two wheel drive can work and it is often cheaper to own. If you deal with mud, slopes, heavy loads, or you do serious tillage, four wheel drive traction can save you from getting stuck and wasting hours.
Make it safer and more productive
A tractor pays back fastest when it is matched with the right attachments and maintained well. Simple habits help a lot:
- Keep tires and ballast correct for the job so you get grip without tearing up soil
- Grease and service on schedule, because breakdowns always come at the worst time
- Treat PTO work with respect, use proper guards and follow safety guidance for shafts and hookups
A practical option for smaller farms
If a full sized tractor is out of reach, a two wheel walking tractor, often called a power tiller, can still handle basic tillage and small hauling on small plots. It is not a replacement for a larger tractor, but it is a real productivity step up for many small farms.
References
- Practical comparison of two wheel drive versus four wheel drive traction considerations.
- FAO, Sustainable Agricultural Mechanization overview and why mechanization is important.
- Power take off definition and standardization details including common PTO speeds.
- Fastline, overview of tractor PTO and why it matters plus safety considerations.
- Tractor categories and typical horsepower ranges used in common guidance materials.
2. Farm transport: truck and trailer
If there is one thing that slows a farm down fast, it is moving stuff the hard way. Feed, fencing, seed, tools, harvested produce, and parts all have to travel from one point to another, often several times in the same day. That is why a dependable transport setup belongs near the top of any farmer’s tool list.
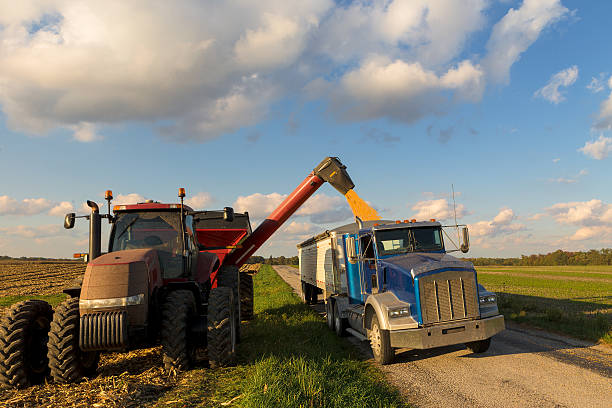
Why a farm truck earns its keep
A pickup is popular because it can do farm work and still handle town trips without fuss. You can haul feed, tote sprayers, carry produce crates, and tow equipment or livestock trailers. The key is choosing a truck that matches your real workload, not your best day and not your worst day.
In North America you will hear people talk about half ton, three quarter ton, and one ton trucks. Those labels are useful shorthand, but they are not the whole story. Ratings vary by model and configuration, so it is smarter to check the truck’s payload and towing numbers on the door sticker and in the owner information before you buy or hook up a trailer. Kelley Blue Book explains the practical differences between these classes and why the names are more guidance than an exact measure.
If you are towing often, many farm focused guides point out that a three quarter ton class truck is a common sweet spot because it is built on heavier running gear than many half ton models, while still being usable as an everyday vehicle.
Why a trailer can be the real productivity upgrade
A trailer does something simple but powerful. It turns one trip into fewer trips. With the right trailer you stop making repeated runs for lumber, fencing rolls, mineral tubs, hay, or a compact implement.
Different trailer styles fit different farm jobs:
- Flatbed style trailers are practical for equipment, building materials, and palletized loads. Gooseneck designs are often chosen when stability and heavier hauling matter.
- Dump trailers shine for gravel, bedding, manure, and cleanup work because you unload without shoveling everything by hand.
- Purpose built livestock and hay setups can save time and reduce handling stress when you are moving animals or large bales.
Reliability comes from maintenance and safe towing habits
Transport tools only help when they are ready to work. Trailer safety groups and maintenance guides emphasize the same basics: keep tires properly inflated, make sure lights work, check brakes if equipped, inspect the hitch and coupler parts, and look over bearings and the frame for wear.
Those checks take minutes and can prevent breakdowns on the road or a dangerous situation in the yard.
Smaller farms still need smart hauling options
Not every farm needs a dedicated truck right away. Many small operations start with a tractor drawn cart, a utility vehicle, or an ATV with a pull cart for light loads. And for close range hauling, the humble wheelbarrow still matters. Retailer guides describe the wheelbarrow as a simple, indispensable tool for hauling around a garden, farm, or work site, especially for soil, bags, debris, and materials that do not justify starting a vehicle.
When you add it up, farm transport is less about owning a specific brand and more about building a dependable system. A capable truck, a correctly matched trailer, and a couple of simple hauling tools keep work moving, protect your time, and make day to day chores smoother.
References
- Kelley Blue Book: guide to half ton, three quarter ton, and one ton trucks.
- Hobby Farms: choosing the correct vehicle for towing farm loads.
- National Association of Trailer Manufacturers: trailer safety information and initiatives.
- Good Sam: trailer maintenance checklist for safe towing.
- Lowe’s: overview of why wheelbarrows make hauling easier.
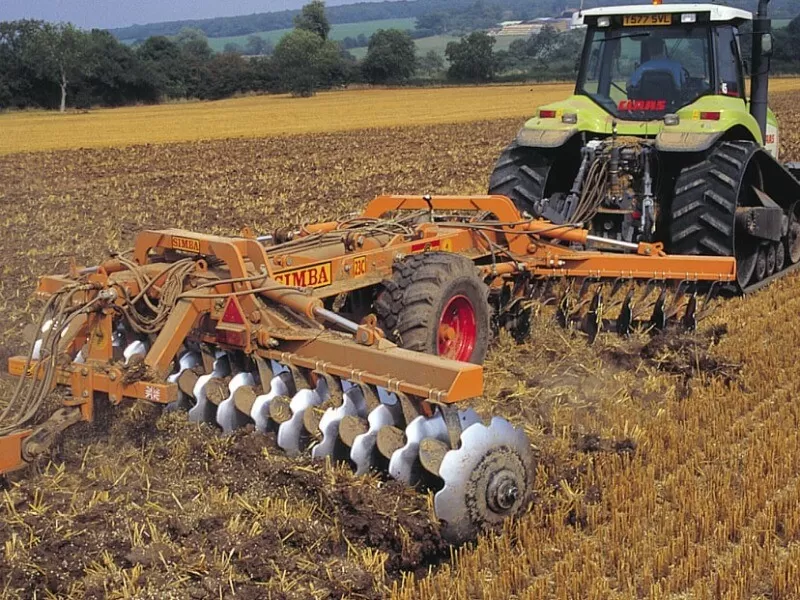
3. Plow
Getting a field ready starts with what is happening below your boots. When soil is tight, rutted, or packed from traffic and rain, seeds struggle to root evenly. A plow is built for that first big pass of the season, the work farmers call primary tillage. Primary tillage is the deeper, more aggressive soil loosening that shatters soil strength and helps bury or mix plant material in the tillage layer.

What a plow actually does for your crop
A good plowing job opens the soil, flips or fractures it, and sets you up for smoother seedbed prep later. Turning in residue can help clean up a field after a heavy crop, and loosening the profile can improve early root growth when compaction is an issue. At the same time, it is worth remembering that more disturbance can also mean more erosion risk if the soil is left bare and exposed.
The three common plow styles and when they make sense
- Moldboard plow
This is the classic plow that cuts a slice of soil and inverts it, burying surface material as it turns the furrow. The USDA definition describes it as a primary tillage implement that cuts and partially or completely inverts a layer of soil to bury surface materials and pulverize the soil.
It is effective when you need a clean flip, such as incorporating heavy residue or resetting a neglected patch. But because it is one of the most aggressive tillage choices and leaves very little residue on the surface, extension guidance notes it has higher potential for erosion by wind and water compared with less aggressive systems. - Chisel plow
If your goal is to loosen the field without fully turning it over, a chisel plow is often the middle road. The USDA describes it as shattering the soil without complete burial or mixing of surface materials, using rows of shanks with different point options.
NC State Extension also explains that chisel plowing leaves a rough surface without soil inversion and can keep more residue coverage than moldboard plowing, which is why it is commonly used in conservation minded tillage systems. - Disk plow
A disk plow uses individually mounted concave disk blades. The USDA definition notes that the blades cut and partially or completely invert a layer of soil, with penetration supported by the blade angle and sometimes extra ballast weight.
In practical terms, many farmers reach for a disk plow when conditions are tough and a standard bottom style plow tends to plug or struggle.
Choosing the right size for your farm
For a small farm, a single bottom or two bottom plow behind a compact tractor can cover a lot of work if you are patient and consistent. Larger acreages usually move to multi bottom plows or wide chisel setups to cover ground efficiently.
The smarter approach is to match the implement to your soil and your goals:
If erosion is a concern, keeping more residue on the surface often matters, so a chisel style may be a better fit than a full inversion pass.
If you truly need to bury residue and reset the surface, a moldboard can do that job, but plan for follow up passes and protect the soil afterward.
References
- USDA, Terminology and Definitions for Agricultural Tillage Implements, definitions of primary tillage and plow types.
- University of Minnesota Extension, tillage implements, residue coverage and erosion considerations for moldboard and chisel systems.
- NC State Extension, chisel plow overview and residue retention and no inversion characteristics.
- Encyclopaedia Britannica, tillage definition and purpose.
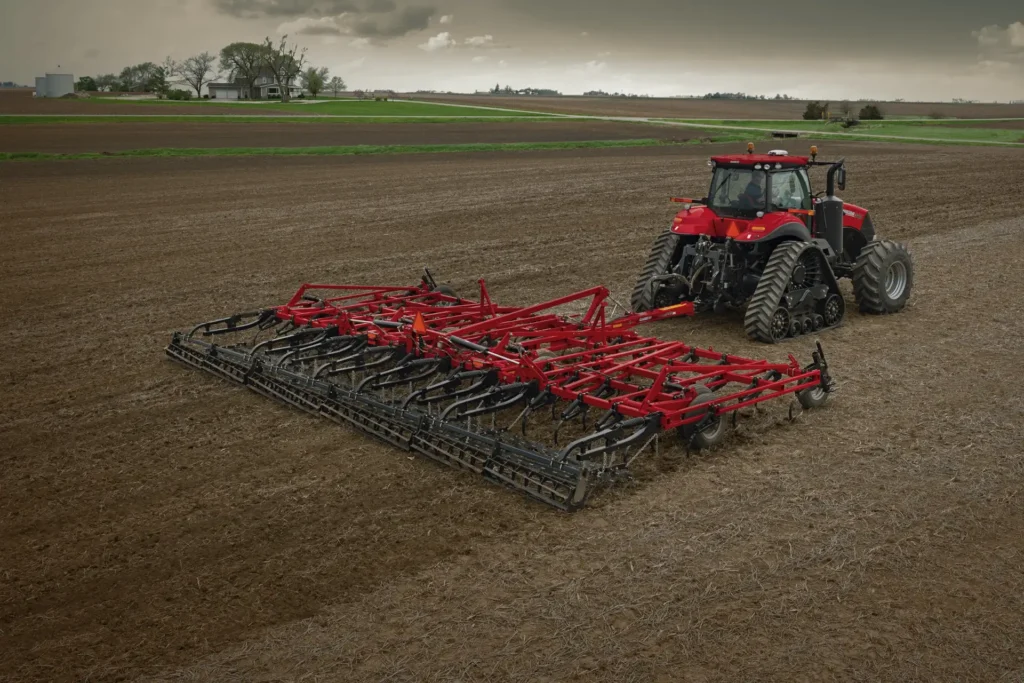
4. Harrow
Plowing does the heavy lifting, but it rarely leaves a field ready to plant. After a plow pass you usually see ridges, furrow marks, and stubborn clods. A harrow is the tool that cleans that up. It is part of secondary tillage, meaning it works shallower than a plow to condition the top layer, break clods, level the surface, and help build a workable seedbed.
What a harrow improves in the field
A well timed harrow pass can do three practical things that matter at planting time.
First, it crushes and spreads clods so seeds are not sitting in air pockets. Second, it smooths the surface, which helps planters place seed more evenly and makes later field work less bumpy. University of Minnesota Extension notes that after moldboard plowing, farmers often make one or two secondary tillage passes with tools such as a tandem disk to smooth the soil and pulverize remaining large clods before planting.
Third, it helps create better seed to soil contact, one of the main goals of seedbed preparation described by NRCS guidance.
Common harrow types and where each fits
Disk harrow
This is the go to choice when plowed ground is rough and cloddy. The concave disks cut, lift, and mix the upper layer, helping chop residue and break the turned soil down further. The USDA tillage terminology document includes several disk harrow configurations used as tillage tools, including tandem disk harrows that can be used for secondary tillage.
Spike tooth or tine harrow
If you need a lighter finish, a spike tooth style can stir the surface without aggressive mixing. SARE describes spike tooth harrows as pointed spikes that stir shallow soil and are widely used for seedbed preparation.
Tine based weeders can also help with early weed control when set for shallow work, especially when the soil surface is not heavily crusted.
Chain or drag harrow
This is a simple, flexible mat you drag over ground. It is popular for pasture work and light seedbed finishing. Oregon State University Extension recommends dragging pastures with a pasture harrow or similar drag to break up manure piles, making nutrients more available and reducing parasite pressure by exposing larvae to sun and air.
Timing matters more than horsepower
The biggest mistake with harrowing is working soil when it is not ready.
If the soil smears and shines, it is too wet. Michigan State University Extension notes that smearing is a sign it is too wet for tillage.
Wet soil is also more vulnerable to compaction, which can cause problems that last beyond one season.
At the other extreme, if soil is baked hard, you may waste fuel and still leave chunks behind. A practical rule is to harrow when the soil is just dry enough to crumble instead of forming slick ribbons.
Smaller farms can still get the job done
On garden sized plots, a walk behind tiller or a small tractor mounted finishing tool can mimic what a harrow does by breaking clods and leveling the top layer. For conservation seedings, NRCS also notes that harrowing can be used early in spring to break down large clods when a field has been left rough over winter.
A harrow is not as flashy as the plow, but it is the difference between rough ground and a seedbed that plants clean, emerges evenly, and is easier to manage all season.
References
- University of Minnesota Extension, tillage passes after plowing and use of secondary tillage tools to smooth and pulverize clods.
- USDA NRCS, terminology and definitions for tillage implements, including disk harrow configurations and secondary tillage terms.
- NRCS, principles of seedbed preparation, goals including seed to soil contact and proper seeding depth.
- SARE, spike tooth harrow overview and shallow stirring for seedbed preparation.
- Oregon State University Extension, dragging pastures to break manure piles and reduce parasite loads.
5. Cultivator
Planting is the start of the season, not the finish. Once seedlings are up, weeds begin competing for light, moisture, and nutrients. A cultivator is the tool that helps you take back that space, especially between crop rows, while also loosening the surface so rain and irrigation soak in instead of running off.
Cultivation is one of the most practical forms of mechanical weed control, but it is not a “set it and forget it” job. Timing is everything. SARE points out that the success of tillage and cultivation depends heavily on weed size, season, weather, and soil conditions. In plain terms, small weeds are easy to knock out, large weeds are not.
What a cultivator does in the field
A cultivator works shallow, usually in the top few inches, cutting weeds off or uprooting them and lightly stirring the surface. Many growers use it as part of an integrated plan to reduce reliance on herbicides, or to keep organic rows clean during the early growth window. UConn’s IPM guidance describes cultivation as one part of an integrated strategy, often combined with other methods to maintain control while reducing herbicide use.
Cultivation also influences soil structure near the surface. Tillage can change soil physical conditions, including aeration, which is one reason farmers cultivate after crusting rains or during early season field work.
Common cultivator styles you will see
- Row crop cultivator
This is the classic between row tool, a toolbar setup with sweeps, knives, or shovels matched to your row spacing. It is designed to slice weeds just under the surface while keeping soil movement away from the crop row. SARE’s guide to sweeps and related tools explains how different shapes are used to cultivate close to the row while protecting the crop. - Field cultivator
Many farms use field cultivators for seedbed work and early weed control, especially before planting, but the same style of tines and sweeps shows up across cultivation systems. University of Vermont Extension describes field cultivators as having multiple rows of shanks fitted with sweeps or shovels and notes their role in weed control and seedbed preparation. - Rotary hoe and similar “blind cultivation” tools
A rotary hoe can be used very early, even before rows are easy to see, when weeds are tiny and crops are resilient enough. NC State Extension describes the rotary hoe as a blind cultivation tool because it disturbs the soil surface without following crop rows.
When cultivation works best
Most farmers get the best results by cultivating early and repeating as needed until the crop canopy shades the row middles.
A simple rule that matches research and extension advice is this: cultivate when weeds are small and the surface is dry enough that uprooted weeds desiccate instead of re rooting. SARE highlights weed size as a key factor in how well cultivation works.
Also remember that weather can disrupt the schedule. UVM Extension notes that timely cultivation matters, and when weeds get ahead, growers may need a more aggressive rescue approach.
A practical takeaway
A cultivator is not just a piece of metal behind a tractor. It is a management tool. Used at the right moment, it keeps rows cleaner, protects moisture for your crop, and supports a balanced weed control plan. Used late, it becomes expensive, slow, and less effective. If you own only one weed control implement beyond a hoe, a well matched cultivator is usually the best place to start.
References
- SARE, Manage Weeds on Your Farm, mechanical and physical weed management and the importance of timing and weed size.
- SARE, Steel in the Field, cultivator sweeps, knives, and wings and how they work near the crop row.
- University of Vermont Extension, Cultivation Equipment for Weed Control, field cultivators and the need for timely cultivation.
- UConn IPM, Cultivation Tools for Mechanical Weed Control in Vegetables and integrated management strategies.
- NC State Extension, Rotary hoe as a blind cultivation tool for early season weed control.
- USDA ARS paper on tillage effects on soil aeration and physical conditions
6. Hand tools and a wheelbarrow
Even on a highly mechanized farm, most days are won with simple tools. You still need to dig a post hole, clean a pen, tighten a loose bolt, or harvest a small patch without firing up a tractor. Strong hand tools cover the jobs that require control, accuracy, and quick fixes.
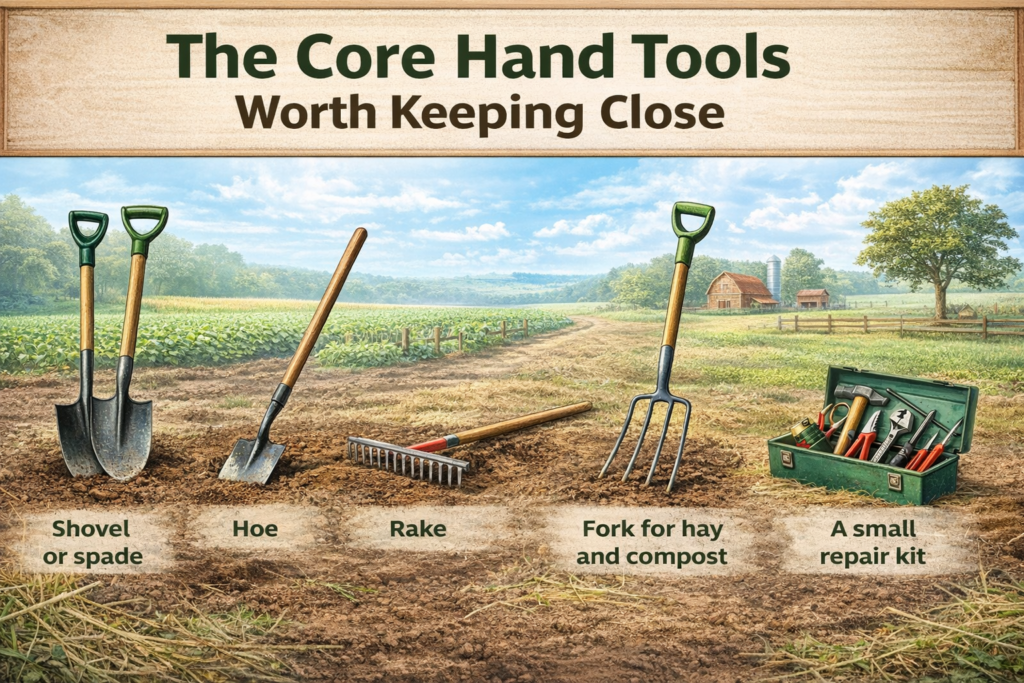
The core hand tools worth keeping close
- Shovel or spade
These are your everyday dig and move tools. A shovel is typically shaped for scooping and moving loose material, while a spade is often better for cleaner cuts and shallow digging. SARE’s hand tools module explains the practical difference between shovel and spade shapes and where each shines. - Hoe
A hoe is still one of the fastest weed tools for tight spots and row edges. It also helps open shallow furrows and pull soil toward crops when hilling is needed. - Rake
A stiff tine rake levels beds, breaks small clods, and spreads compost or manure evenly. A lighter leaf style rake is useful around yards, paths, and livestock areas. - Fork for hay and compost
A pitchfork or manure fork saves your back when you are moving bulky material like bedding, hay, and compost. It grips and lifts in a way a shovel simply cannot. - A small repair kit
Farms break things constantly. A basic kit with a hammer, adjustable wrench, screwdrivers, pliers, and a sharp knife handles many repairs before they become bigger problems.
Why the wheelbarrow still matters
A wheelbarrow is the short distance hauling machine you use all day without thinking about it. It moves buckets of harvest, feed sacks, rocks, fence posts, and stall clean out with far less strain than carrying by hand.
If you regularly move heavy loads, consider whether a two wheel design or a garden cart style wagon fits you better. Multi wheel carts can offer more stability, while a wheelbarrow can be easier to maneuver through narrow spaces.
References
- SARE, Hand Tools module, shovel versus spade and hand tool basics.
- Oregon State University Extension Service, Care and Maintenance of Garden Tools, cleaning and dry storage guidance.
- NIOSH, Ergonomic Guidelines for Manual Material Handling, injury risk and reducing physical demands.
- CCOHS, Hand Tool Ergonomics, tool design factors to reduce musculoskeletal risk.
- NIOSH, Guide to Selecting Non Powered Hand Tools, selecting tools that reduce injury risk.
7. Irrigation System
Rain is welcome, but it is not a plan. When a crop hits a sensitive stage and the sky stays dry, yield and quality can drop fast. An irrigation system gives you control. It lets you apply water when the plant actually needs it, rather than hoping the weather cooperates. Good irrigation management can also reduce energy use, limit nutrient leaching, and improve consistency across the field.
Start with the real goal: put water in the root zone, not everywhere else
Every irrigation method is basically trying to do one thing well: refill the root zone without wasting water to runoff, deep percolation, or evaporation. FAO’s crop water guidance explains that crop water needs change with climate, growth stage, soil water availability, and the irrigation method itself, which is why local conditions matter so much.
Common irrigation options and where they fit
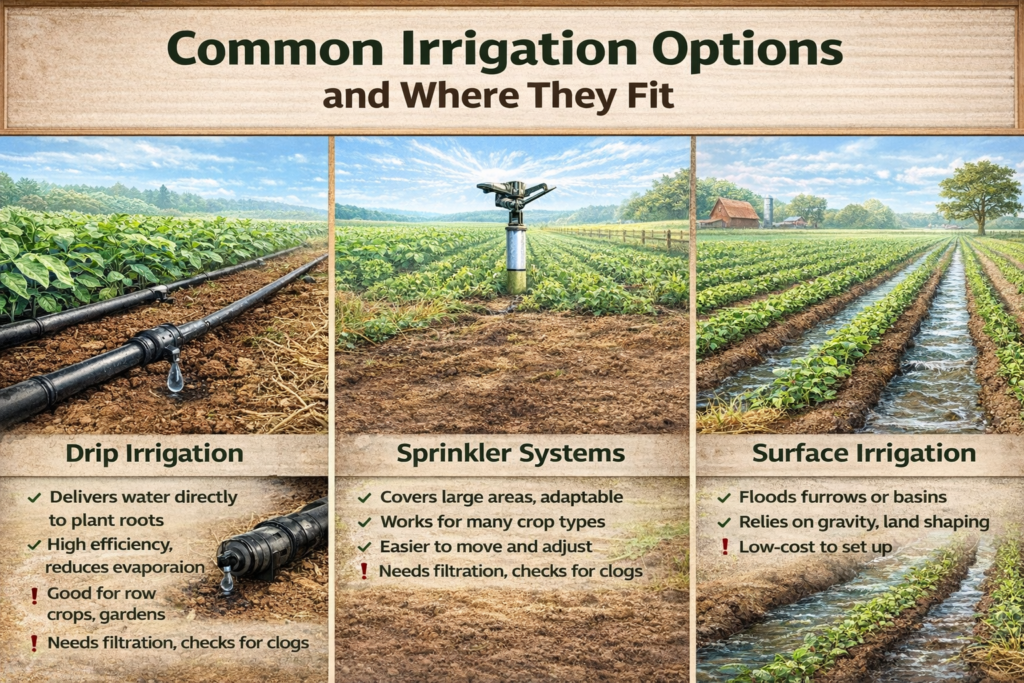
Drip irrigation
Drip delivers water in small amounts close to the plant, which usually means less evaporation and less water hitting areas that do not need it. FAO training materials summarize drip as a high efficiency approach and note that it can use substantially less water than surface methods in many cases.
The same FAO resource also summarizes research findings showing yield gains for drip compared with several traditional methods, especially against flooding type irrigation.
Practical note: drip needs filtration and routine checks. Clogged emitters and small leaks can quietly ruin uniformity.
Sprinkler systems
Sprinklers are popular because they can cover large areas and work across many crop types. They are often easier to move and reconfigure than drip in broadacre settings. The tradeoff is that spraying water through the air can increase losses in hot, windy conditions, and distribution uniformity depends on pressure, nozzle choice, and spacing. FAO’s irrigation method guidance compares these approaches and discusses selection factors.
Surface irrigation: flood, basin, furrow, border
These methods rely on gravity and land shaping to move water across the field. They can be low cost to install, but efficiency depends heavily on leveling, soil intake rate, and good timing. FAO’s irrigation efficiency annex outlines common loss pathways such as runoff and seepage and explains why management details matter so much.
Make irrigation smarter with scheduling and sensors
Many farms now schedule irrigation using soil moisture sensors, flow measurements, and weather based crop water use estimates. University of Minnesota Extension notes that using soil moisture sensors is one of the easiest and most effective ways to improve irrigation efficiency, with benefits that include conserving water and energy and reducing nutrient leaching.
On the planning side, NRCS irrigation water management guidance emphasizes having a clear plan that includes system layout, sensor locations if used, and measurement records of water applied.
A practical approach many growers use looks like this:
- measure how much water you are actually applying
- track soil moisture in the root zone
- irrigate before the crop is stressed, not after it is already wilting
- adjust for growth stage and weather demand
Do not ignore the maintenance basics
Any system can fail from small issues:
- clogged filters or emitters in drip
- leaks, pressure drops, or worn nozzles in sprinkler systems
- uneven flow and poor leveling in surface methods
Regular inspections and simple record keeping often make the difference between “we irrigated” and “we irrigated effectively.”
References
- FAO, Guidelines for predicting crop water requirements and the role of climate, soil, and irrigation method in water needs.
- FAO, Irrigation Water Management: Choosing an irrigation method and overview of surface, sprinkler, and drip options.
- FAO, Annex on irrigation efficiencies and common water loss pathways.
- FAO climate smart training catalogue, drip irrigation efficiency, water savings, and summarized yield comparisons.
- University of Minnesota Extension, soil moisture sensors for irrigation scheduling and efficiency benefits.
- USDA NRCS, Irrigation Water Management practice guidance and documentation elements
10 Best Irrigation Systems for Efficient Water Use
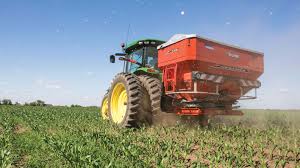
8. Fertilizer spreader
Good yields start with nutrition that is applied evenly. When one part of a field gets too much fertilizer and another part gets too little, you see it in the crop. Uneven color, uneven growth, uneven harvest. A fertilizer spreader solves that basic problem by putting the right material on the right area at a consistent rate, whether you are applying granular fertilizer, lime, compost, or manure.
Nutrient management is not only about growing a better crop. It is also about protecting water and reducing waste. USDA NRCS describes nutrient management as maximizing the economic benefit of nutrients and soil amendments while minimizing environmental impact.
Why a spreader matters more than people think
Hand spreading can work on tiny plots, but it is slow and rarely uniform. A spreader gives you repeatable coverage, and repeatability is where profit and stewardship live. The NRCS nutrient management standard also emphasizes basing nutrient rates on current soil tests and keeping records of the source, timing, method, and rate of applications.
Common spreader types and where each fits
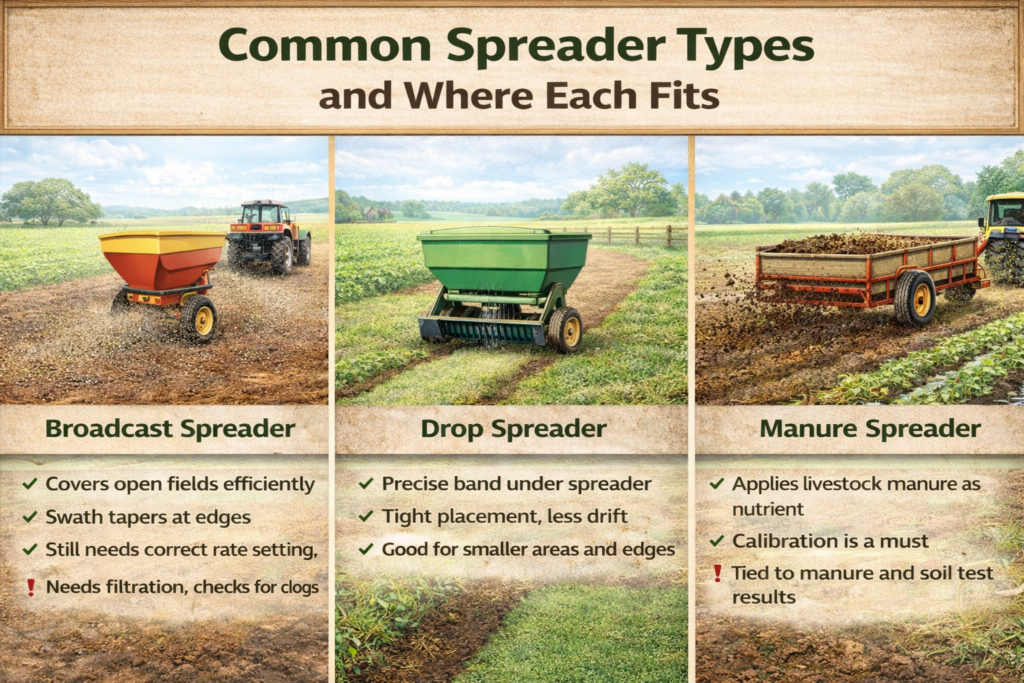
- Broadcast spreader
A spinning disc throws granules in a wide pattern, which makes it efficient for open fields. Extension guidance notes that broadcast patterns typically taper at the edges, which can make the swath more forgiving of small overlap errors, but the material still must be applied at the correct rate to avoid poor performance or unnecessary loss. - Drop spreader
A drop spreader releases product straight down in a band that matches the width of the machine. It is often used where you want tighter placement and less drift beyond the target area. Clemson Extension explains that drop spreaders apply in a swath equal to the spreader width, making them useful for smaller areas and edges. - Manure spreader
Livestock farms often rely on manure as a nutrient source, but the only way to apply it responsibly is to know the rate. Penn State Extension notes that calibrating the manure spreader is the only way to know the actual manure application rate, and that calibration combined with soil tests and manure analysis helps match crop nutrient needs.
NRCS also calls out manure testing and calibration as part of good nutrient planning.
Calibration is the difference between guessing and managing
Many spreaders come with suggested settings, but those are only a starting point. Penn State Extension warns that recommended settings should not be trusted to deliver the desired amount because ground speed and spreader differences change the rate, and calibration should be done for each operator.
University of Georgia guidance also highlights that constant ground speed is important for uniform application, especially when there is no rate controller.
If you do just one thing to improve fertilizer performance, do this: calibrate, then write the setting down for that material, that field speed, and that operator.
A simple way to use a spreader responsibly
- Start with soil test recommendations and realistic yield goals.
- Choose the spreader type that fits the material and the field layout.
- Calibrate every time you change product, rate, or speed.
- Keep application records so you can learn what worked and prove what was applied.
A fertilizer spreader is not just a convenience tool. It is what turns soil test advice and nutrient plans into an even, predictable crop response.
References
- USDA NRCS, Nutrient Management overview and purpose.
- USDA NRCS, Conservation Practice Standard 590 and nutrient planning records, soil test basis, and calibration guidance.
- Penn State Extension, calibrating fertilizer spreaders and why preset settings are not enough.
- Penn State Extension, manure spreader calibration and linking manure analysis with soil tests and crop needs.
- Clemson HGIC, calibrating spreaders and rotary versus drop swath differences.
- University of Georgia, calibration of dry broadcast fertilizer applicators and importance of constant ground speed.
9. Sprayer for pesticides and herbicides
In most seasons, something will try to take your crop away. Weeds compete for water and nutrients, insects chew leaves and fruit, and diseases can spread fast when weather turns favorable. FAO estimates that plant pests and diseases reduce global crop yields by about 20 to 40 percent per year, which is why timely crop protection matters on almost every farm.
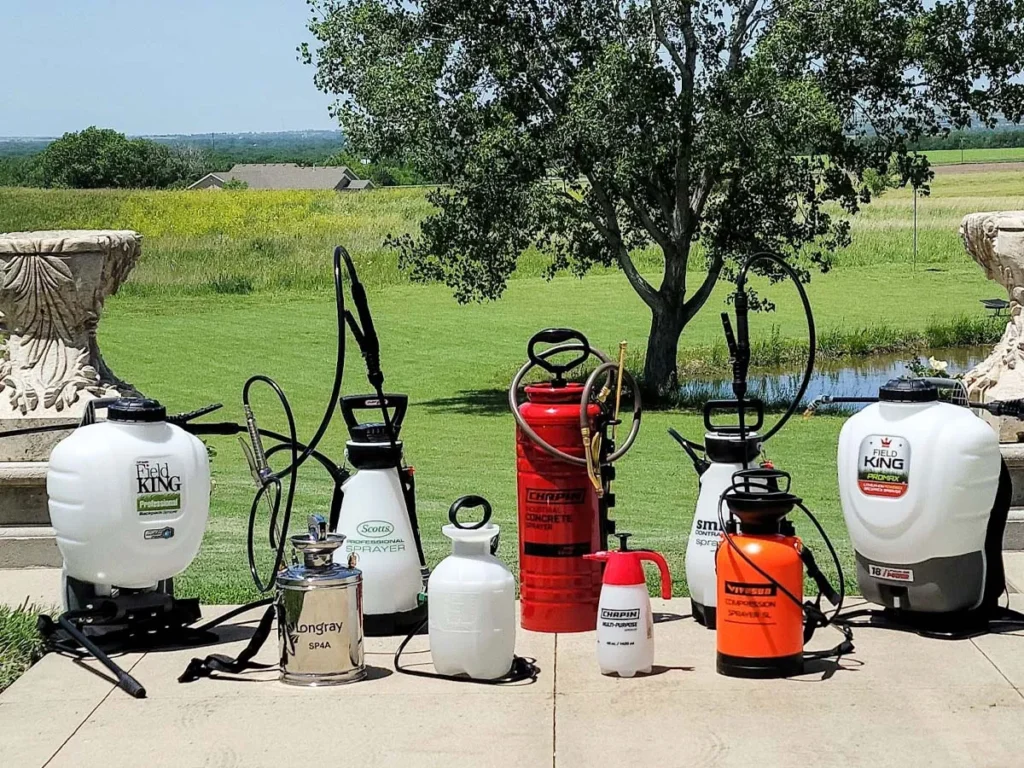
A sprayer is the tool that makes that timing possible. It lets you apply herbicides, insecticides, fungicides, and foliar feeds with enough speed and uniformity to protect yield and quality.
Sprayer options that match real farm needs
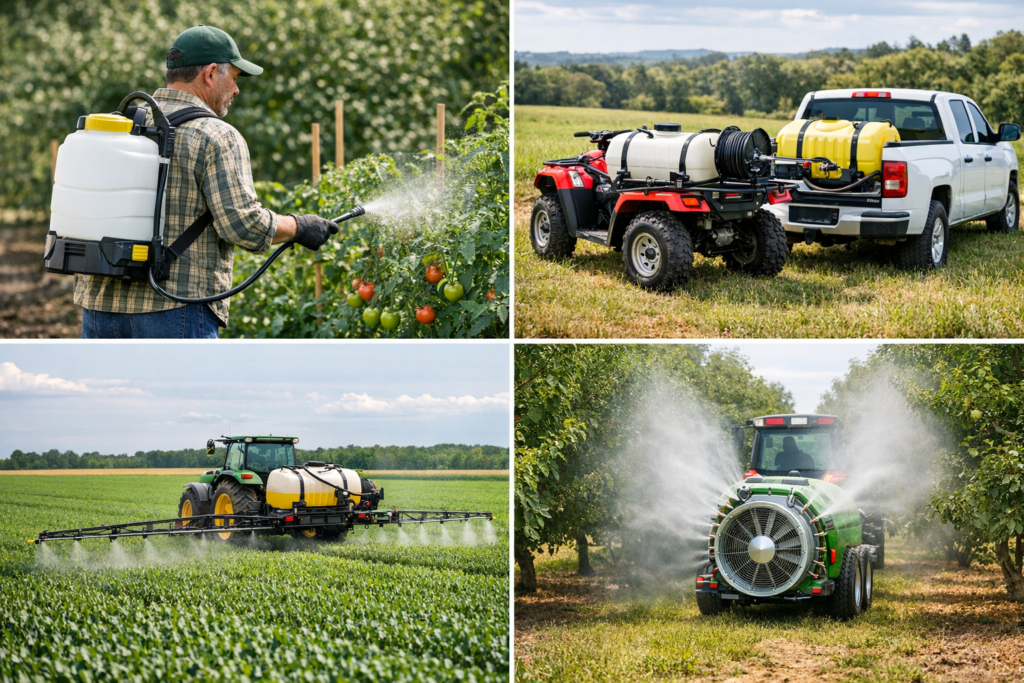
- Backpack sprayer
Best for small plots, greenhouses, and spot treatments where you need control and precision. It is also useful for fence lines and problem patches. - ATV or pickup mounted sprayer
A practical middle ground for orchards, pastures, and mixed farms. You get more capacity than a backpack unit and can cover ground quickly while still treating targeted areas. - Tractor boom sprayer
Designed for field scale work where uniform coverage across a wide swath is the priority. Boom sprayers are common for herbicide applications and any situation where consistent rate and even overlap are essential. - Air blast and mist style sprayers
Used in orchards and vineyards where foliage is dense and you need good canopy penetration. Calibration and droplet control are especially important for these systems.
What separates good spraying from expensive mistakes
Follow the label and local rules
Pesticide labels are not marketing copy. They are legally enforceable directions for safe and correct use. The US EPA explains that labels define where and how a product may be used, including precautions and limitations.
Many countries also require training or certification, so always match your practice to your local regulations.
Calibrate every time something changes
Speed, nozzle wear, pressure, and product choice all change your application rate. Extension guidance for boom sprayers emphasizes that calibration is necessary to avoid overdoses and skips and to keep application economical and uniform.
Manage drift with droplet size and weather awareness
Off target movement is one of the biggest risks in spraying. Guidance from NDSU and University of California notes that droplet size, nozzle selection, and conditions like wind strongly influence drift and coverage, and applicators should select equipment that reduces drift risk while still achieving adequate coverage.
Newer technology worth knowing about
Some modern sprayers use sensors to spot spray weeds, often in green on brown situations, so herbicide is applied only where plants are detected. Farm equipment reporting and university resources describe these sensor based systems and the factors to consider before buying one.
Spray drones are also expanding quickly in some regions, especially where terrain, wet soil, or small fields make ground rigs difficult. Recent reporting and reviews describe the growth of agricultural drone spraying and ongoing work around performance, deposition, and regulation.
A sprayer is a powerful tool, but it demands good habits. When it is calibrated, used under the right conditions, and operated according to the label, it becomes one of the most valuable pieces of equipment on the farm for protecting yield, quality, and long term field health.
References
- FAO, Pest and Pesticide Management, global yield losses of about 20 to 40 percent from pests and diseases.
- US EPA, pesticide labels are legally enforceable and define safe use conditions.
- UNH Extension and BC Government factsheet, boom sprayer calibration and avoiding overdoses and skips.
- NDSU Extension and UC guidance, droplet size, nozzle selection, weather, and drift reduction.
- Montana State University research center and Farm Progress, precision spot spraying and sensor based weed detection.
10. Harvesting equipment
A crop is only valuable when it is brought in cleanly and on time. Harvest is where weeks or months of work turn into grain in a bin, hay in storage, or produce that can actually be sold. It is also the stage where delays and poor adjustment can create real losses. University of Nebraska Extension explains that combine calibration and good harvest practice are key to keeping grain losses at acceptable levels.
FAO also notes that when harvest is delayed, losses can increase due to shattering and damage in overripe grain.
The right harvesting tools depend on what you grow, but the goal stays the same: gather the crop at peak condition with minimal field loss and minimal handling damage.
Grain and oilseed farms: the combine harvester
For wheat, rice, maize, soybean, and similar crops, the combine is the centerpiece. It performs several jobs in one pass, cutting the crop and separating and cleaning the grain. Britannica describes modern combines as machines that handle reaping, threshing, and winnowing at the same time.
Because a combine is a precision machine, setup matters. Small changes in ground speed, header settings, or threshing and cleaning adjustments can be the difference between a clean sample and grain left on the ground. Extension educators emphasize measuring harvest losses so you know whether losses are happening before harvest or during harvest, and then correcting settings accordingly.
Hay and forage farms: mower, rake, baler
Hay is not just cut and collected. It is cut, dried, raked into windrows, then baled. Iowa State University Extension notes that raking can combine mower swaths into a windrow that is easier for the baler to pick up, which can reduce missed hay and improve bale consistency.
Once hay is ready, the baler compresses it into bales for handling and storage. Britannica describes balers as compressing hay or straw into tightly packed bales tied with wire or twine.
Purdue Extension also describes how rectangular balers feed hay into a bale chamber for compression and bale formation.
Vegetables and root crops: digging and lifting tools
For market gardens and vegetable operations, harvesting equipment can be as simple as sharp knives, harvest bins, and a good field cart. For root crops, it often includes undercutters, lifters, and diggers that loosen soil and bring the crop up with less hand digging. In larger potato systems, research on potato harvesters describes separation systems designed to remove clods and reduce tuber damage during handling.
Orchards and vineyards: harvest aids that protect people and fruit
Tree fruit harvest is often limited by labor efficiency and safety. Research and extension sources discuss harvest aid platforms that move pickers along rows at working height and improve ergonomics compared with ladder picking.
Even when you hand pick, the right picking bags, bins, and platforms help reduce bruising and speed up the flow from tree to storage.
If you cannot own the big machines, plan access
Not every farm can justify owning a combine or a full hay line for a short harvest window. Many farms solve this by custom hire. Iowa State University Extension points out that custom operators play a major role in timely harvesting and a farm’s decision to own versus hire can involve major cost differences.
You can also cooperate with neighbors, rent equipment, or hire a contractor for the peak weeks and keep smaller tools in house year round.
Harvest equipment is the capstone of the whole season. Planting well and managing well only pays when you can harvest quickly, safely, and with losses kept under control.
References
- Britannica, overview of combine harvesters and combined operations such as reaping, threshing, and winnowing.
- University of Nebraska Extension, estimating harvest losses and the importance of combine calibration.
- FAO, post harvest physical losses and how delayed harvest increases shattering and grain loss.
- Iowa State University Extension, machinery ownership versus custom hire and role of custom operators.
Summary Table: 10 best tools every farmer should own
| SL No. | Tool | Best used for | Why it earns a spot | Practical tip that pays back |
|---|---|---|---|---|
| 1 | Tractor | Soil prep, hauling, mowing, spraying, loader work, running PTO implements | Biggest time-saver; turns “days” of labor into “hours,” improves timeliness | Match HP + implement size to your heaviest seasonal job; keep PTO guards and service schedule tight |
| 2 | Farm transport (truck + trailer) | Moving feed, fencing, inputs, produce, equipment, livestock | Cuts trips, reduces handling, keeps the whole farm moving | Buy/choose by payload + tow rating, not “half-ton” labels; do quick tires/lights/hitch/brakes checks |
| 3 | Plow | Primary tillage: break compaction, turn/loosen soil, incorporate residue | Sets up the season by fixing “what’s under your boots” | Pick style by goal: moldboard = full inversion, chisel = loosen w/ residue, disk = tough conditions |
| 4 | Harrow | Secondary tillage: break clods, level field, improve seedbed | Makes planting smoother and emergence more uniform | Don’t work soil too wet (smearing/compaction) or too dry (fuel burn + clods stay) |
| 5 | Cultivator | Shallow weed control between rows; surface loosening | One of the best low-cost ways to protect yield early-season | Cultivate when weeds are small and surface is dry enough so uprooted weeds desiccate |
| 6 | Hand tools + wheelbarrow | Daily fixes, tight spaces, harvesting small patches, moving materials short distance | The “everyday work winners” even on mechanized farms | Keep a core kit: shovel/spade, hoe, rake, fork, repair tools; store clean/dry and keep edges sharp |
| 7 | Irrigation system | Deliver water to root zone on your schedule | Reduces risk in dry spells; stabilizes yield/quality | Focus on root-zone watering; inspect for leaks/clogs; consider simple scheduling using soil feel/sensors |
| 8 | Fertilizer spreader | Apply fertilizer/lime/compost/manure evenly | Uniform nutrition = uniform crop; reduces waste and environmental loss | Calibrate whenever product/rate/speed changes; write down settings per material + speed |
| 9 | Sprayer | Herbicides, insecticides, fungicides, foliar feeds | Enables timely crop protection and consistent coverage | Follow the label, calibrate often, and manage drift with nozzle choice + wind-aware spraying |
| 10 | Harvesting equipment | Bring crops in cleanly and on time (combine/hay tools/harvest aids) | Harvest is where profit is captured—or lost | If you can’t own it, plan access (rent/custom hire/co-op); check settings to reduce losses/damage |
Final Thoughts
The right tools make farming easier because they help you do the right job at the right time, from soil prep and planting to watering, feeding, crop protection, and harvest. You do not have to own every machine, but you do need access, through renting, custom hire, or equipment sharing. Mechanization can improve productivity and reduce labor pressure when timing is tight.
Choose equipment based on your crops, farm size, and budget, and rely on trusted guidance for decisions like irrigation design and nutrient application. Keep tools maintained, because downtime during planting or harvest can cost more than repairs.
FAQs for Best Tools Every Farmer
1) If I can only afford one “big” purchase, what should it be?
For most farms, a tractor or access to one is the highest, impact upgrade because it multiplies what you can do soil prep, hauling, mowing, loader work, and powering implements. If buying is unrealistic, the next best move is renting or custom hiring at key windows – land prep + harvest.
2) What’s the most common tool mistake new farmers make?
Overbuying or mismatching tools to the real workload. A tractor that’s too small struggles , wasted time, breakdowns and too big drains cash. Same with spreaders/sprayers: buying without planning for calibration, maintenance, and correct sizing leads to poor results.
3) Do small farms really need a truck and trailer?
Not always at first, but you do need a reliable hauling system. Many small farms start with a tractor drawn cart, ATV/UTV with a pull cart, and a wheelbarrow then upgrade to truck/trailer when transport becomes the bottleneck.
4) How do I choose between a moldboard plow and a chisel plow?
Choose moldboard when you truly need a clean flip – bury heavy residue, reset a neglected patch .
Choose chisel when you want to loosen soil while keeping more residue on the surface .
If you’re unsure, default toward less disturbance and build your seedbed with harrow/cultivator passes.
5) What “small habit” improves results across almost every tool on this list?
Calibration + maintenance discipline.
Calibrate spreaders and sprayers so you’re managing, not guessing.
Keep blades sharp, grease points serviced, tires/pressures correct, and fix small issues early.
This reduces downtime in the exact weeks you can’t afford it , planting and harvest.

Thesis Link : https://saulibrary.edu.bd/daatj/public/uploads/BAU200601_19-Pp_5.pdf
- Why Fruit Trees Die Suddenly – Common Diseases Guide - June 26, 2026
- Best Backpack for Work, Travel, College, and Everyday Use - May 24, 2026
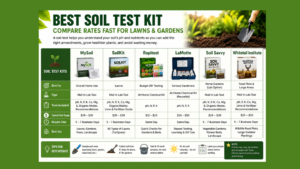
- Best Soil Test Kits for Lawns and Gardens - May 16, 2026


[…] Learn more Best Time to Travel to Hawaii for Amazing Weather – 2026 Guide 10 Best Tools Every Farmer – Essential Farm Equipment […]