


10 Best High Yield Crops for Small Farms
On a small farm, space is the budget and every square foot has to earn its keep. That’s why 10 Best High Yield Crops for Small Farms is more than a catchy title; it’s a practical roadmap for growers who want stronger harvests from limited land. Whether you’re working with a backyard plot, a few raised beds, or a couple of acres, the crops you choose will shape your season either delivering steady production or leaving you with a lot of effort and a modest return. For beginners especially, starting with reliable, high performing crops can build confidence fast and make the farm feel “worth it” sooner.
High yield crops simply mean more harvest from the same area. Some produce heavily per plant, others keep producing for weeks, and some allow quick succession planting so one bed can deliver multiple harvests in a season. When managed well, these crops can improve cash flow, reduce waste, and make better use of your time and inputs.
In this guide, you’ll discover 10 proven high yield crops suited to small farms across the USA. For each one, we’ll explain why it performs so well, share realistic yield expectations, and give practical tips on spacing, watering, fertility, and harvest habits plus FAQs on what “higher crop yield” really means and how to increase it sustainably.
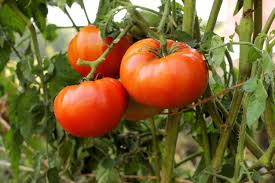
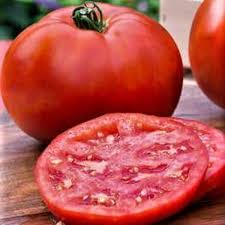
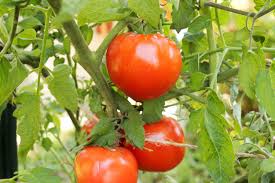
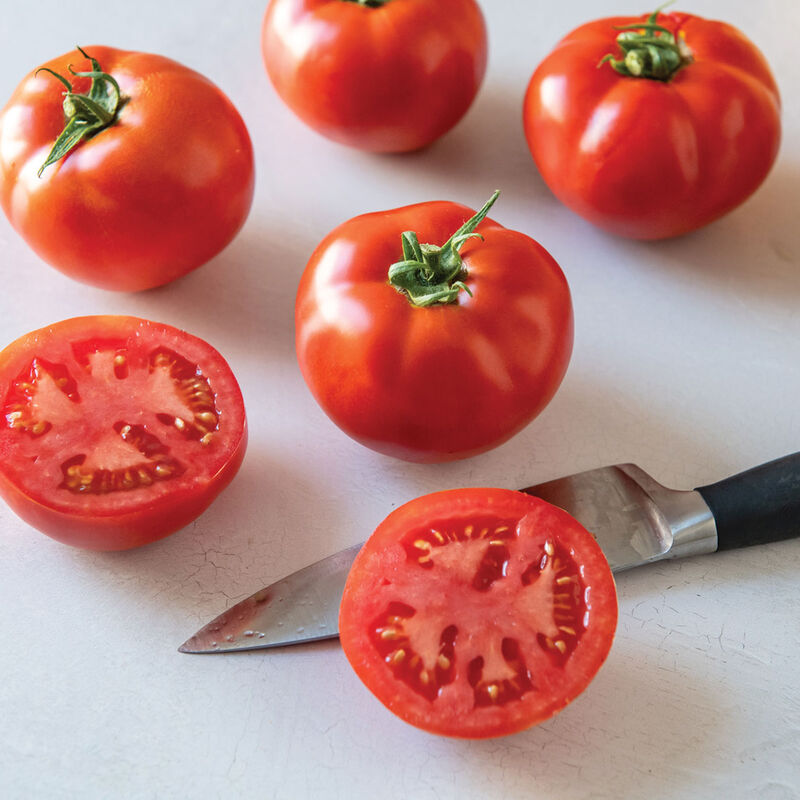
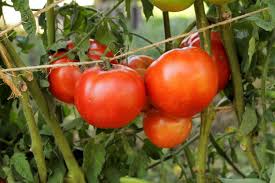
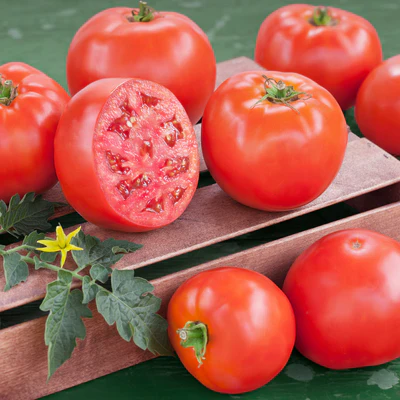
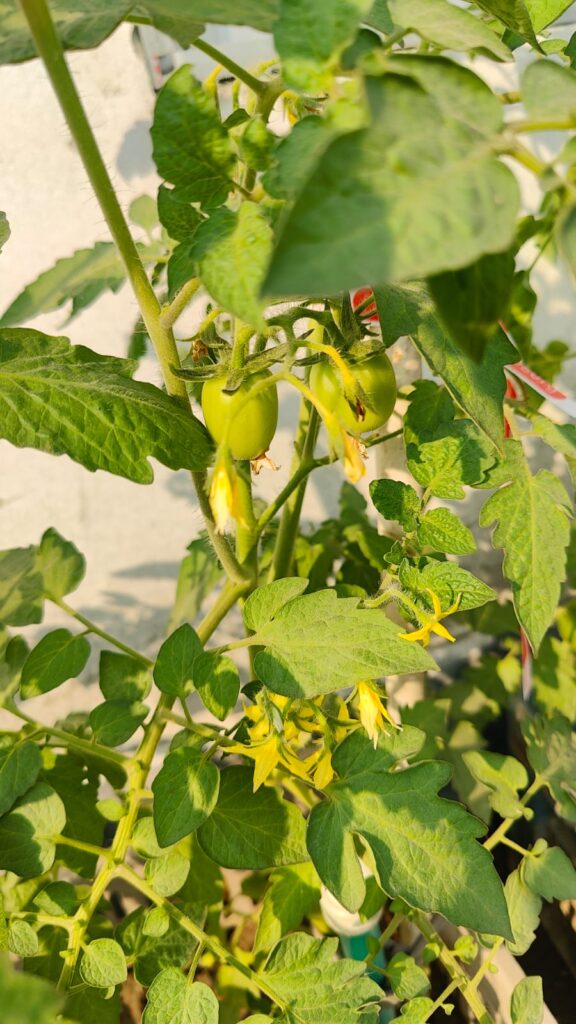
1. Tomatoes in Small Spaces – Big Harvests From a Tiny Footprint
Tomatoes are one of the few crops that can genuinely pay rent in a small garden. Train them up, keep moisture steady, feed them like fruiting plants, not leafy ornamentals, and they’ll produce for weeks from a footprint that’s smaller than most people’s patio furniture.

But tomatoes are also brutally honest. A weak cage, inconsistent watering, and a “random fertilizer whenever I remember” routine will show up fast, cracked skins, blossom end rot, disease pressure, and fruit that ends up on the soil instead of in your kitchen.

This guide is built around what extension programs repeatedly emphasize – Maryland, Oregon State, Missouri, Iowa State, Cornell Cooperative Extension, Ohio State/OSU resources : support + consistency + airflow + balanced nutrition. The difference between “decent” and “loaded” usually isn’t luck, it’s the system.
Start Here: What Success Looks Like
If you’re growing in a raised bed or tight backyard space, these are reasonable planning ranges:
- Per plant: about 8–15+ lbs in a normal season with staking/trellising and steady care
- Harvest window: commonly 8–12 weeks, longer in warm regions
- 4×8 raised bed: typically 6–8 indeterminate plants if you trellis and prune for airflow
Could you get more? Sure, especially with long seasons, excellent trellising, and consistent feeding. But if you plan for “internet brag yields,” you’ll end up disappointed and overplanted.
The 80/20 Rules of Tomato Yield
If you do four things well, your yield usually follows:
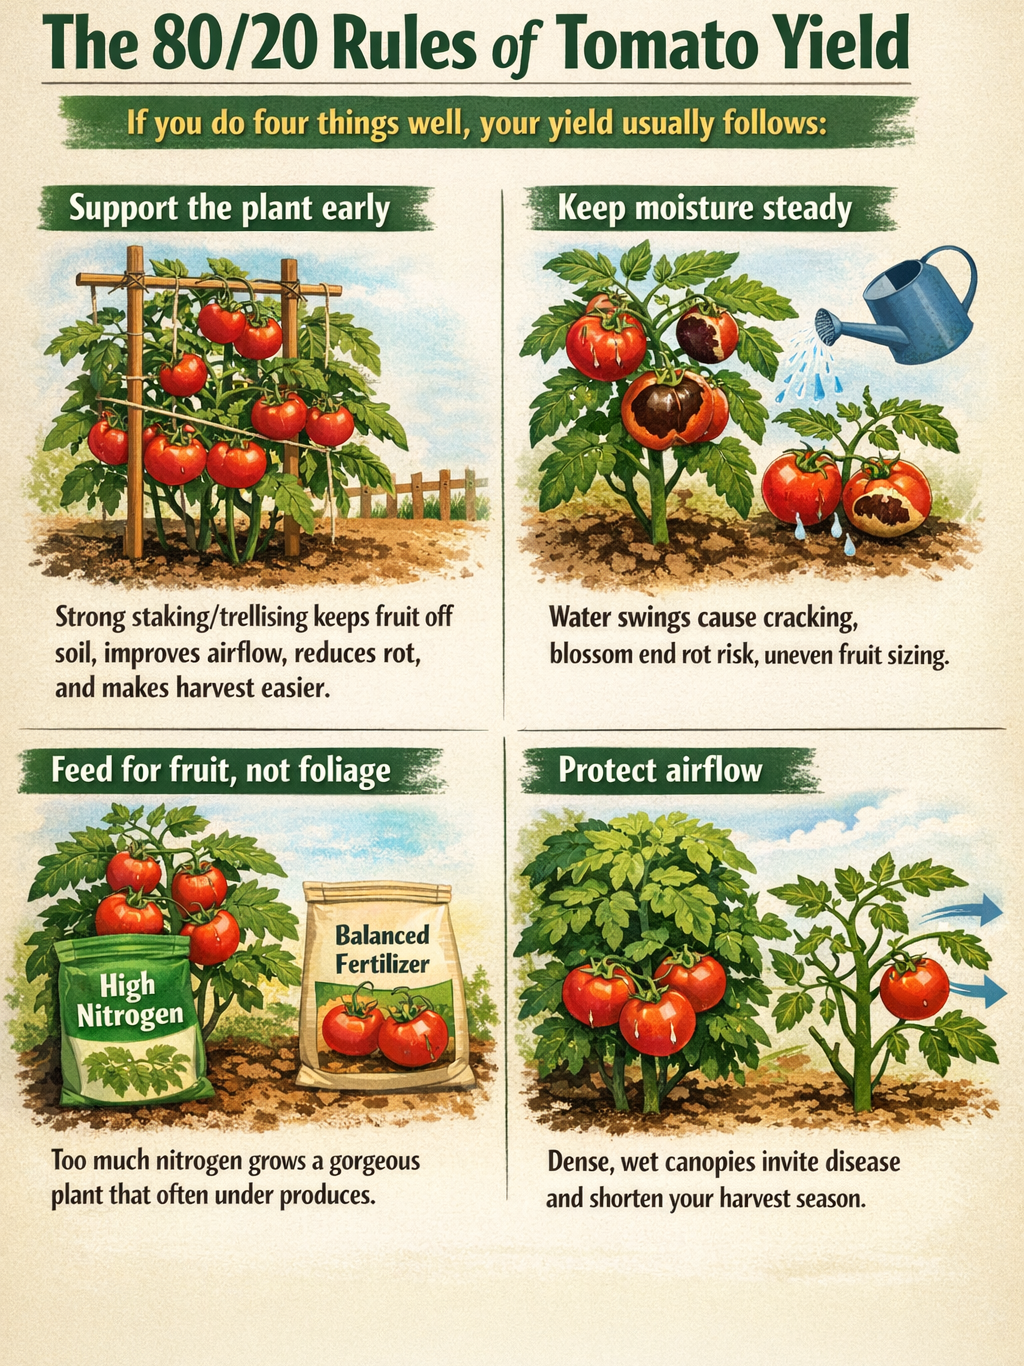
- Support the plant early
Strong staking/trellising keeps fruit off soil, improves airflow, reduces rot, and makes harvest easier , this is a consistent theme across extension guidance. - Keep moisture steady
Water swings are behind many common tomato issues, cracking, blossom end rot risk, uneven fruit sizing. - Feed for fruit, not foliage
Too much nitrogen grows a gorgeous plant that often under produces. - Protect airflow
Dense, wet canopies invite disease and shorten your harvest season.
The Small Space Setup That Works – 4×8 Raised Bed Blueprint
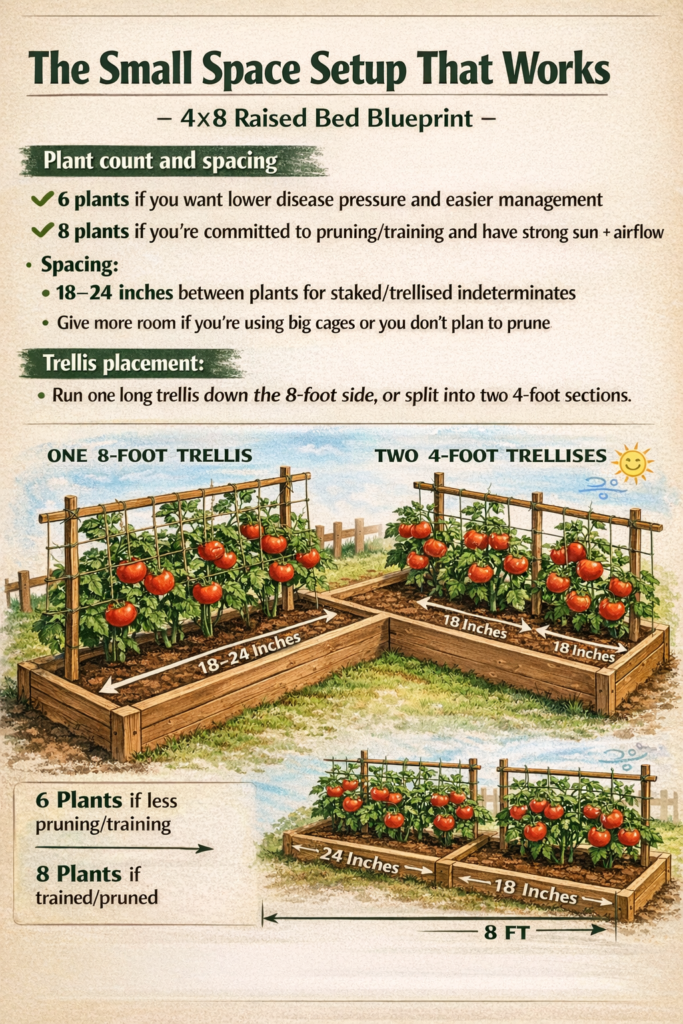
Plant count and spacing
- 6 plants if you want lower disease pressure and easier management
- 8 plants if you’re committed to pruning/training and have strong sun + airflow
Spacing:
- 18–24 inches between plants for staked/trellised indeterminates
- Give more room if you’re using big cages or you don’t plan to prune
Trellis placement
Run one long trellis down the 8-foot side, or split into two 4-foot sections.
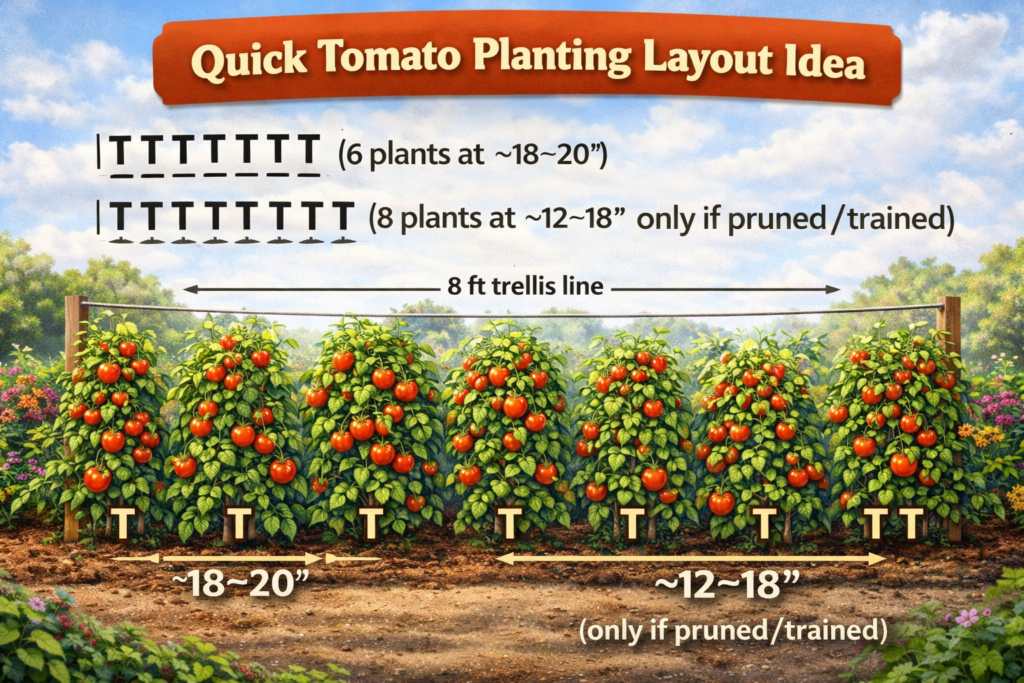
Quick layout idea :
8 ft trellis line
| T  T  T  T  T  T |  (6 plants at ~18–20")
or
| T T T T T T T T |  (8 plants at ~12–18" only if pruned/trained)
Variety choice
If you want dependable output, indeterminate hybrids are the workhorses because they keep producing until frost.
Good “find it anywhere” options:
- Big Beef

- Better Boy
- Celebrity
- Early Girl especially helpful in short seasons
Heirlooms are great for flavor and novelty, but if your priority is pounds + fewer problems, hybrids are typically easier to run.
Support Systems Compared
Most tomato “fails” start with a support system that wasn’t built for July.
| Support Type | Best For | Pros | Cons |
|---|---|---|---|
| Cattle panel / livestock panel trellis | Raised beds, long seasons | Very strong, great airflow, easy harvest | Needs sturdy posts, upfront setup |
| Heavy duty DIY cages (reinforcing wire / livestock wire) | Low-maintenance growers | Long lifespan, minimal weekly tying | Bulky to store, can be expensive upfront |
| Stake + twine (Florida weave style) | Rows / market garden style | Cheap per plant, quick to install | Requires maintenance; not ideal for a few random plants |
| Cheap cone cages | Determinate or small plants | Easy, common | Often collapses with vigorous indeterminates |
Rule of thumb: if it can be bent with one hand at the store, it’s not a tomato cage, it’s decor.
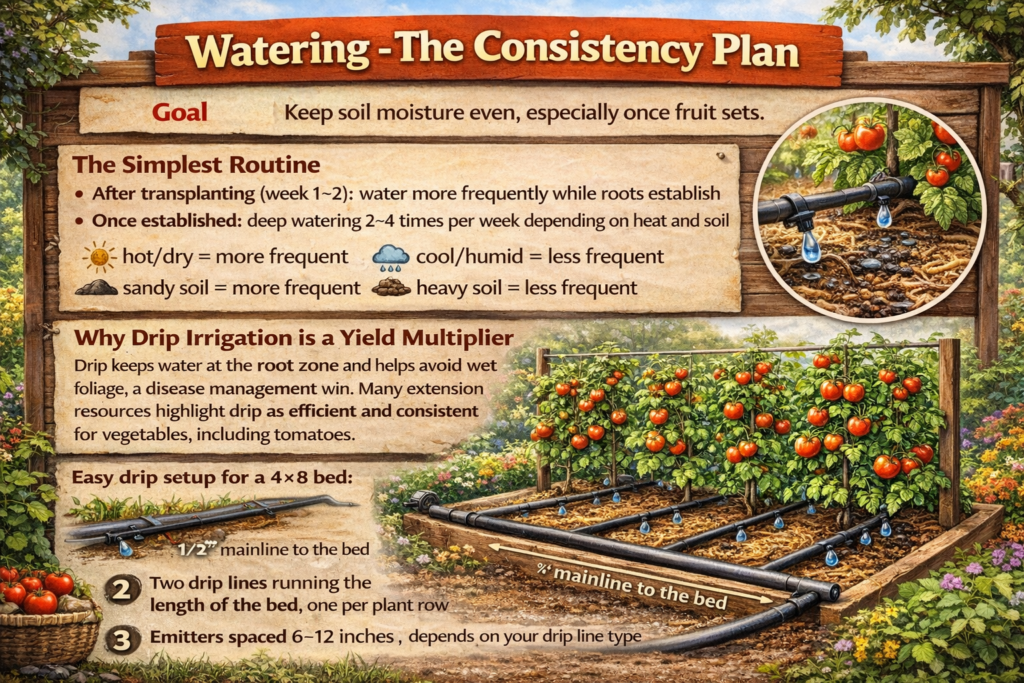
Watering – The Consistency Plan
Goal
Keep soil moisture even, especially once fruit sets.
The simplest routine
- After transplanting (week 1–2): water more frequently while roots establish
- Once established: deep watering 2–4 times per week depending on heat and soil
- hot/dry = more frequent
- cool/humid = less frequent
- sandy soil = more frequent
- heavy soil = less frequent
Why drip irrigation is a yield multiplier
Drip keeps water at the root zone and helps avoid wet foliage, a diseasemanagement win. Many extension resources highlight drip as efficient and consistent for vegetables, including tomatoes.
Easy drip setup for a 4×8 bed:
- 1/2″ mainline to the bed
- Two drip lines running the length of the bed, one per plant row
- Emitters spaced 6–12 inches , depends on your drip line type
Mulch matters:
A 2–3 inch mulch layer , straw, shredded leaves, etc. reduces moisture swings and soil splash both directly connected to fruit quality and disease pressure.
Feeding Tomatoes Without Overcomplicating It
Tomatoes are heavy feeders, but the biggest mistake is feeding them like leafy greens.
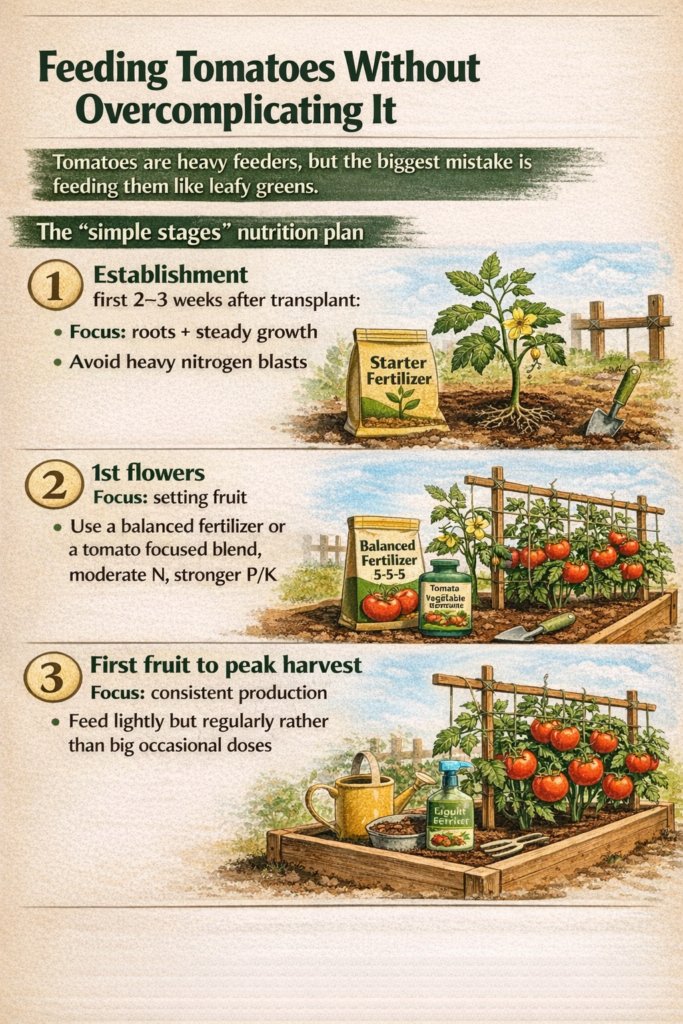
The “simple stages” nutrition plan
1 — Establishment , first 2–3 weeks after transplant:
- Focus: roots + steady growth
- Avoid heavy nitrogen blasts
2 — 1st flowers:
- Focus: setting fruit
- Use a balanced fertilizer or a tomato focused blend , moderate N, stronger P/K
3 — First fruit to peak harvest:
- Focus: consistent production
- Feed lightly but regularly rather than big occasional doses
One high value move – soil test mindset
Extension programs repeatedly push this: don’t throw fixes at symptoms.
Example: Epsom salt is popular online, but magnesium is not always the issue. Unless you know you’re deficient, random additions can be wasted effort or create new imbalances.
Practical version:
If you don’t want lab testing, at least keep inputs conservative and consistent, and don’t chase every new “hack” midseason.
Pruning That Increases Yield
Pruning helps most in small spaces because it improves airflow and keeps the plant manageable.
The easiest approach for high yield + sanity: double leader
- Choose the main stem and one strong sucker below the first flower cluster
- Train both upward
- Remove other suckers weekly while small , less stress, cleaner cuts
Why this works: you get strong production without the constant labor of managing a crowded multi stem jungle. Cornell Cooperative Extension trials comparing training systems in cherry tomatoes have shown double leader can be a strong “best balance” option when labor is considered alongside yield.
What to always remove
- leaves touching the soil
- crowded interior growth blocking airflow
- damaged or diseased foliage
Tool tip: sharp, scissor type pruners make clean cuts and reduce tearing, another common extension recommendation.
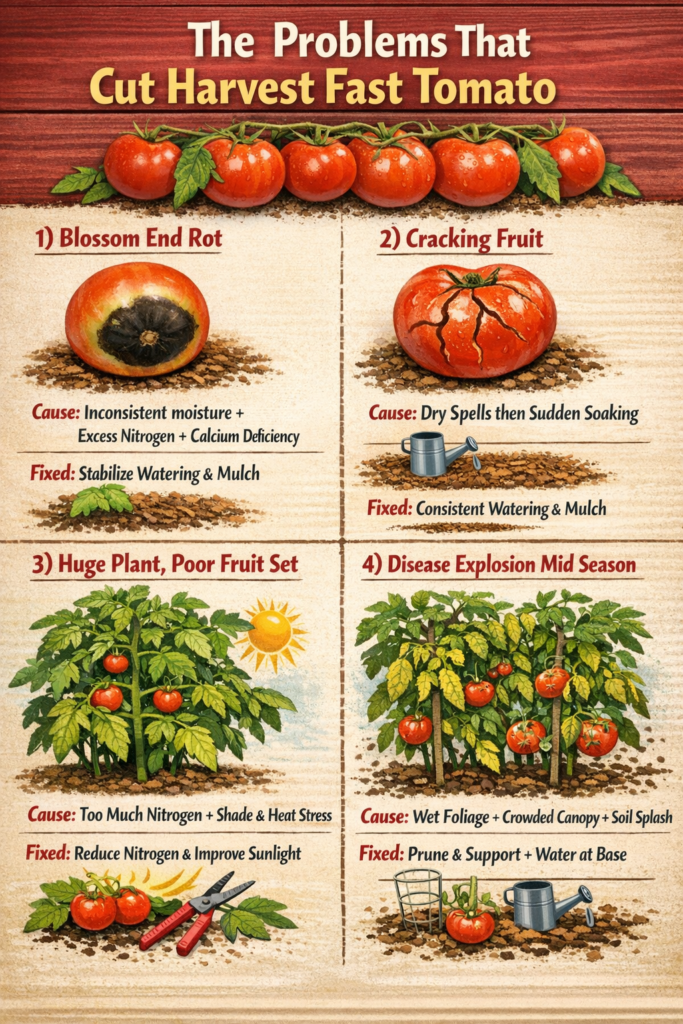
The Problems That Cut Harvest Fast
1) Blossom end rot
Common drivers: inconsistent moisture + excess nitrogen + calcium uptake issues
Best fix: stabilize watering + mulch; don’t overfeed nitrogen
2) Cracking fruit
Common driver: soil goes dry, then suddenly gets soaked
Best fix: drip/consistent watering + mulch
3) Huge plant, poor fruit set
Common driver: too much nitrogen, too much shade, too much heat stress
Best fix: reduce nitrogen, improve sunlight/airflow, keep watering steady
4) Disease explosion mid season
Common drivers: wet foliage, crowded canopy, poor airflow, splash from soil
Best fix: support + pruning + mulch + water at the base .
The “High Yield Tomato” Checklist
Before planting
- strong trellis/cage system installed
- mulch ready
- irrigation plan
- varieties chosen
Weekly (10–15 minutes per bed)
- tie stems to support
- remove small suckers
- remove low leaves / improve airflow
- check moisture
During fruiting
- feed lightly on a schedule
- keep soil evenly moist
- harvest frequently
A Short “Affiliate Friendly” Gear List That’s Actually Honest
If you’re building an affiliate guide, the content that converts best is the stuff that truly prevents failure:

- Real support system – panel trellis, heavy cages, or sturdy stakes
- Drip kit + timer – consistency upgrade
- Quality pruning shears – clean cuts, less disease spread
- Mulch + simple soil amendment plan – prevents swings and splash
People don’t regret buying tools that stop tomato season from collapsing in July.
References
- Commercial Production of Fresh Market Tomatoes — Oklahoma State University Extension (Fact Sheet).
- Tomato Production in Miami-Dade County, Florida — UF/IFAS Extension (EDIS publication).
- How Much Yield Can I Expect Per Plant? (Greenhouse Tomatoes) — Mississippi State University Extension.
- Growing Tomatoes in a Home Garden – determinate vs. indeterminate growth habit — University of Maryland Extension.
- Grow Your Own Tomatoes and Tomatillos – indeterminate tomatoes produce all season until frost — Oregon State University Extension.
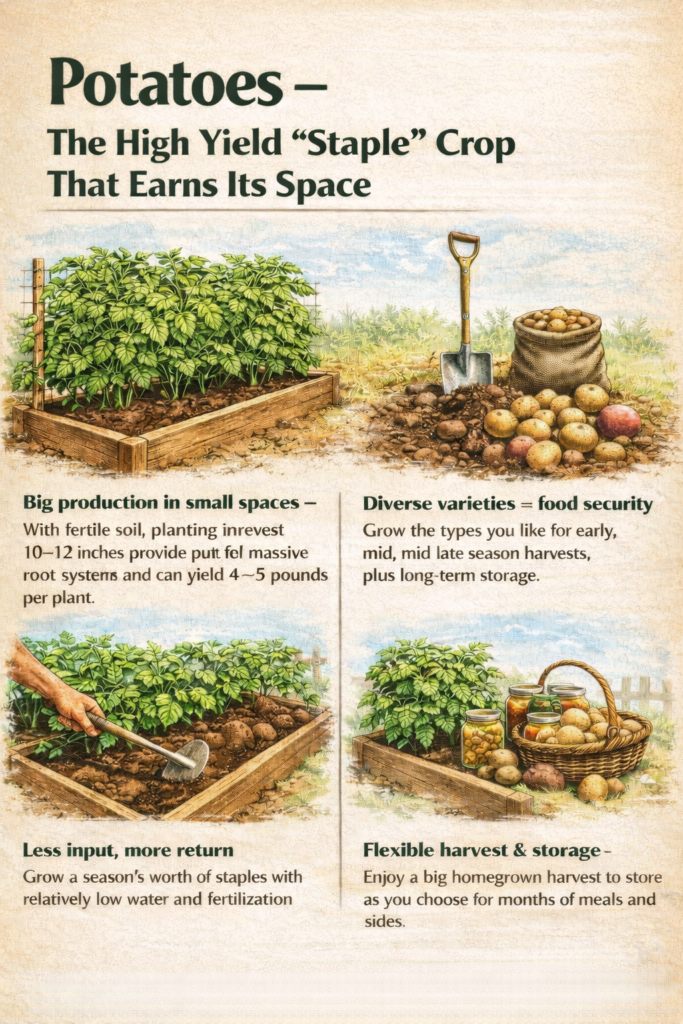
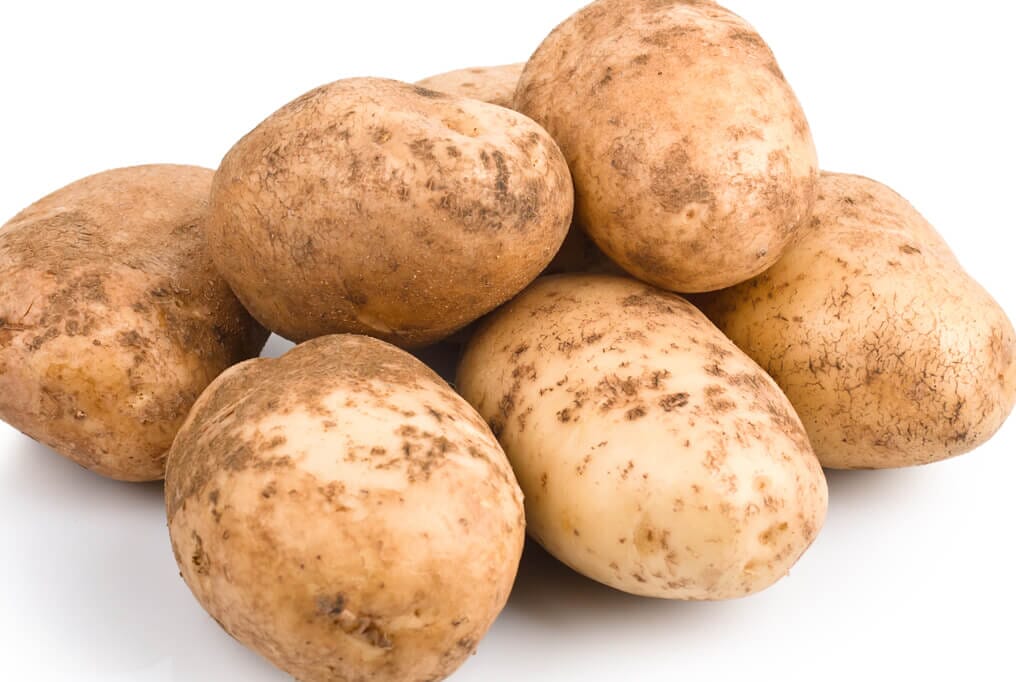
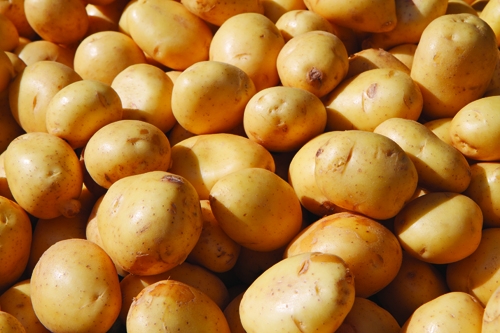
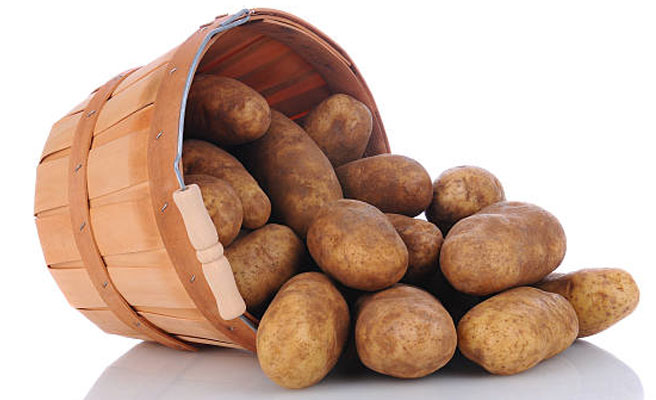
2. Potatoes – The High Yield “Staple” Crop That Earns Its Space
Potatoes are famous for a reason. Few crops turn a small planting into a heavy, calorie dense harvest as reliably. One seed piece becomes a cluster of tubers underground, so potatoes naturally multiply your starting material. That’s why they’ve been a staple crop for centuries and why they still make sense for small farms, homesteads, and high yield gardens today.
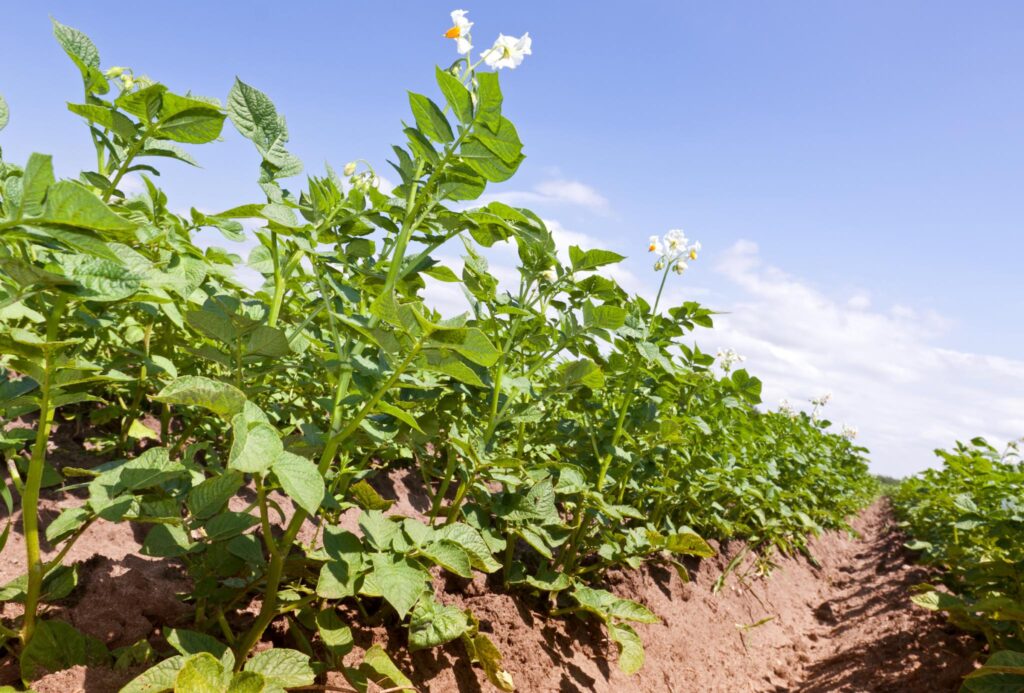
On a commercial scale, USDA data shows just how productive they can be. The 2024 U.S. average yield was roughly 454 cwt per acre about 45,400 lbs/acre under solid management. In a small scale setting, yields depend on variety, soil structure, irrigation consistency, and summer heat, but potatoes remain one of the best crops when your goal is bulk harvest that stores well instead of quick, fragile produce.
This guide follows the same principles repeated across extension programs: soil structure + moisture consistency + disease prevention + timing. Potato success isn’t complicated but shortcuts show up underground at harvest.
Start Here: What Success Looks Like
For small gardens and raised beds, realistic expectations matter.
- Yield range: commonly 2–5 lbs per plant in home systems
- Season length: roughly 90–120 days depending on variety
- Raised bed planning:
- 4×8 bed: typically 10–16 plants depending on spacing and hilling method
- Storage life: months when cured and stored properly
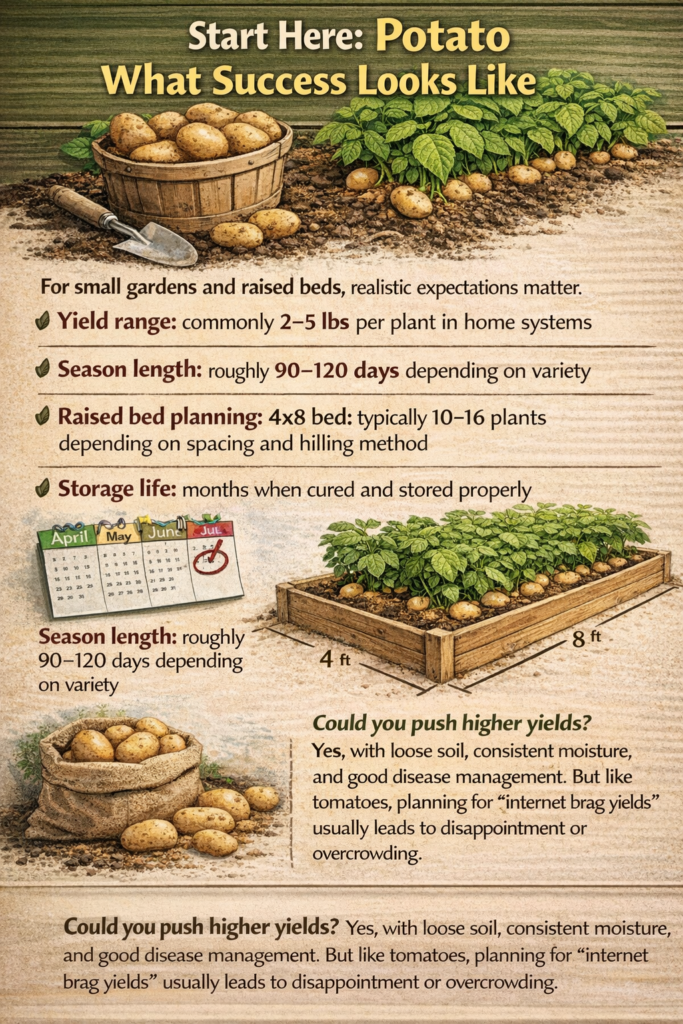
Could you push higher yields? Yes, with loose soil, consistent moisture, and good disease management. But like tomatoes, planning for “internet brag yields” usually leads to disappointment or overcrowding.
The 80/20 Rules of Potato Yield
If you get these right, yield usually follows:
- Build the soil before planting
Loose, deep soil is the biggest yield multiplier. - Keep moisture steady
Water stress reduces tuber size and quality fast. - Hill properly and on time
More underground stem = more tuber potential. - Protect leaf health
Healthy foliage is what fuels tuber bulking.
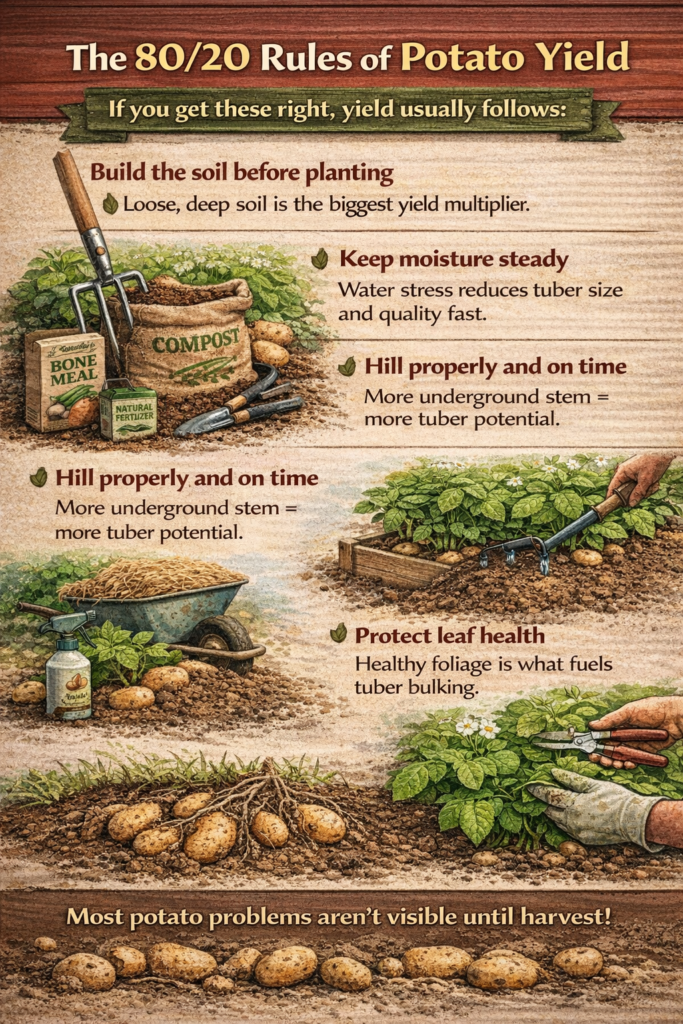
Most potato problems aren’t visible until harvest , which is why systems matter more than last minute fixes.
The Small Space Potato Setup That Works
Spacing and layout
- In ground or raised beds:
- 12–15 inches between plants
- 30–36 inches between rows if hilling traditionally
- Tight beds or containers:
- Fewer plants with more soil depth outperform crowded plantings
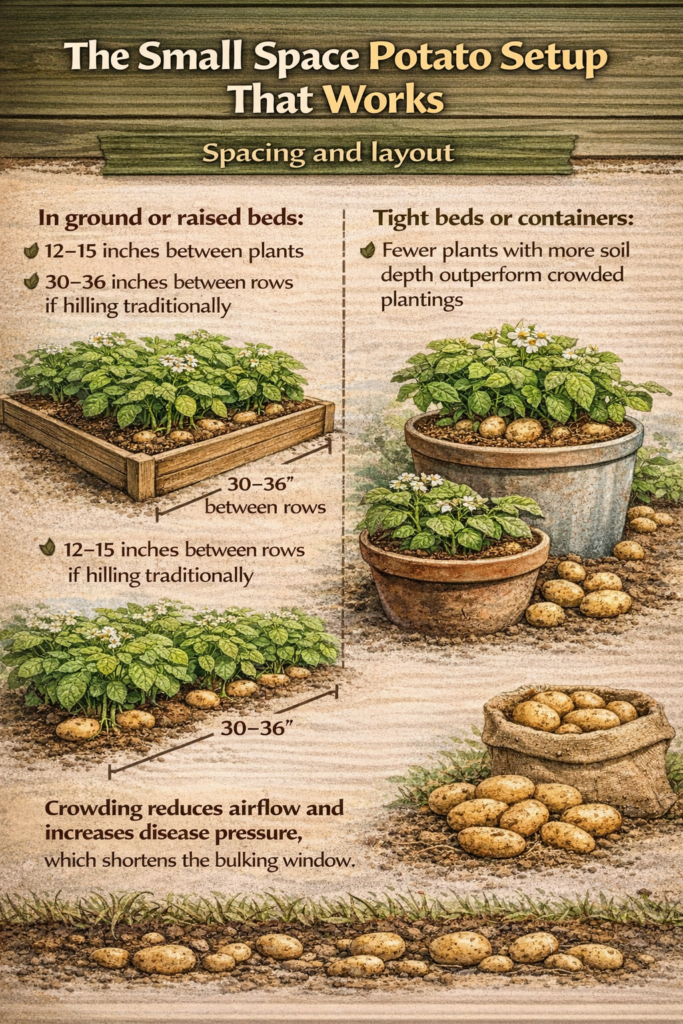
Crowding reduces airflow and increases disease pressure, which shortens the bulking window.
Variety choice
If your priority is dependable yield and storage:
- Reliable maincrop types:
- Kennebec
- Yukon Gold
- Red Norland
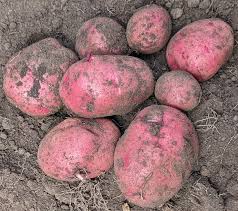
- Russet types for storage
Fingerlings and specialty varieties are great, but total poundage is often lower. Like tomatoes, match the variety to your goal , flavor vs. bulk vs. storage.
Soil: Where Potato Yield Is Won or Lost
Potatoes reward preparation more than almost any other crop.
What they want
- Loose, deep soil – compacted or rocky ground leads to misshapen tubers
- pH roughly 5.0–6.5
- Slightly lower pH can help reduce scab risk, a point commonly emphasized in extension guidance
- Balanced fertility
- Excess nitrogen = big tops, smaller tubers
Rule of thumb: potatoes want structure and consistency, not constant feeding.
Seed Matters More Than People Think
Always start with certified, disease free seed
Using grocery store potatoes risks introducing viruses and seed-borne diseases that quietly destroy yield. Certified seed costs more up front, but it protects:
- stand establishment
- tuber size uniformity
- storage quality
This is one of those “boring” decisions that pays off at harvest.
Hilling – Not Optional, Not Just Tradition
Hilling does three critical things:
- Increases underground stem length, more tuber sites, Prevents greening from sun exposure
- Supports the plant as it bulks up
Best practice
- Start hilling when plants are 6–8 inches tall
- Hill again as they grow, keeping developing tubers covered
- Stop once flowering and bulking begin
Late or shallow hilling is one of the most common yield limiters in small gardens.
Watering – The Consistency Rule
Potatoes dislike stress.
Goal
Keep soil evenly moist, never waterlogged, never bone dry.
Why swings hurt yield
- Dry → sudden soak = cracked or malformed tubers
- Prolonged wet soil = rot and disease pressure
Drip irrigation or carefully managed watering schedules help maintain consistency, especially during tuber initiation and bulking.
Disease Pressure and Rotation
Potatoes are heavy feeders and disease magnets if planted repeatedly in the same spot.
Key practices
- Rotate away from nightshades – tomatoes, peppers, eggplant
- Choose resistant varieties if late blight is common in your region
- Protect foliage — leaf health directly drives tuber growth
Once foliage collapses early, bulking stops.
Side Note – Sweet Potatoes in Hot Regions
If you grow in a warmer climate, sweet potatoes deserve attention.
Extension data shows yields of ~400 bushels per acre (50-lb bushels) , roughly 20,000 lbs/acre , are attainable under good management. They tolerate heat better than white potatoes and store well, making them a strong companion or alternative staple crop.
The High Yield Potato Checklist
Before planting
- soil loosened and amended
- certified seed on hand
- irrigation plan in place
During growth
- hill early and thoroughly
- keep moisture steady
- monitor foliage health
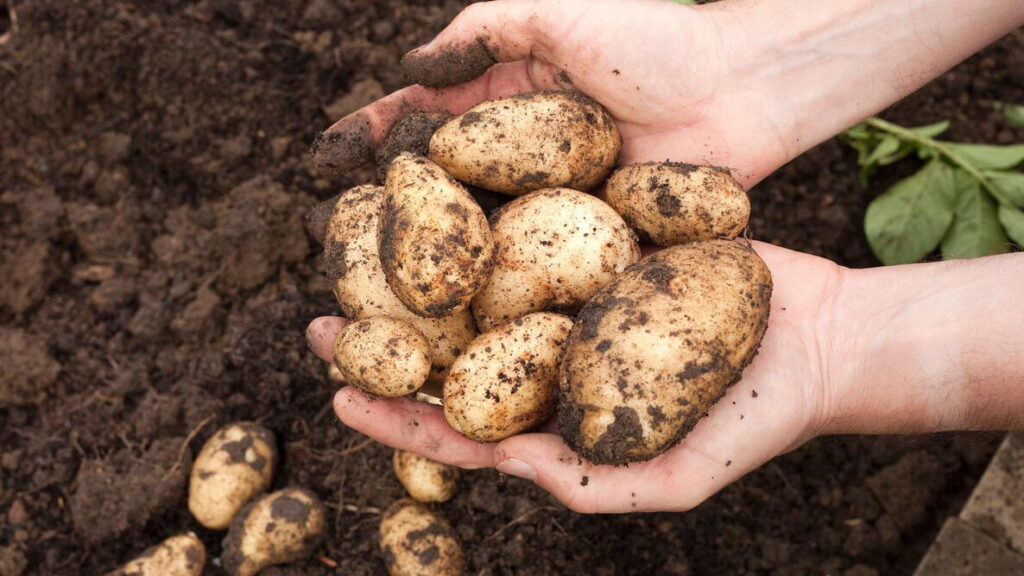
At harvest
- allow skins to set before digging
- cure before long term storage
A Short, Honest “Affiliate Friendly” Gear List
What actually prevents failure:
- Certified seed potatoes
- Drip irrigation or controlled watering setup
- Soil amendments for structure – compost, organic matter
- Mulch to reduce moisture swings

Like tomatoes, people don’t regret buying tools that prevent disappointment at harvest especially when the payoff is hundreds of pounds of food instead of foliage.
References
- Potato Irrigation – excess irrigation can reduce oxygen and cause tuber rot; timing matters
- Potatoes 2024 Summary (U.S. average yield 454 cwt/acre) — USDA National Agricultural Statistics Service (NASS).
- Growing Potatoes (hilling increases underground stems/stolons; helps prevent greening) — University of Minnesota Extension.
- Potatoes (soil pH guidance; recommends certified seed; seed-piece sizing) — Virginia Cooperative Extension (PDF).
- Irrigation (maintain adequate soil moisture; avoid extreme fluctuations) — Utah State University Extension.
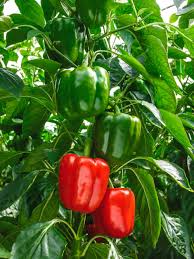
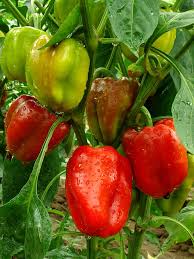
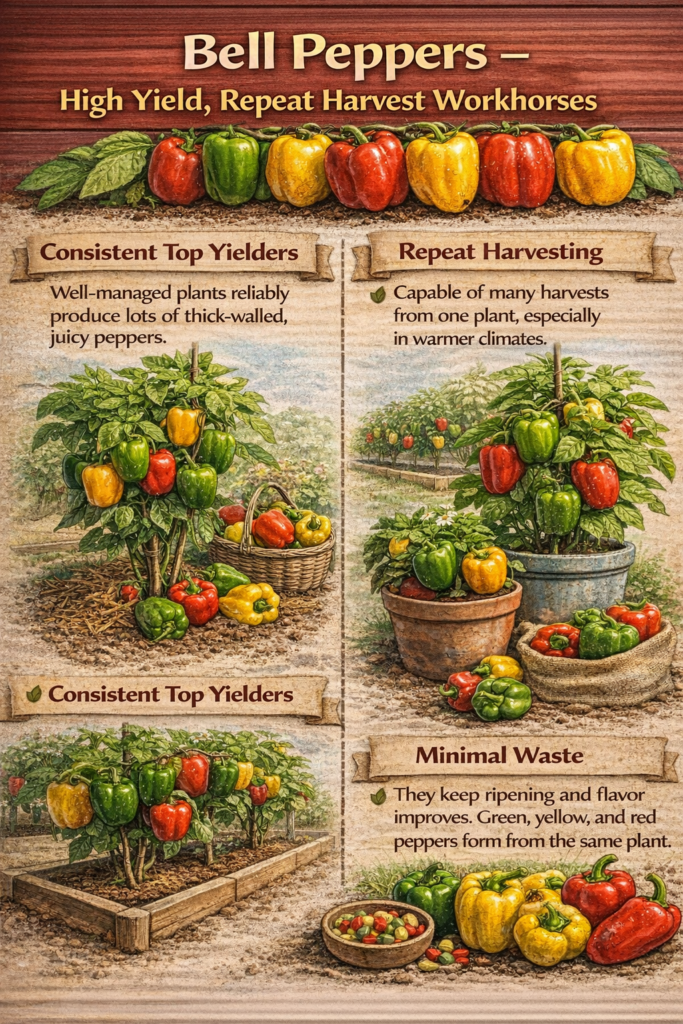
3. Bell Peppers – High Yield, Repeat Harvest Workhorses
Bell peppers earn their space on small farms and in intensive gardens because they combine repeat harvests, strong demand, and flexible marketing. Once plants are established and begin setting fruit, they don’t stop at a single flush. Instead, they flower and reload in waves, allowing you to harvest for weeks, even months in warm regions or with season extension.
From a production standpoint, extension data shows just how productive bell peppers can be under good management. University of Vermont Extension lists ~20,000 lbs/acre as a solid yield benchmark, with higher “excellent” yields possible. Michigan State University reports 10–13 tons per acre (20,000–26,000 lbs/acre) under optimal conditions, while UF/IFAS has documented U.S. yields in the hundreds of cwt per acre for example, ~376 cwt/acre ≈ 37,600 lbs/acre. For small scale growers, those numbers translate to a crop that produces steadily and predictably rather than all at once.
Like your other high yield crops, bell pepper success comes down to temperature + nutrition balance + moisture consistency + harvest timing. Miss any one of those, and yield suffers quietly.
Start Here: What Success Looks Like
For raised beds, market gardens, and backyard production, realistic planning helps avoid frustration.
- Yield range: commonly 4–8+ lbs per plant over a long season
- Harvest window: 6–10+ weeks once picking begins
- Raised bed planning:
- 4×8 bed: typically 12–18 plants depending on spacing and airflow
- Market flexibility:
- harvest green for volume
- harvest colored fruit (red, yellow, orange) for higher value
Could you push higher yields? Yes , with warm soil, steady feeding, and consistent harvest. But peppers punish impatience early and excess nitrogen later.
Why Bell Peppers Qualify as “High Yield”
Bell peppers don’t behave like one and done crops.
- They set fruit repeatedly, increasing total yield with each harvest
- Modern hybrids offer better uniformity and disease resistance, protecting marketable fruit
- Growers can choose when to harvest, green for bulk, colored for price
That combination makes peppers one of the most reliable “income per square foot” crops in warm-season systems.
The 80/20 Rules of Bell Pepper Yield
If you get these right, production usually follows:
- Plant into real warmth
Cold soil stalls peppers for weeks. - Feed steadily, not aggressively
Excess nitrogen delays fruiting. - Keep moisture consistent
Water swings show up as blossom end rot. - Harvest early and often
Removing fruit encourages more flowers.

Peppers don’t fail loudly, they just sit there leafy and unproductive if conditions aren’t right.
The Small Space Bell Pepper Setup That Works
Spacing and layout
Extension recommendations cluster tightly because peppers tolerate closer spacing than many crops:
- In rows: 18–24 inches between plants
- In beds: 14–18 inches with good airflow
Tighter spacing increases efficiency, but crowding the canopy creates humidity, disease pressure, and smaller fruit.
Warmth Is Non Negotiable
Transplant timing
Multiple extension programs emphasize waiting until:
- night temperatures stay above ~50°F
- soil is thoroughly warmed
Cold transplants often survive , but they don’t thrive.
Black plastic mulch advantage
Black plastic mulch is widely recommended because it:
- warms soil faster
- reduces weeds
- conserves moisture
The result is often earlier fruit set and heavier total yield, especially in cooler regions.
Feeding Bell Peppers Without Killing Yield
Peppers are moderate feeders, but balance matters.
What works
- steady, moderate nutrition
- avoid heavy nitrogen early
Utah State Extension specifically warns that over fertilizing encourages foliage at the expense of fruiting. Big plants don’t always mean big harvests.
Preventing Blossom End Rot the Smart Way
Blossom end rot in peppers is usually not a fertilizer problem, it’s a water management problem.
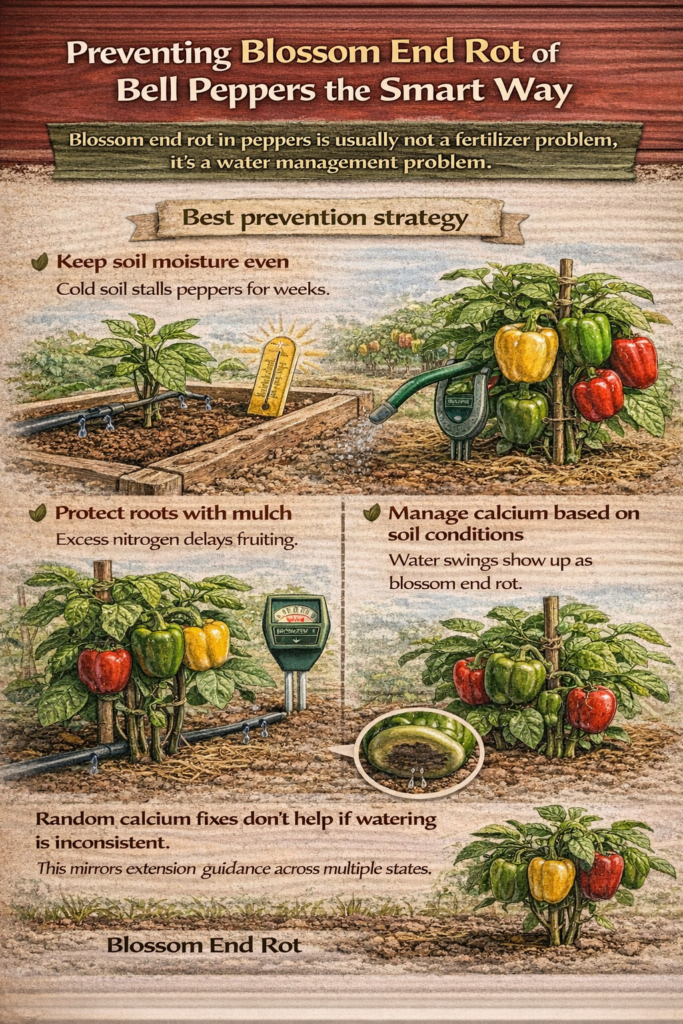
Best prevention strategy
- keep soil moisture even
- protect roots with mulch
- manage calcium based on soil conditions
Random calcium fixes don’t help if watering is inconsistent. This mirrors extension guidance across multiple states.
Harvesting: Where Yield Adds Up
Harvest promptly and gently
- cut fruit instead of pulling
- avoid breaking stems or nodes
NDSU recommends using scissors or a knife to protect future fruit sites. Clean harvesting keeps plants producing longer and increases total yield over the season.
The High Yield Bell Pepper Checklist
Before planting
- wait for warm soil and nights
- spacing plan in place
- mulch ready
During growth
- feed lightly but consistently
- keep moisture even
- maintain airflow
During harvest
- pick regularly
- cut fruit cleanly
- don’t let plants overload
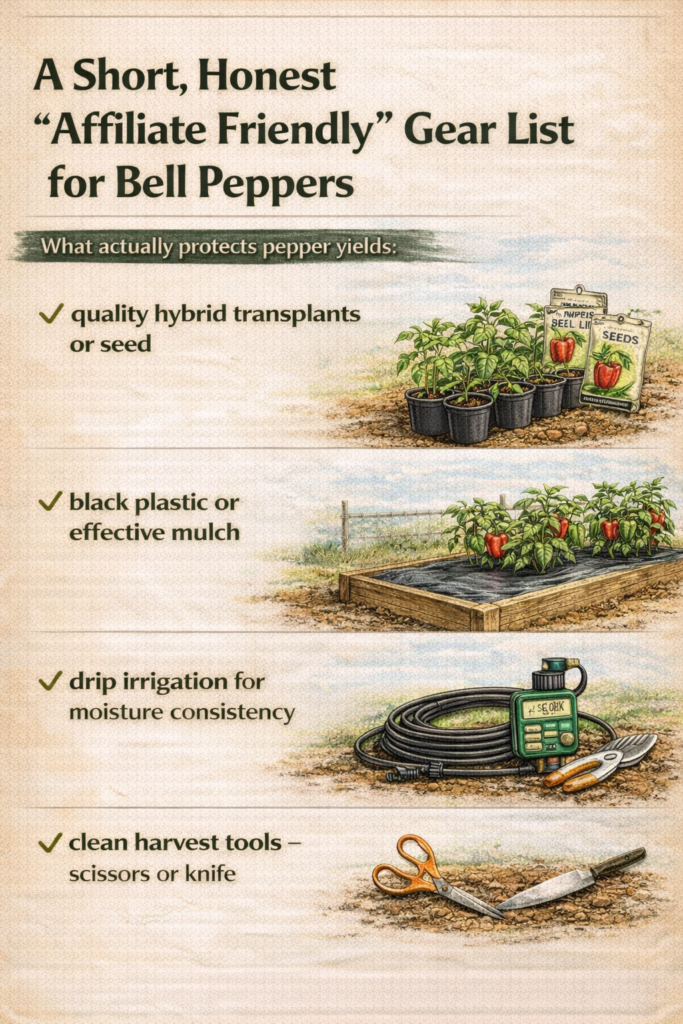
A Short, Honest “Affiliate Friendly” Gear List
What actually protects pepper yields:
- quality hybrid transplants or seed
- black plastic or effective mulch
- drip irrigation for moisture consistency
- clean harvest tools – scissors or knife
Like tomatoes and potatoes, growers don’t regret buying tools that keep plants productive for weeks instead of stalling halfway through the season.
References
- Vegetable and Berry Crop Yield Estimates for New England (bell pepper yield benchmarks, incl. ~20,000 lb/acre “good”) — University of Vermont Extension (PDF).
- Peppers: Commercial Vegetable Recommendations (10–13 tons/acre under optimum conditions) — Michigan State University Extension (E1815).
- An Overview of the US Bell Pepper Industry (U.S. yield trend; cwt/acre examples) — UF/IFAS (EDIS FE1028).
- Growing Peppers (transplant after warm nights; black plastic mulch benefits) — University of Minnesota Extension.
- Growing Peppers in a Home Garden (soil must be thoroughly warmed; early planting stalls plants) — University of Maryland Extension.
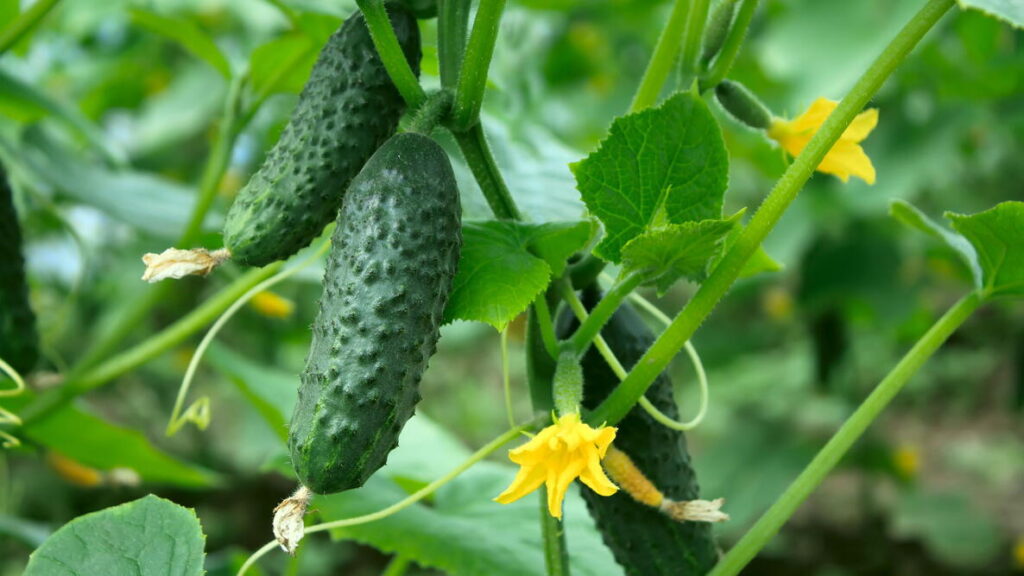
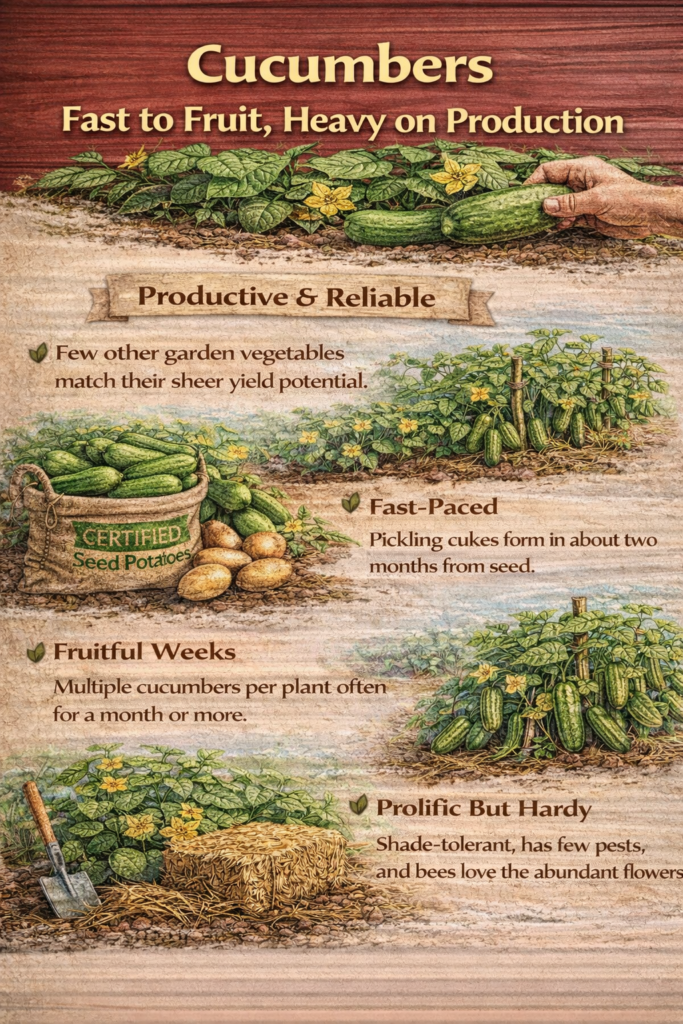
4. Cucumbers – Fast to Fruit, Heavy on Production
Cucumbers are one of those crops that make even a small plot feel productive in a hurry. Once they start, they don’t slow down politely. Many varieties begin producing in 50–70 days, and during peak season it’s normal to harvest multiple times per week sometimes daily. That speed, combined with steady output, is what makes cucumbers a reliable high yield crop in tight spaces.

Extension data backs this up. University of Vermont New England estimates list cucumber yields around 20,000 lbs/acre, with “excellent” yields approaching 26,000 lbs/acre. University of Hawaiʻi reports similar averages for slicing cucumbers. For small scale growers, those numbers translate to a crop that turns bed space into volume quickly especially when vines are trained vertically.
Like other high yield crops, cucumber success isn’t about one trick. It comes down to plant type + airflow + pollination + harvest timing. Get those right, and the plants do the rest.
Start Here: What Success Looks Like
For raised beds and market gardens, realistic expectations help with planning and labor.
- Days to first harvest: typically 50–70 days
- Harvest window: 4–8+ weeks depending on disease pressure and heat
- Raised bed planning:
- 4×8 bed: 4–6 vining plants when trellised
- Harvest frequency: every 1–3 days at peak production
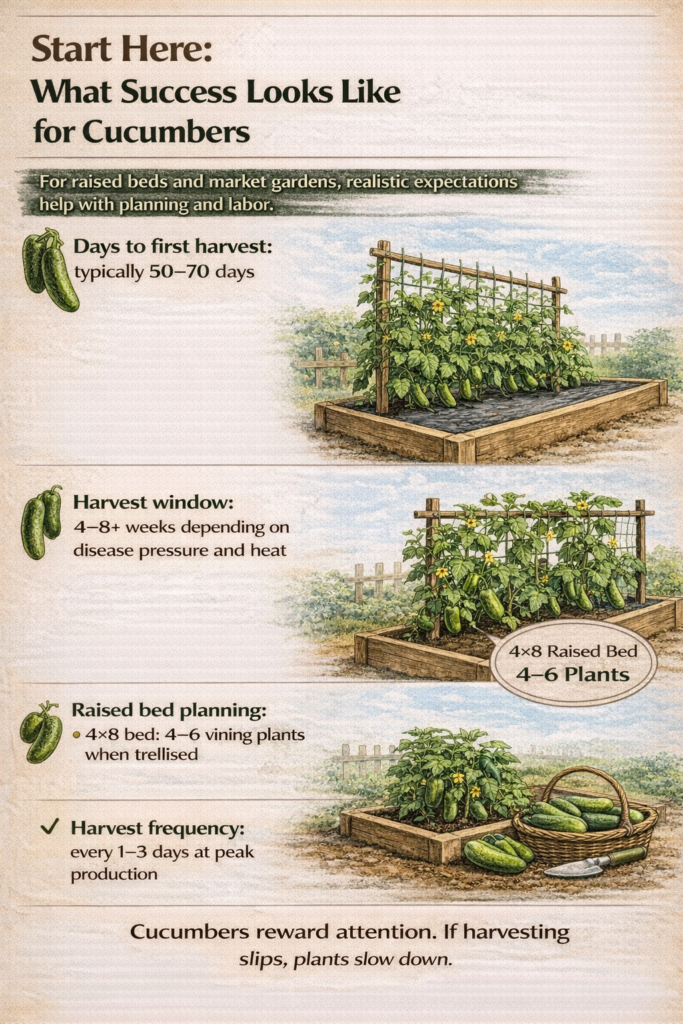
Cucumbers reward attention. If harvesting slips, plants slow down fast.
Why Cucumbers Qualify as “High Yield”
Cucumbers check multiple high yield boxes:
- They produce early, shortening time to return
- They set fruit continuously when harvested regularly
- They can be succession planted to extend seasonal yield
Plant type also matters. Rutgers Extension notes that gynoecious varieties, plants that produce a high percentage of female flowers, are commonly used for higher, more concentrated yields, with pollinator plants included to supply pollen. This is one of the quiet yield multipliers in commercial systems.
From a market standpoint, trellised cucumbers are usually straighter, cleaner, and more uniform, which increases marketable yield even if total pounds stay similar.
The 80/20 Rules of Cucumber Yield
If you get these right, production usually follows:
- Trellis vining cucumbers
Vertical growth improves airflow, fruit quality, and harvest speed. - Protect pollination
Fruit set depends heavily on insect activity. - Harvest aggressively
Oversized fruit shuts down new flowering. - Plan for succession
A second planting keeps yield steady when vines decline.

Cucumbers don’t “fail” , they just stop producing if ignored.
The Small Space Cucumber Setup That Works
Spacing and layout
When trellised:
- Plants: 12–18 inches apart
- Support: netting, string, or panel trellis
Trellising reduces disease pressure by improving airflow and keeping fruit off the soil, a recurring theme in extension guidance.
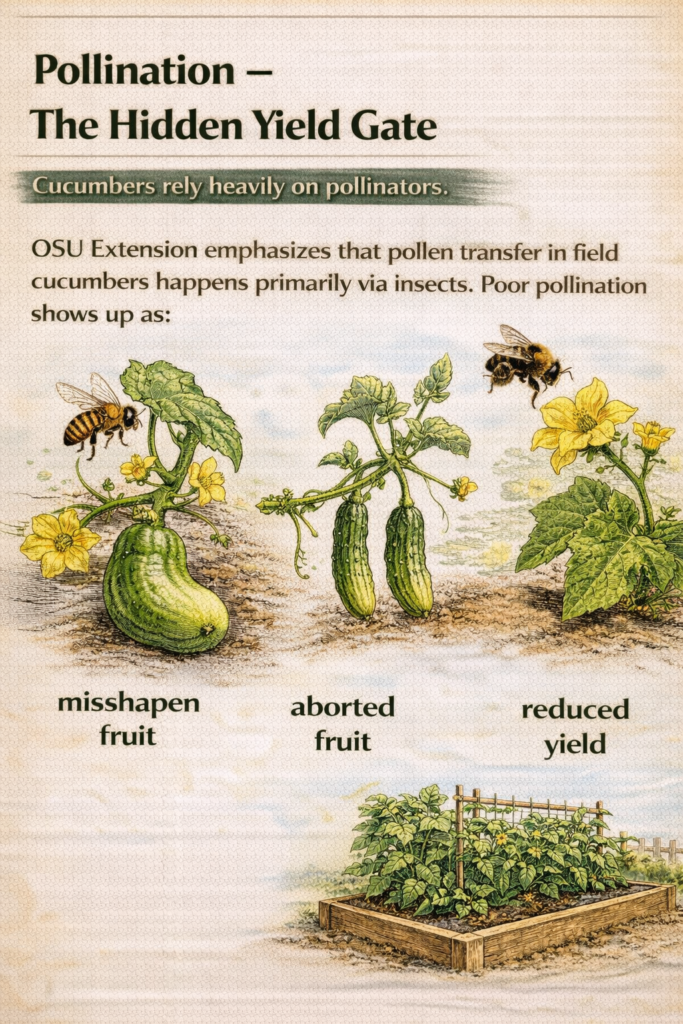
Pollination – The Hidden Yield Gate
Cucumbers rely heavily on pollinators.
OSU Extension emphasizes that pollen transfer in field cucumbers happens primarily via insects. Poor pollination shows up as:
- misshapen fruit
- aborted fruit
- reduced yield
Row cover timing matters
Row cover is useful early for protection against cucumber beetles, but Iowa State Extension stresses removing covers at flowering so pollination can occur. Forgetting this step is a common yield killer in small gardens.
Succession Planting for Season Long Production
Cucumbers often produce hard, then decline due to:
- heat stress
- disease pressure
- vine exhaustion
A second planting in mid to late summer can extend total seasonal yield, especially for market growers who need consistent weekly volume rather than one heavy flush.
Harvesting – Where Yield Is Made or Lost
Cucumbers grow fast, sometimes shockingly fast.
Best practice
- harvest every 1–2 days during peak production
- remove fruit before it becomes oversized
Frequent harvesting keeps vines in a reproductive mode instead of aging out.
The High Yield Cucumber Checklist
Before planting
- trellis system installed
- spacing planned
- pollinator access considered
During growth
- protect young plants if needed
- remove row cover at flowering
- train vines vertically
During harvest
- pick frequently
- remove oversized fruit promptly
- monitor vine health
A Short, Honest “Affiliate Friendly” Gear List
What actually protects cucumber yields:
- sturdy trellis or netting
- row cover for early protection
- drip irrigation for steady moisture
- harvest container to keep up with volume
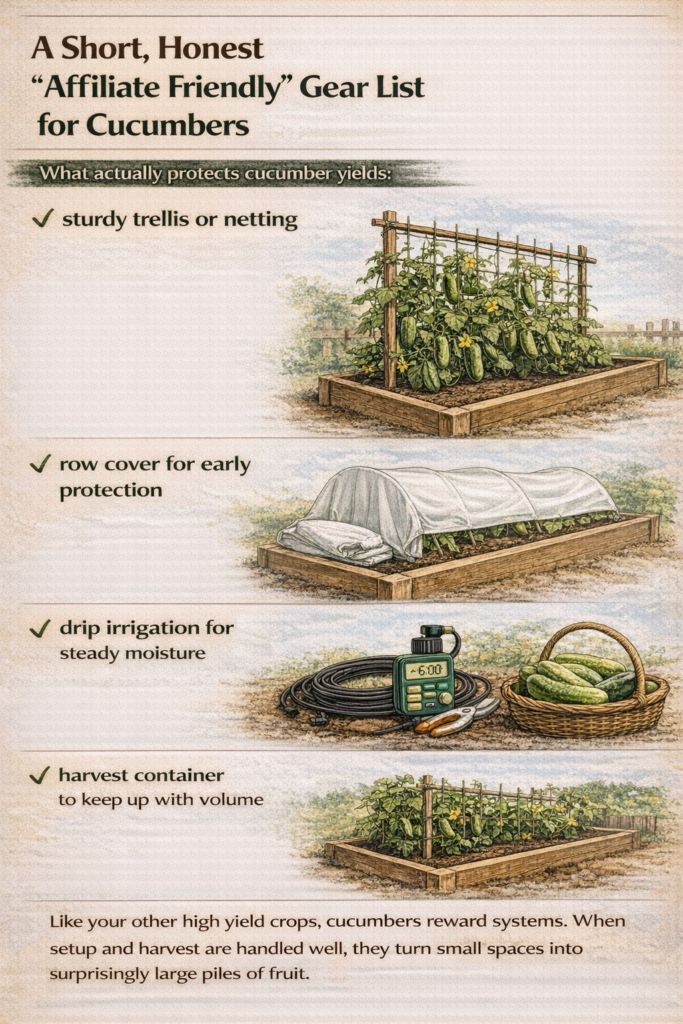
Like your other high yield crops, cucumbers reward systems. When setup and harvest are handled well, they turn small spaces into surprisingly large piles of fruit.
References
- Grow Your Own Cucumbers (days to maturity ~50–70 days depending on variety and conditions) — Oregon State University Extension.
- Vegetable and Berry Crop Yield Estimates for New England (cucumbers: good ~20,000 lb/acre; excellent ~26,000 lb/acre) — University of Vermont Extension (PDF).
- Field Cucumber Production Guidelines (average slicing cucumber yields about 20,000 lb/acre in Hawaiʻi) — University of Hawaiʻi (CTAHR).
- Cucumber Production (pollination required; insect pollinators critical for fruiting/yield) — Oklahoma State University Extension.
- Mid-Atlantic Commercial Vegetable Production Recommendations: Cucumbers (gynoecious varieties for higher, concentrated yields; pollinator % notes) — Rutgers NJAES (PDF).
- Addressing Problems When Growing Cucumbers (row cover protects from cucumber beetles; remove when flowering for pollination) — Iowa State University Extension & Outreach.
5. Sweet Corn – High Impact, High Volume Season Builders
Sweet corn is one of those crops that practically markets itself when it’s fresh. For small farms selling direct, farm stands, CSA add ons, or local markets, it works as a traffic builder during peak season. Customers rarely buy just one or two ears; they buy by the dozen. When managed well, even a modest planting can move serious volume in a short window.
Yield benchmarks reflect that potential. A commonly cited “good” sweet corn yield is around 1,000 dozen ears per acre (≈ 12,000 ears). Under strong fertility and irrigation management, extension educators also note excellent yields in the range of 1,400–1,500 dozen per acre (≈ 16,800–18,000 ears). Actual results depend heavily on variety, plant population, insect pressure, fertility timing, and moisture, corn is honest about management mistakes.
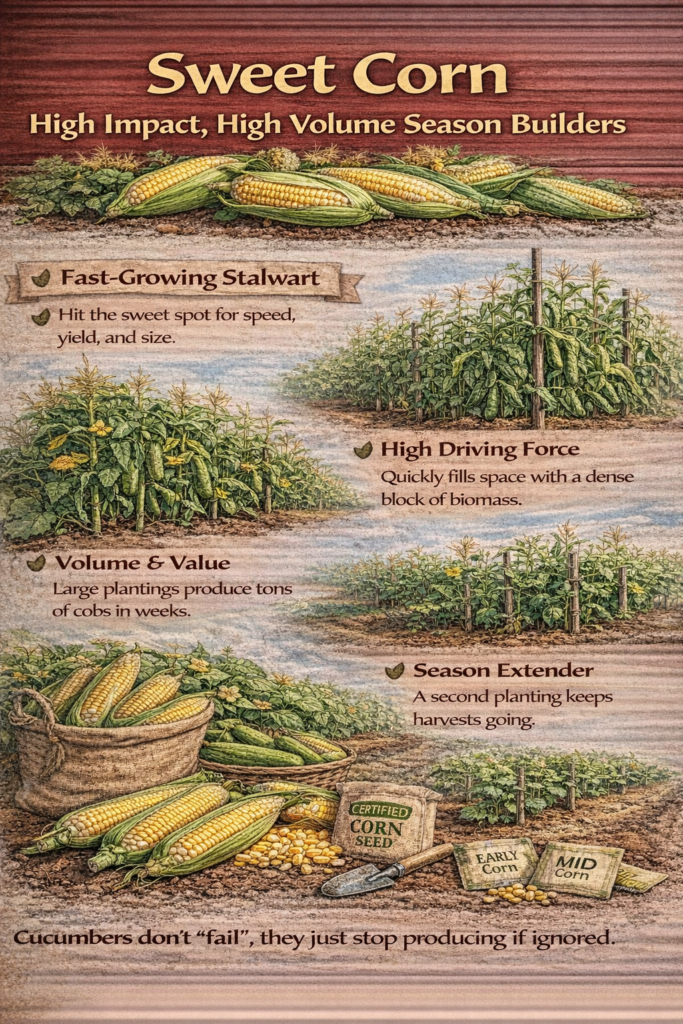
Like other high yield crops, sweet corn success comes down to plant density + nitrogen timing + water during pollination + harvest scheduling. Miss any one of those, and ear quality suffers fast.
Start Here: What Success Looks Like
For small farms and intensive plantings, realistic expectations help with planning and labor.
- Days to maturity: typically 60–100 days depending on variety
- Plant population: roughly 14,000–24,000 plants per acre
- Ears per plant: usually 1–2 marketable ears
- Sales pattern: heavy, short harvest windows rather than long trickle harvests

Sweet corn rewards precision. It doesn’t “make up” for missed inputs later in the season.
Why Sweet Corn Qualifies as “High Yield” on Small Acreage
Sweet corn earns its reputation through density and volume, not repeat harvests.
Penn State Extension lists optimal populations in the 14,000–24,000 plants per acre range, depending on cultivar and planting system. When most plants produce one or two full ears, total yield adds up quickly, even on small blocks.
Sweet corn also fits small farm cashflow well. Many modern varieties mature within 60–100 days, making it easier to schedule harvests around CSA distributions, markets, or farm stand peaks.
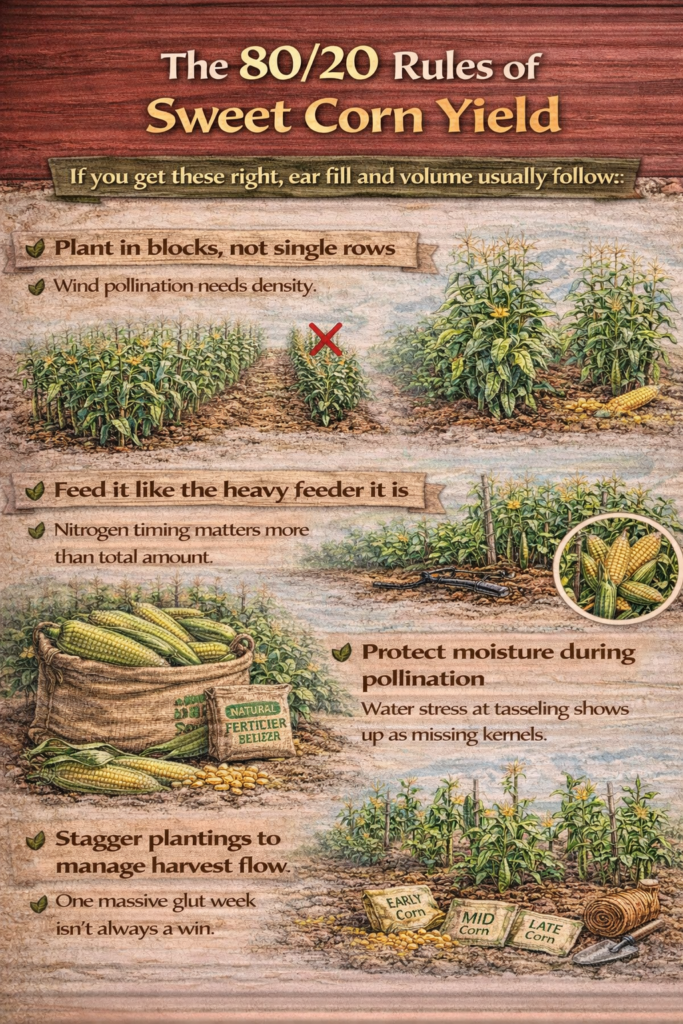
The 80/20 Rules of Sweet Corn Yield
If you get these right, ear fill and volume usually follow:
- Plant in blocks, not single rows
Wind pollination needs density. - Feed it like the heavy feeder it is
Nitrogen timing matters more than total amount. - Protect moisture during pollination
Water stress at tasseling shows up as missing kernels. - Stagger plantings to manage harvest flow
One massive glut week isn’t always a win.
Corn doesn’t fail quietly, it shows mistakes directly in the ears.
Pollination – The Yield Gate Most People Miss
Sweet corn is wind pollinated, not insect pollinated.
Extension guidance consistently recommends planting in blocks of at least 3–4 short rows, rather than one long row. This improves pollen movement across silks and leads to fuller, better filled ears.
Thin or isolated plantings often look healthy but produce poorly filled ears.
Feeding Sweet Corn Without Guesswork
Sweet corn is a nitrogen responsive crop.
Utah State University Extension specifically recommends side dressing nitrogen:
- once plants are knee high
- again around tassel and silk emergence
This staged feeding supports rapid growth and kernel development during the crop’s most demanding phases.
Big plants without timely nitrogen often translate into disappointing ears.
Water -The Make or Break Window
Water stress around pollination is one of the fastest ways to lose yield.
University of Minnesota Extension highlights the critical period as roughly two weeks before and after tassel emergence, when drought or heat stress can reduce kernel set. University of New Hampshire Extension similarly emphasizes ample water leading up to silking, with a practical target of ~1 inch of water per week from rain and irrigation combined.
Once kernels fail to form, there’s no recovery later.
Succession Planting for Manageable Harvests
Sweet corn tends to mature all at once.
To avoid a single overwhelming harvest week, extension recommendations commonly suggest:
- planting smaller amounts every 7–10 days, or
- using early, mid-season, and late varieties
This spreads labor, reduces waste, and keeps sales steady rather than frantic.
The High Yield Sweet Corn Checklist
Before planting
- block layout planned
- fertility program ready
- irrigation capacity confirmed
During growth
- side dress nitrogen on schedule
- monitor moisture closely
- manage insects proactively
During harvest
- pick promptly at peak maturity
- cool quickly for best quality
- move volume fast
A Short, Honest “Affiliate Friendly” Gear List
What actually protects sweet corn yield and quality:
- quality seed matched to your market window
- nitrogen source suitable for side dressing
- irrigation system capable of steady delivery
- harvest containers for fast, bulk handling
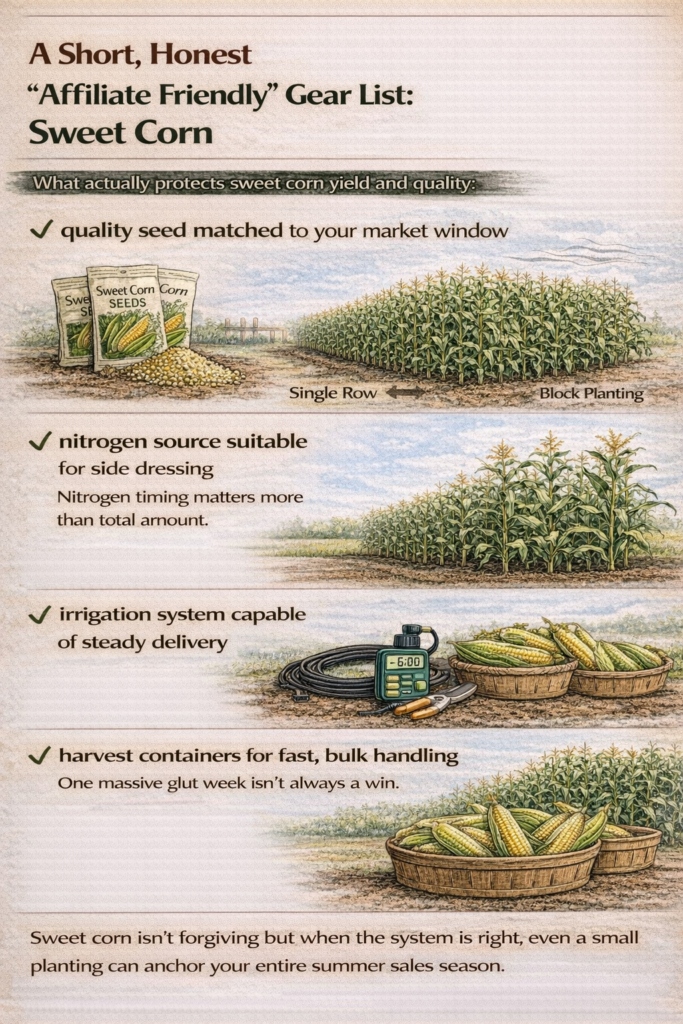
Sweet corn isn’t forgiving but when the system is right, even a small planting can anchor your entire summer sales season.
References
- Oklahoma State University Extension — Sweet Corn Production (HLA-6021) (yield benchmark: ~1,000 dozen ears/acre).
- Ask Extension (Cooperative Extension Q&A) — yield ranges including “excellent” irrigated yields (~1,400–1,500 dozen/acre).
- Penn State Extension — Sweet Corn Production (recommended plant population 14,000–24,000 plants/acre).
- University of Maryland Extension — Growing Sweet Corn in a Home Garden (wind pollination + block planting guidance).
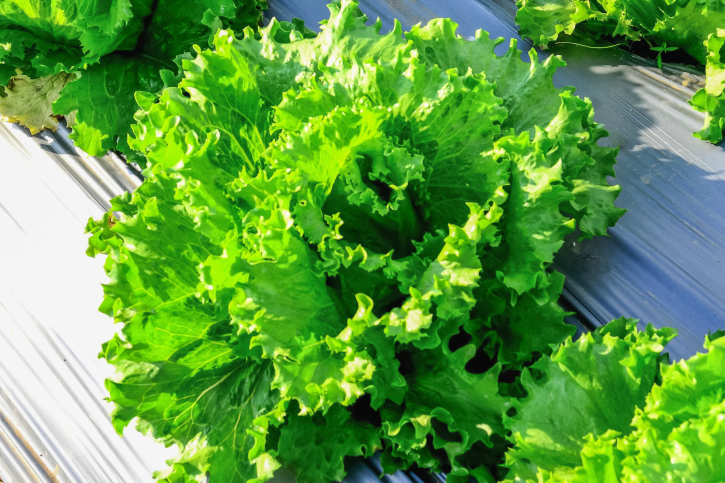
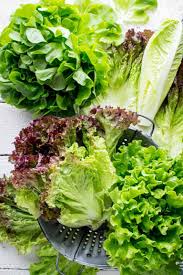
6. Lettuce and Salad Greens – Fast Turnover, Repeat Sales, Reliable Volume
Lettuce looks small in the field, but it stacks up fast in harvest bins. That’s why salad greens are a small farm favorite: you can plant them tight, harvest quickly, and keep customers coming back week after week.
If you want a realistic yield target, the University of Vermont Extension yield estimate sheet is a solid benchmark:
- Leaf lettuce: ~20,000–24,000 lb/acre in “good” conditions, ~30,000 lb/acre in “excellent” conditions
- Romaine: ~36,000 lb/acre (“good”) up to ~44,000 lb/acre (“excellent”)

Your actual numbers will move based on planting density, season, fertility, irrigation, and how many successions you run.
Start Here: What Success Looks Like
For small farms and intensive plantings, greens “win” by consistency, not one giant harvest.
- Days to first harvest (baby greens): commonly 25–40 days to reach ~4–6 inches (University of Maryland Extension)
- Sales pattern: steady weekly pull, not a single peak week
- Best use cases: CSA shares, farm stands, restaurants, weekly markets
- Big idea: greens are high yield because they turn over fast and can be harvested more than once with the right method
Why Greens Qualify as “High Yield” on Small Acreage
The magic isn’t only pounds per acre. It’s pounds per week.
1) Fast harvest = faster cashflow
Baby greens can size up quickly (University of Maryland Extension), letting you cycle beds more often than slower crops.
2) Multiple harvests from one planting
If you harvest correctly, you can keep plants producing:
- Oregon State Extension describes harvesting outer leaves / cutting in a way that protects the growing point so plants can continue producing.
- Michigan State University Extension notes baby leaf harvests can repeat 1–3 times before quality drops, depending on timing and conditions.
Short cycle + repeat harvest + constant demand is what makes greens a true turnover crop.
The 80/20 Rules of Lettuce Yield
If you get these right, yield and quality usually follow:
- Succession planting beats “one big planting.”
- Spacing must match the product – baby leaf vs full heads.
- Heat management protects the crop – bolting is a yield killer.
- Steady water matters – shallow roots hate big swings.
- Harvest method determines repeatability – Cut and come again” is earned.
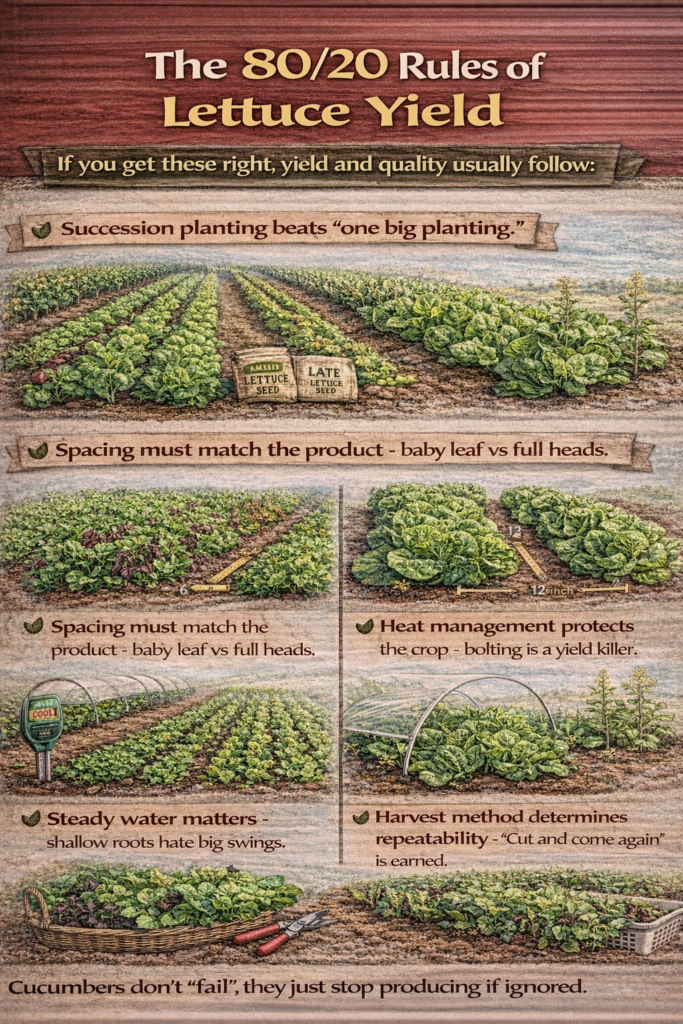
Greens don’t fail quietly. Heat, stress, and poor timing show up fast in bitterness, bolting, and stalled growth.
Succession Planting: Keep the Pipeline Full
Greens reward rhythm.
University of Missouri Extension recommends planting loose leaf lettuce every few weeks so harvests overlap, no gaps, no “everything ready at once.”
Simple market rule: if you want lettuce every market, plant lettuce every market or close to it.
Spacing: Match Density to the Product
You’ll grow greens differently depending on the end goal.
- Head lettuce: Utah State University Extension recommends 8–12 inches between plants, with rows commonly 12–18 inches apart.
- Baby leaf: typically denser and harvested earlier more like cut greens than heads.
Heat: The Quality Gate That Destroys Yield
Lettuce wants cool conditions. When heat hits, it can bolt, turn bitter, or stall.
- Oregon State Extension notes leafy greens grow best around 60–70°F, and heat can trigger bolting and bitterness.
- Illinois Extension similarly notes lettuce thrives around 60–70°F, while higher temps can stunt growth and push fast seedstalk formation.
If you’re pushing into warm weather, shade can be a real yield saver. Kansas State Research & Extension explains how shade cloth reduces heat stress and bolting and offers practical setup guidance.
Water: Keep It Steady
Greens are shallow-rooted and don’t like boom/bust moisture cycles.
Oregon State Extension offers a simple baseline: around ~1 inch of water per week, keeping soils consistently moist.
Harvest Method – If You Want Repeat Cuts, Harvest Like It
Cut and come again depends on technique.
- Oregon State Extension describes harvesting by taking outer leaves and leaving inner growth so plants can keep producing.
- Michigan State University Extension adds that baby leaf harvests can repeat at roughly ~10-day intervals, typically 1–3 repeats before quality declines.
Quick Food Safety Note
Because lettuce is often eaten raw, buyers pay attention to on farm practices.
- If using raw manure, Utah State University Extension summarizes the USDA National Organic Program approach: 120 days before harvest for crops that contact soil, and 90 days for crops that don’t.
- FDA produce safety guidance emphasizes reducing contamination risk with animal-origin soil amendments and notes ongoing work on application intervals under FSMA Produce Safety considerations.
- Cornell Cooperative Extension highlights GAPs (Good Agricultural Practices) as the practical foundation for minimizing contamination during growing and harvest.
The High Yield Greens Checklist
Before planting
- succession plan mapped – dates + quantities
- spacing chosen for baby leaf vs heads
- irrigation plan confirmed
- heat strategy ready – timing, shade cloth if needed
During growth
- keep moisture consistent
- watch heat closely
- stay on schedule with plantings
During harvest
- harvest in a way that protects regrowth
- keep quality high with fast handling and cooling
- keep the pipeline moving weekly
A Short, Honest “Affiliate Friendly” Gear List
What actually protects lettuce yield and quality:
- seed suited to your season
- irrigation that delivers steady, even moisture
- shade cloth for warm season production
- harvest bins + quick cooling setup for freshness and shelf life
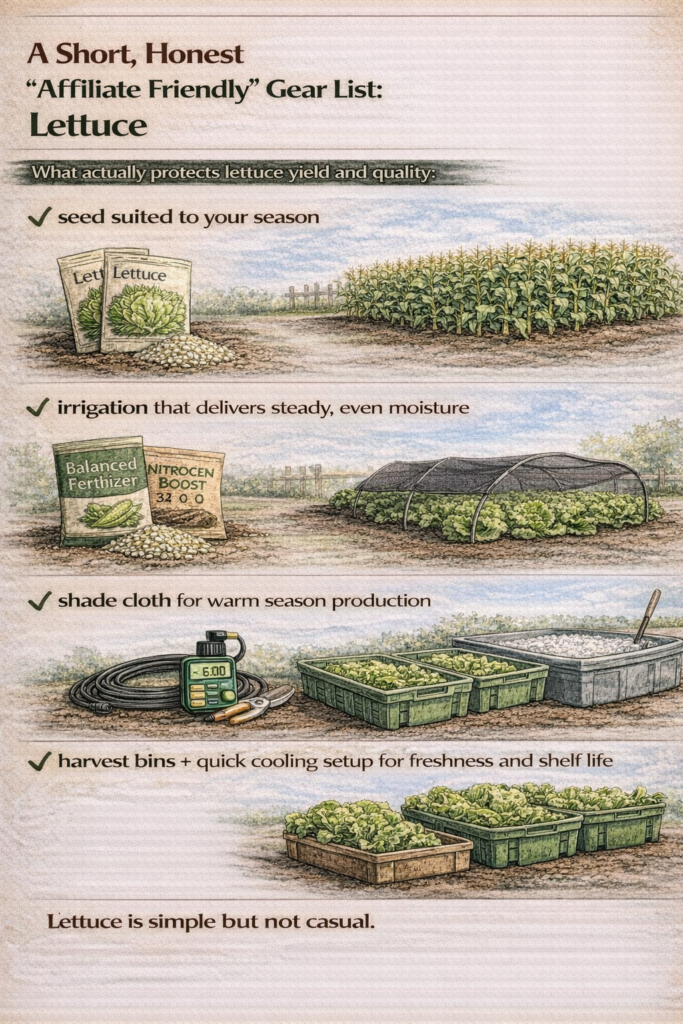
Lettuce is simple but not casual. When planting rhythm, temperature management, water consistency, and harvest method are dialed in, salad greens can become one of the most reliable “small acreage, high output” crops on the farm.
References
- UVM Extension — Vegetable and Berry Crop Yield Estimates for New England (leaf lettuce and romaine yield ranges).
- Oregon State University Extension (via OSU Master Gardener handout) — temperature range, bolting, ~1 inch/week water guidance, harvesting method.
- Utah State University Extension — head lettuce spacing guidance.
- University of Maryland Extension — baby greens growth timeframe (25–40 days for baby greens in many cases).
- Michigan State University Extension — repeat baby leaf harvest guidance (1–3 times at ~10-day intervals).
- University of Missouri Extension — succession sowing concept for continuous harvest.
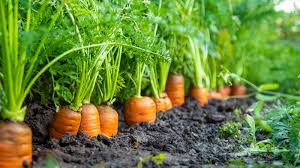
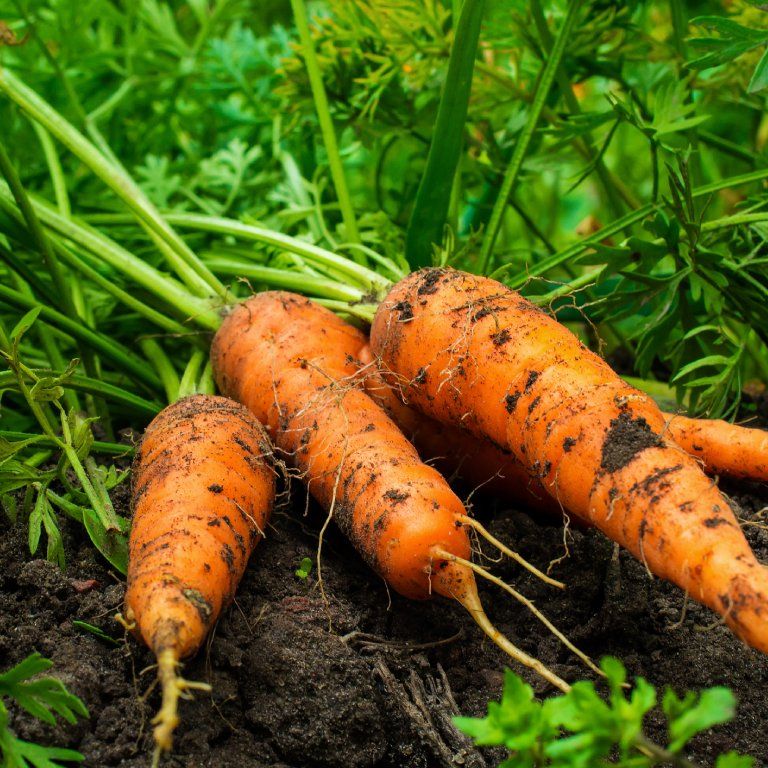
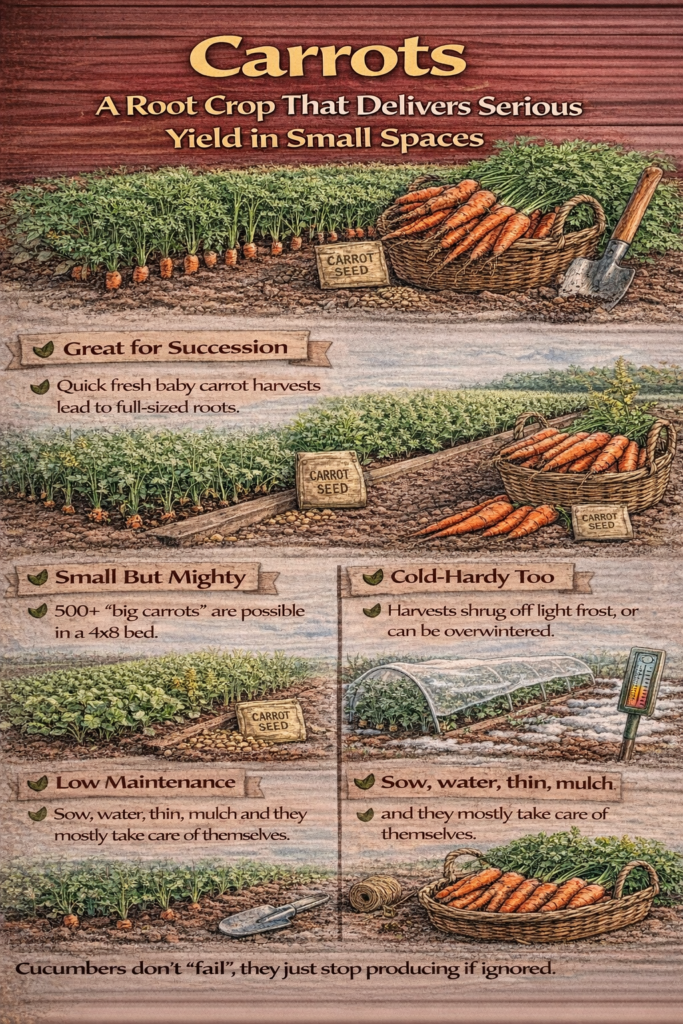
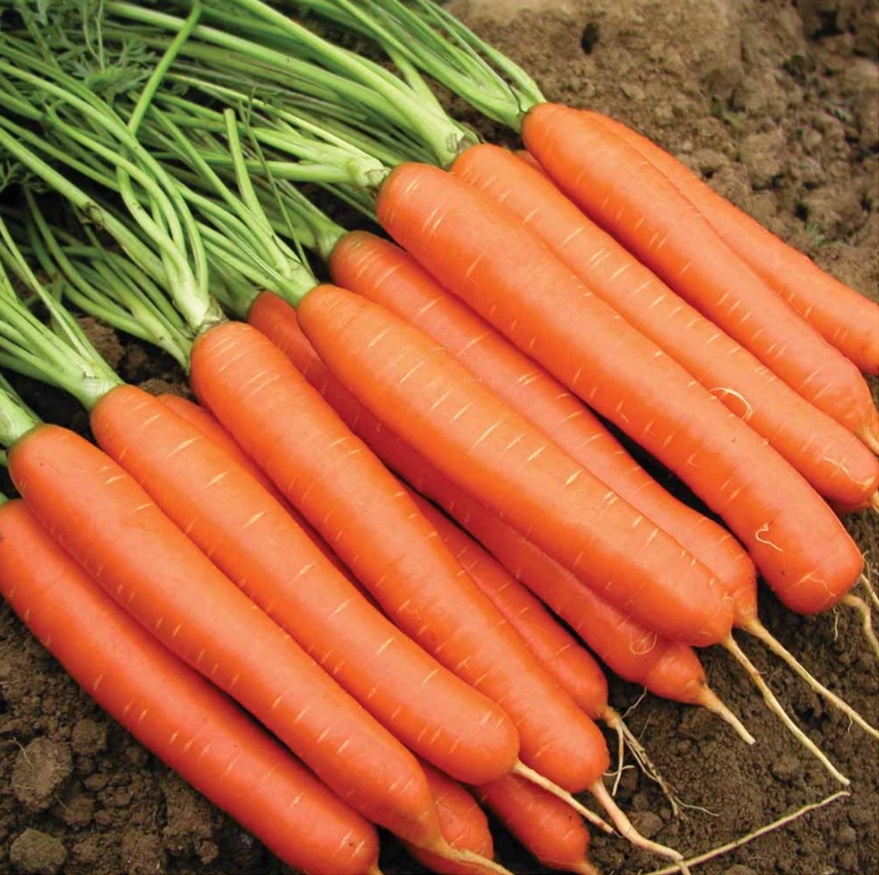
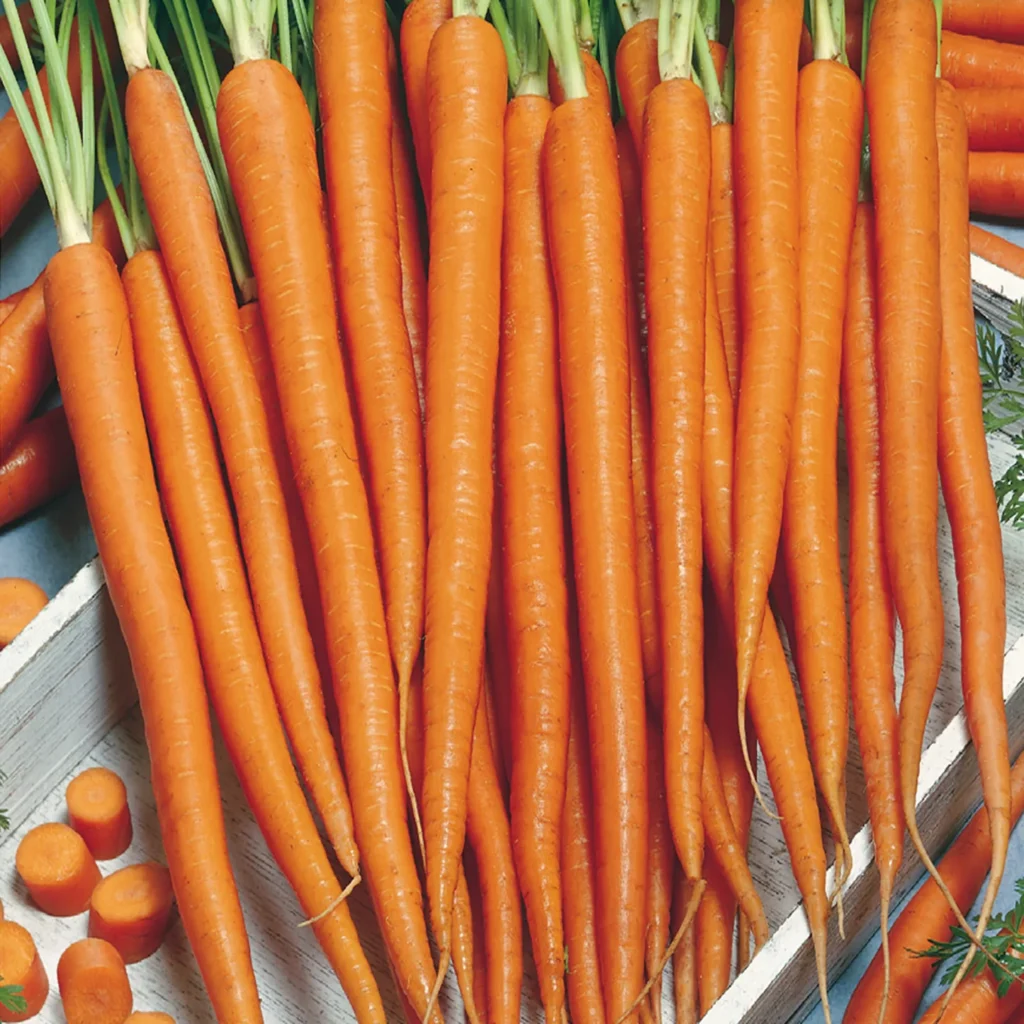
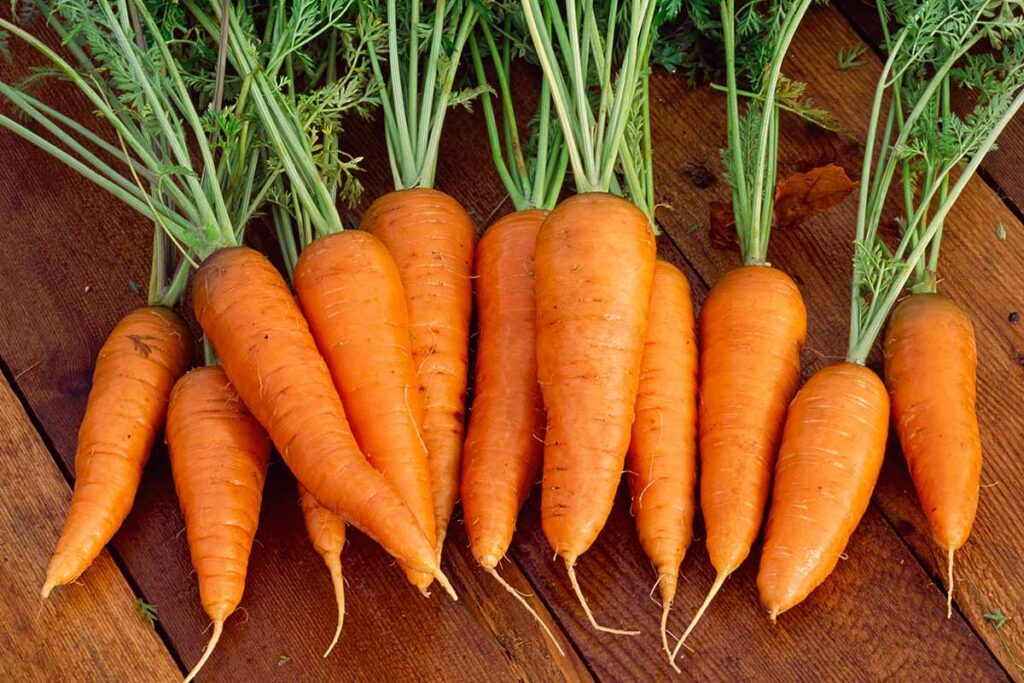
7. Carrots – A Root Crop That Delivers Serious Yield in Small Spaces
If you’re trying to get the most harvest from the least land, carrots belong near the top of the list. They’re direct seeded, they don’t sprawl, and they fit perfectly in raised beds or well prepped ground. When the basics are right, good seed, good soil, and consistent moisture carrots can move a surprising amount of weight per acre.
A common fresh market yield range is ~25,000–30,000 lb/acre , about 12–15 tons. Strong growers in ideal conditions can push ~50,000 lb/acre+. For small farms and market gardens, that matters because carrots sell in multiple formats and store well, so a big harvest doesn’t have to be dumped all at once.
Start Here: What Success Looks Like
Carrots are “high yield” because they stack density and storeability into one crop.
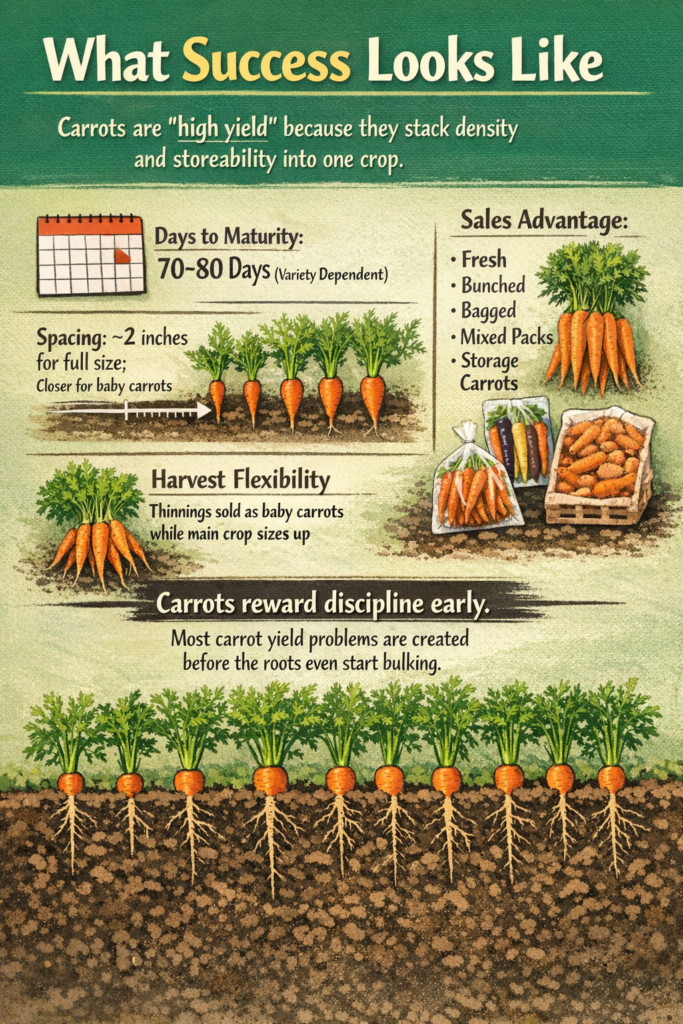
- Days to maturity: many varieties run ~70–80 days
- Spacing : often ~2 inches for full size roots; tighter for baby carrots
- Harvest flexibility: thinnings can be sold as baby carrots while the main crop sizes up
- Sales advantage: can be sold fresh, bunched, bagged, mixed packs, and storage carrots
Carrots reward discipline early. Most carrot yield problems are created before the roots even start bulking.
Why Carrots Qualify as “High Yield” on Small Acreage
Carrots win on two fronts: density and efficiency.
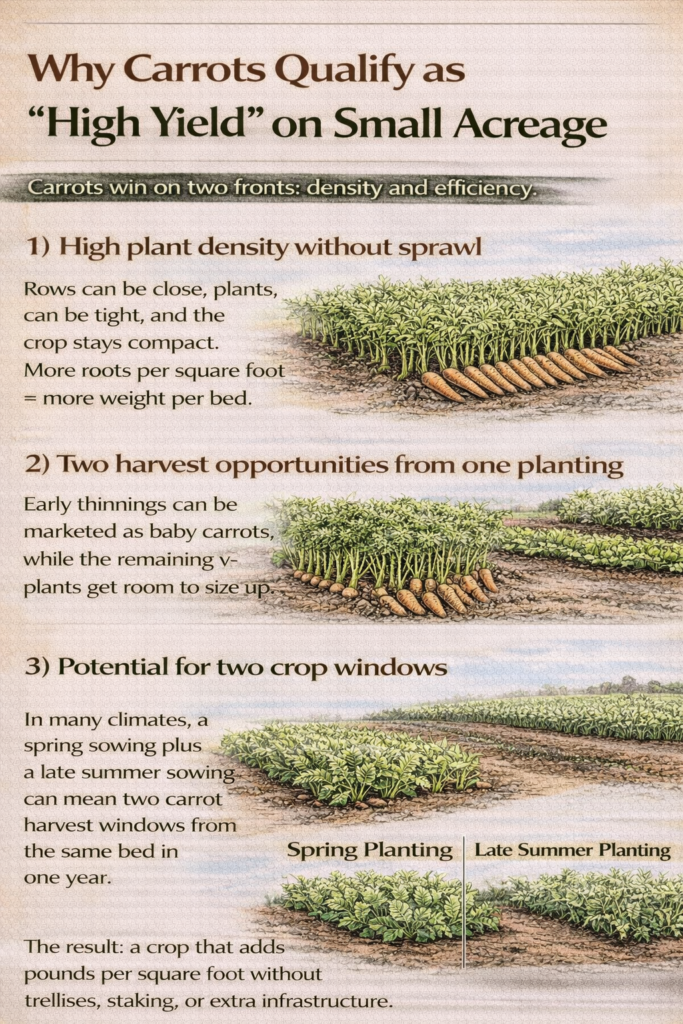
1) High plant density without sprawl
Rows can be close, plants can be tight, and the crop stays compact. More roots per square foot = more weight per bed.
2) Two harvest opportunities from one planting
Early thinnings can be marketed as baby carrots, while the remaining plants get room to size up.
3) Potential for two crop windows
In many climates, a spring sowing plus a late summer sowing can mean two carrot harvest windows from the same bed in one year.
The result: a crop that adds pounds per square foot without trellises, staking, or extra infrastructure.
The 80/20 Rules of Carrot Yield
If you get these right, yield and quality usually follow:

- Deep, clean soil = heavy, straight roots
- Full stand establishment = more total yield
- Thinning on time = fewer skinny carrots, more sellable weight
- Steady moisture = better texture and fewer splits
- Variety selection = better pack out and storage performance
Carrots don’t hide mistakes. Bad prep shows up as forked roots, patchy stands, and low weight harvests.
Step 1: Soil Prep Is the Yield Foundation
Carrots can only get as big as the soil allows. Tight, rocky, cloddy ground doesn’t just make ugly roots it reduces total weight.
Best setup
- loose, deep soil with good structure
- beds prepared ~12–18 inches if possible
- minimal stones and clumps, anything that stops a root costs you size
If you’re on heavier clay, carrots can still work just lean on:
- raised beds amended toward a lighter texture, or
- varieties that perform better in heavier soils
Bottom line: the easier it is for a carrot to push down, the more likely you get full-weight roots instead of forked disappointments.
Step 2: Seed Thick, Then Thin Like You Mean It
Carrot germination is often uneven. The fix isn’t “seed perfectly”—it’s seed generously and thin on time.
A practical approach
- sow thick enough to guarantee a full stand
- once seedlings are established, thin to target spacing
- for full-size roots, ~2 inches is a common goal , tighter if you want baby carrots
Skipping thinning feels like saving plants, but it usually produces lots of skinny carrots instead of fewer heavier ones and total sellable yield can drop.
Pro tip: sell early thinnings in salads, micro bunches, or mixed baby root packs so thinning feels like harvest, not waste.
A good carrot bed isn’t crowded. It’s evenly spaced.
Step 3: Moisture Is the Hidden Yield Lever
Carrots are picky at the beginning and quietly demanding the rest of the season.
During germination
Carrot seed must stay consistently moist. If the soil surface dries out, you get patchy stands and lost yield before the crop even starts.
Many growers improve germination moisture by covering seeded rows with:
- burlap
- row cover
- boards
During bulking
Aim for steady moisture. ~1 inch per week is a common benchmark, adjusted for heat, soil type, and rainfall.
Inconsistent watering can lead to:
- woody texture
- splitting especially after drought followed by heavy irrigation
- stalling, which means less weight
Also , harvest on time. Over mature carrots are more likely to crack, take pest damage, or lose market quality.
Step 4: Choose Varieties That Match Your Goal
Not all carrots are built for tonnage.
- Nantes: reliable, uniform, strong fresh-market performance
- Imperator: long roots, excellent weight potential in deep soil
- Danvers: tough, dependable, often better for storage and heavier soils
If your goal is maximum pounds, varieties bred for uniformity and size improve “pack-out” more of what you pull is actually sellable.
Also pay attention to top strength: strong foliage feeds big roots. Weak tops often mean smaller carrots even in great soil.
A Simple High Yield Carrot Plan for Small Farms
If you want a straightforward approach that works in many regions:
- prepare deep, clean beds early , non-negotiable
- direct seed thickly and hold steady moisture through germination
- thin promptly and evenly
- maintain consistent water during root bulking
- where climate allows, do a second sowing in late summer for fall storage carrots
Carrots don’t require fancy tools. They require discipline on the details and they pay you back in weight when you do them right.
References
- Michigan State University Cooperative Extension Service. Commercial Vegetable Recommendations: Carrots (Extension Bulletin E-1437). (Includes yield benchmarks for fresh-market and processing carrots.)
- University of California Agriculture and Natural Resources (UC ANR). Carrot Production in California (Publication 7226). (Direct-seeding, seeding rates, bed/row systems, and commercial production notes.)
- Rutgers New Jersey Agricultural Experiment Station (NJAES). 2024/2025 Mid-Atlantic Commercial Vegetable Production Recommendations: Carrots (section PDF). (Commercial spacing/production guidance and management recommendations.)
- University of Maryland Extension. Mid-Atlantic Commercial Vegetable Production Recommendations (EB-236) – overview page. (Confirms the regional guide scope and edition details.)
- Utah State University Extension. Water Recommendations for Vegetables. (General irrigation guidance and weekly water needs commonly used for vegetable crops.)
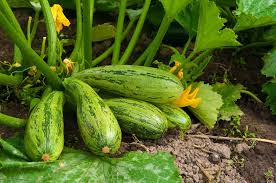
8. Zucchini (Summer Squash) – The “Keep Picking” Profit Crop
Zucchini is famous for one reason: it doesn’t know when to stop. In peak season, a healthy plant pushes flowers constantly, and every successfully pollinated female flower can become a marketable fruit. For small farms and market gardens, that matters because zucchini delivers steady harvests over weeks, not one big harvest day.
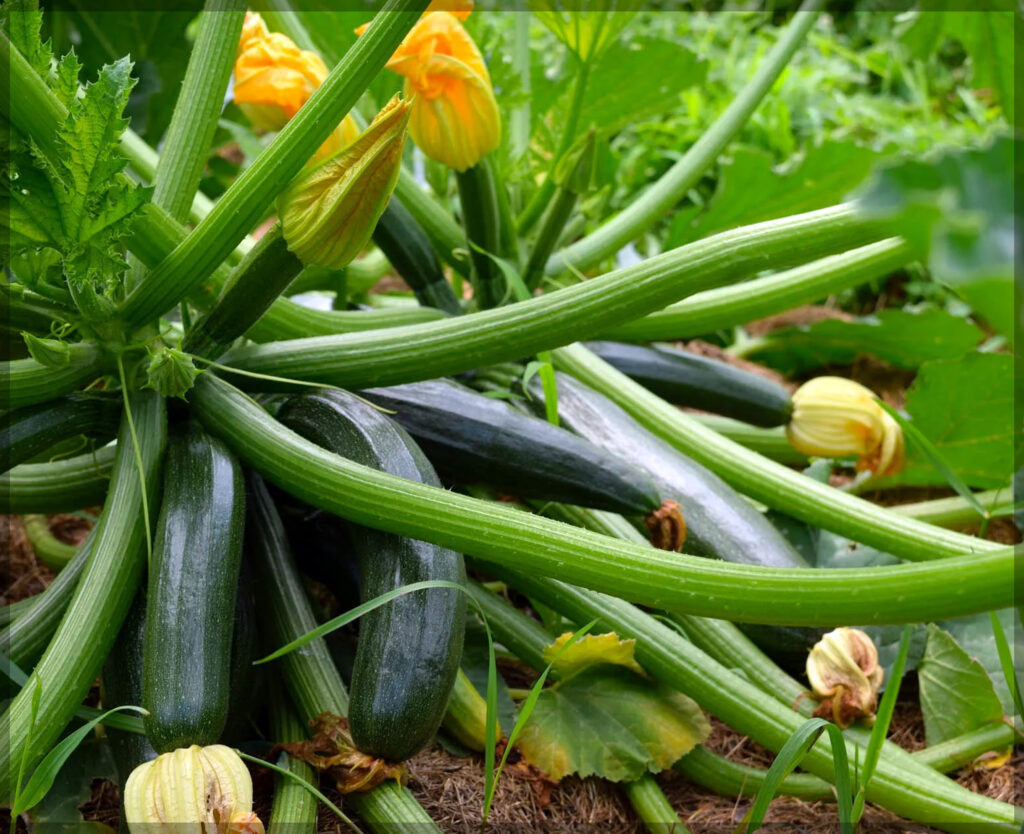
When managed well, zucchini becomes a “repeat sales” crop: you harvest often, your stand stays stocked, and customers get used to seeing it every week.

Start Here: What Success Looks Like
Zucchini yield is driven less by “one time size” and more by how consistently you pick and keep plants healthy.
- Days to first harvest: commonly ~50–65 days from transplant, then continuous production
- Harvest pattern: frequent picking, often daily or every 1–2 days in peak season
- Market strength: high turnover, steady volume, impulse friendly add on crop
- Critical idea: harvest drives more harvest, overgrown fruit slows future fruit set
Zucchini is high yield because it produces fast and keeps producing as long as you keep picking.
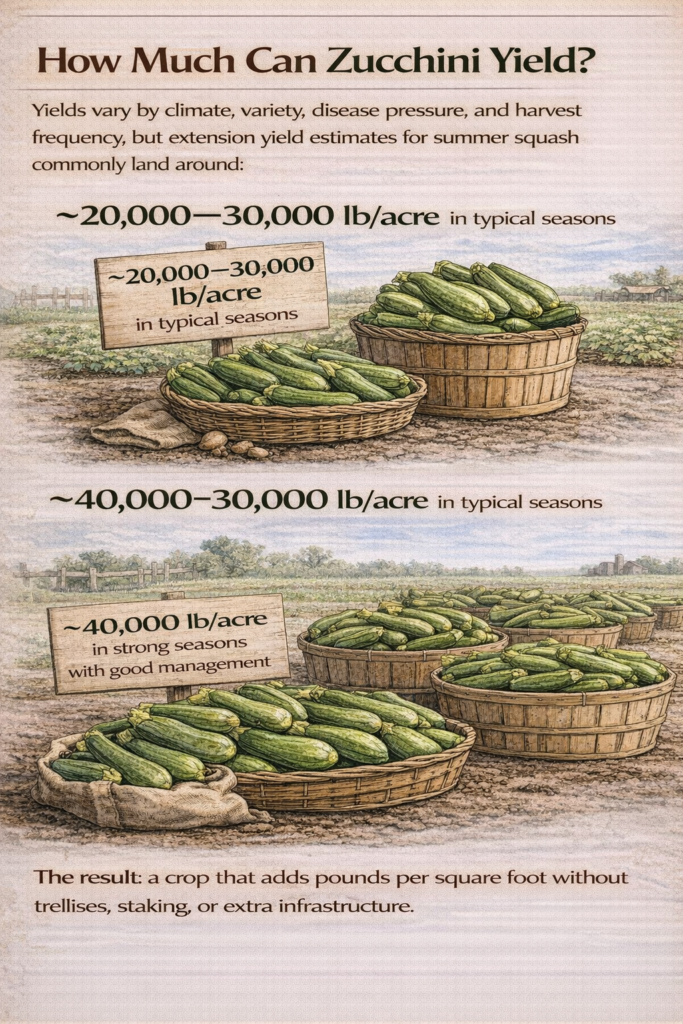
How Much Can Zucchini Yield?
Yields vary by climate, variety, disease pressure, and harvest frequency, but extension yield estimates for summer squash commonly land around:
- ~20,000–30,000 lb/acre in typical seasons
- ~40,000 lb/acre in strong seasons with good management
In high producing regions , such as parts of California, yields are sometimes discussed in cartons. Many fields exceed 1,000 cartons/acre, and ~2,400 cartons/acre has been reported. Zucchini is often packed in 28-lb cartons, which helps explain how totals can climb when conditions and management are excellent.
Why Zucchini Qualifies as “High Yield” on Small Acreage
Zucchini wins because of speed + frequency, not storage.
1) Frequent flowering + rapid fruit development
Once pollinated, zucchini can jump to harvestable size in just a few days. That makes it a crop you can cut every day or two during peak production.
2) Harvest drives future yield
Leaving fruit to grow oversized signals the plant to slow down. Removing fruit on time keeps the plant setting new ones.
3) Perfect fit for direct sales
Zucchini doesn’t store for months like winter squash but it delivers reliable weekly volume. It can also be held short term under proper cool, humid storage.
The 80/20 Rules of Zucchini Yield
If you get these right, the volume usually follows:
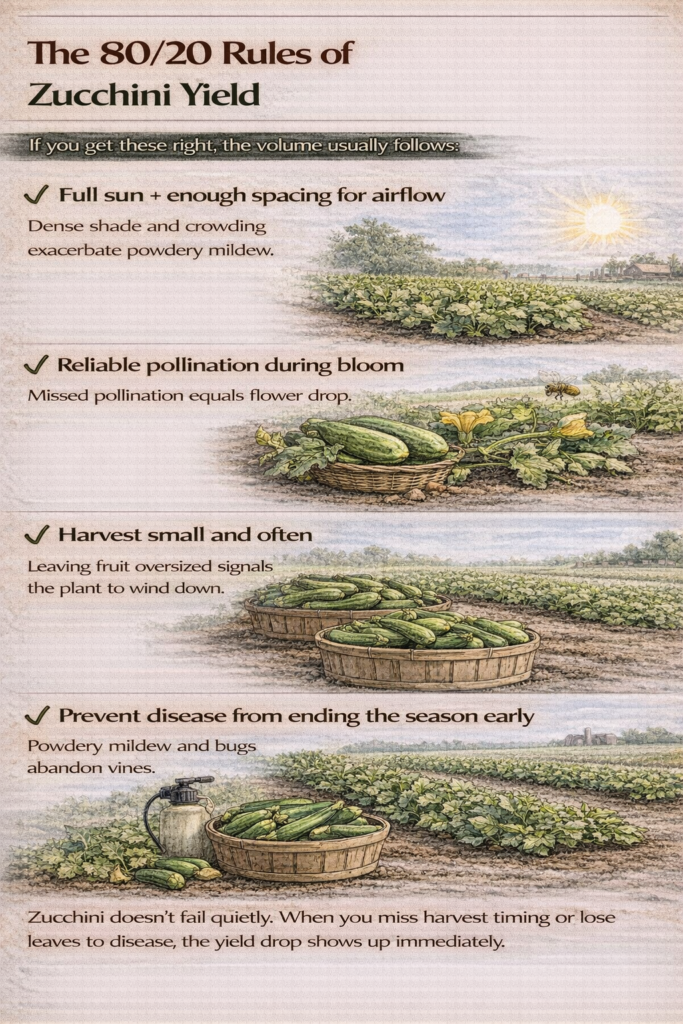
- Full sun + enough spacing for airflow
- Reliable pollination during bloom
- Harvest small and often
- Prevent disease from ending the season early
- Stagger plantings to avoid a single production cliff
Zucchini doesn’t fail quietly. When you miss harvest timing or lose leaves to disease, the yield drop shows up immediately.
Step 1: Give It Sun and Space
Zucchini needs full sun at least ~6 hours, ideally more and enough room to keep leaves dry and productive.
A common spacing benchmark is roughly 3–4 feet between plants, depending on whether you plant in hills or single plants. The goal is airflow: dense plantings often turn into powdery mildew factories later in the season.
Step 2: Make Pollination Easy
Summer squash has separate male and female flowers, and fruit set depends heavily on pollinators or hand pollination when needed. Cool, rainy stretches can reduce bee activity and shrink yields.
Practical yield protectors:
- avoid insecticides during bloom
- keep flowering plants nearby to support pollinators
- consider hand pollination during poor bee weather if fruit set drops
No pollination = no zucchini. Everything else is secondary.
Step 3: Harvest Small, Harvest Often
This is the yield lever most growers underestimate.
Most markets prefer zucchini at a medium size, commonly ~6–8 inches, depending on buyer preference. Once plants start producing, check them daily. Zucchini can go from “perfect” to “too big” fast, and oversized fruit reduces future set.
Rule: if you want more zucchini, pick more zucchini.
Step 4: Don’t Let Disease End the Season Early
Powdery mildew and other leaf diseases often arrive mid to late season. Once leaf health declines, the plant loses its ability to keep setting and filling fruit.
Best practical moves:
- prioritize airflow , spacing + weeds down
- avoid plant stress , steady water, avoid extreme drying cycles
- choose resistant varieties when possible
- if you spray, follow labeled products appropriate for vegetables, extension sources commonly mention options like sulfur or potassium bicarbonate among organic fungicides where appropriate and labeled
The goal isn’t perfection. It’s keeping leaves functioning long enough to extend the harvest window.
Step 5: Stagger Plantings to Keep Production Steady
Instead of betting everything on one planting, many growers plant zucchini more than once to keep production consistent. One extension guide suggests planting summer squash 2–3 times during the season to avoid a single “boom then crash.”
This spreads risk and keeps your stand stocked when older plants slow down.
The High Yield Zucchini Checklist
Before planting
- full sun location chosen
- spacing planned for airflow
- pollinator support nearby, flowers, reduced spray risk
During production
- harvest daily or every 1–2 days at peak
- keep water consistent
- monitor leaf disease early
Late season
- maintain airflow and leaf health
- rotate in later plantings for continuous supply
A Short, Honest “Affiliate Friendly” Gear List
What actually protects zucchini yield and market quality:
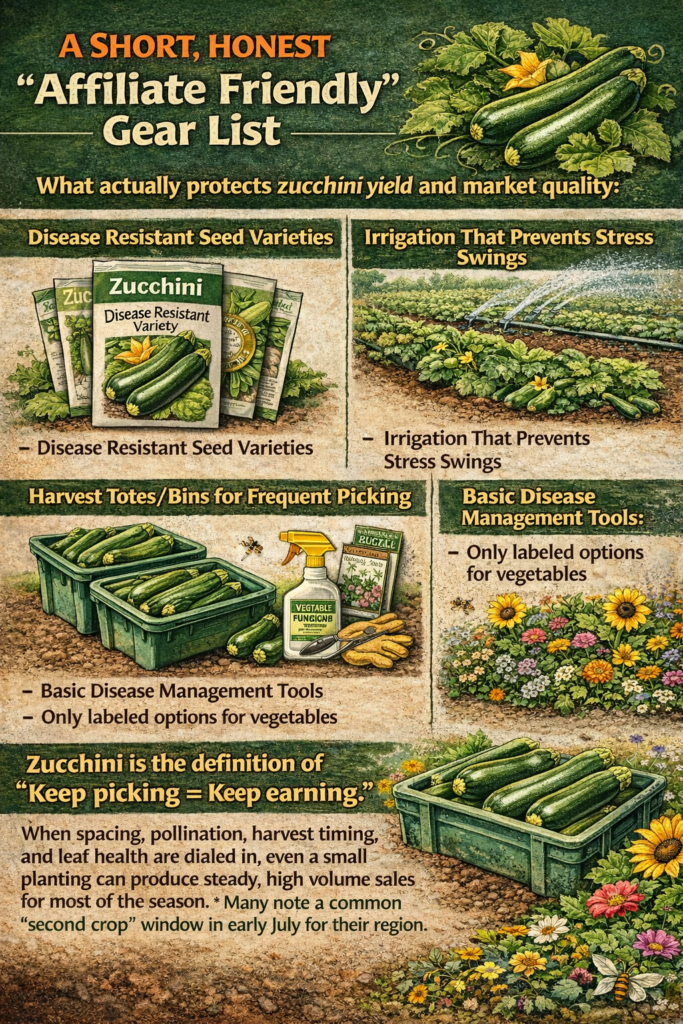
- disease resistant seed varieties
- irrigation that prevents stress swings
- harvest totes/bins for frequent picking
- basic disease management tools , only labeled options for vegetables
- pollinator support plantings , simple flowering borders
Zucchini is the definition of “keep picking = keep earning.” When spacing, pollination, harvest timing, and leaf health are dialed in, even a small planting can produce steady, high volume sales for most of the season and even notes a common “second crop” window early July in their region.
References
- University of Vermont Extension — Vegetable and Berry Crop Yield Estimates for New England (includes summer squash yield ranges).
- UC ANR Small Farms Network — Summer Squash Production in California (cartons/acre, harvest frequency, pack weights, handling).
- University of Maryland Extension — Growing Summer Squash (Zucchini) in a Home Garden (spacing, maturity, harvest size, succession planting, pollination notes).
- Oklahoma State University Extension — Squash and Pumpkin Production (pollination importance + yield benchmarks by region/management).
- University of Minnesota Extension / NC State Extension / Utah State University Extension — powdery mildew impact + management options.
9. Spinach and Fast Leafy Greens – Big Yield From Repeat Harvests
Spinach doesn’t always get the “high yield” spotlight, but it should. On a small farm or market garden, spinach can quietly outproduce flashier crops because it’s fast, it packs tightly into a bed, and it thrives in the cool edges of the season when other crops aren’t doing much.
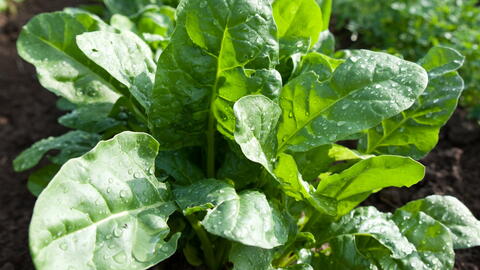

At field scale, fresh market spinach often lands around ~12,000–14,000 lb/acre, and processing spinach can reach roughly ~10–12 tons/acre with heavier seeding and mechanical harvest. But on small acreage, the real advantage isn’t only pounds per cut it’s how many cycles you can run per year, plus quick baby leaf harvests.
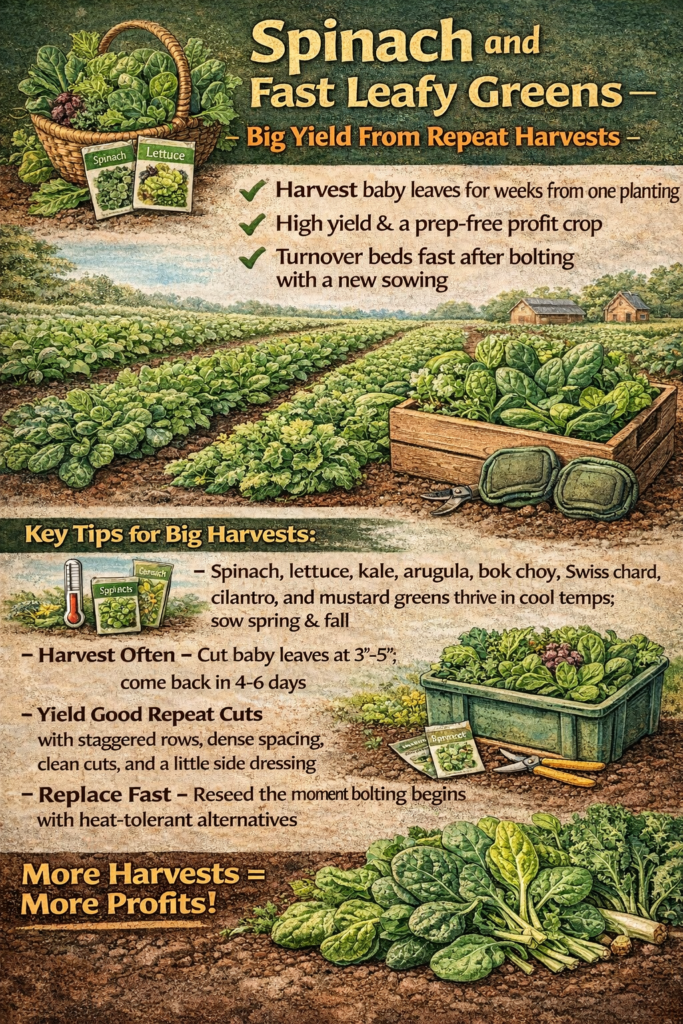
Spinach isn’t alone in this category. Managed the same way, baby kale, mustard greens, and young harvest collards can follow the same high-yield pattern: quick growth + dense planting + frequent harvest windows.
Start Here: What Success Looks Like
Spinach wins when you treat it like a schedule driven crop.
- Timeline: many varieties reach full size in ~40–50 days
- Baby leaf window: often ready in ~3–4 weeks, depending on temperature
- Planting style: dense beds especially for baby leaf
- Yield strategy: multiple cycles per year + quick cuts when conditions stay cool
- Key risk: heat stress → bolting → yield stops
If spinach is comfortable, it grows fast and stays tender. If it gets hot, it bolts and your marketable yield drops fast.
Why Spinach Qualifies as “High Yield” on Small Acreage
Spinach produces high yield through turnover, not size.
1) Short crop cycle
Spinach can be ready quickly, especially as baby leaf meaning beds can be replanted and harvested multiple times in a season.
2) Dense planting
Spinach tolerates tight spacing, so you can pack a lot of plants into a small bed and still harvest clean product.
3) Season extension value
Spinach thrives in cool weather, so it fits perfectly in early spring and fall , times when beds often sit empty.
4) Limited repeat harvest potential
Spinach isn’t a “cut forever” crop like some kales, but you can often get one strong cut, and sometimes a second lighter cut if you harvest correctly and the weather stays cool.
If your goal is more harvests per year, spinach is one of the simplest ways to keep beds earning in the shoulder seasons.
The 80/20 Rules of Spinach Yield
If you get these right, spinach usually performs:

- Plant early and plant again before heat arrives
- Run successions instead of one big planting
- Keep fertility steady across repeat cycles
- Harvest efficiently so the bed can reset fast
- Protect leaf quality , one pest outbreak can erase “high yield” instantly
Spinach doesn’t fail quietly. It bolts quickly, and leaf damage destroys saleability.
Step 1: Plant Early, Then Plant Again
Spinach rewards growers who treat it like a calendar crop, not a one-time planting.
Spring
- sow as soon as soil can be worked and daytime temps stay mild
Fall
- sow in late summer for a big autumn harvest, timing depends on climate
Bonus window
- in many regions, spinach can overwinter under row cover or a simple hoop house and produce very early spring harvests
Practical rule: comfortable weather = fast growth + tender leaves. Heat = bolting + yield stops.
Step 2: Feed the Bed Like You Mean It
Spinach is leaf production, so nutrition shows up directly in yield.
Best foundations:
- soil that holds moisture
- plenty of organic matter
- steady fertility, especially if you’re running repeated successions
Spinach responds strongly to nitrogen , not excessive, but consistent. If you’re reseeding the same bed multiple times, don’t just seed and hope, refresh fertility between rounds with compost, a balanced amendment, or a light side dress.
A well fed spinach bed doesn’t just yield more it produces thicker, heavier leaves, which adds up fast at harvest.
Step 3: Harvest Fast, Reset Faster
High yield is often a workflow issue.
For baby leaf
- many growers cut about ~1 inch above the soil with a sharp knife or small greens harvester so the crown can push another flush
For full-size spinach
- harvest once rosettes are substantial
- don’t delay especially as temps rise
- waiting too long often means bolting, and bolting means lost yield
The faster you can harvest cleanly, the sooner you can reseed and start the next cycle.
Step 4: Protect Leaf Quality
Spinach can look perfect one day and get hammered the next if you ignore the usual suspects.
Common yield killers:
- Downy mildew: thrives in cool, damp conditions; choose resistant varieties when possible and keep airflow decent
- Leaf miners: tunnels destroy saleability; floating row cover is one of the simplest and most reliable preventions
Also , if a section is bolting or badly damaged, pull it. It feels counterintuitive, but removing problem plants often protects the rest of the bed and keeps harvest quality high.
The High Yield Spinach Checklist
Before planting
- choose cool, season windows (spring/fall)
- plan successions, not a single sowing
- ensure bed fertility can support repeat plantings
During growth
- keep moisture steady
- watch heat
- use row cover early if leaf miners are common
During harvest
- cut efficiently and cleanly
- reset beds quickly for the next cycle
- remove bolting/damaged sections to protect quality
A Short, Honest “Affiliate Friendly” Gear List
What actually protects spinach yield and quality:
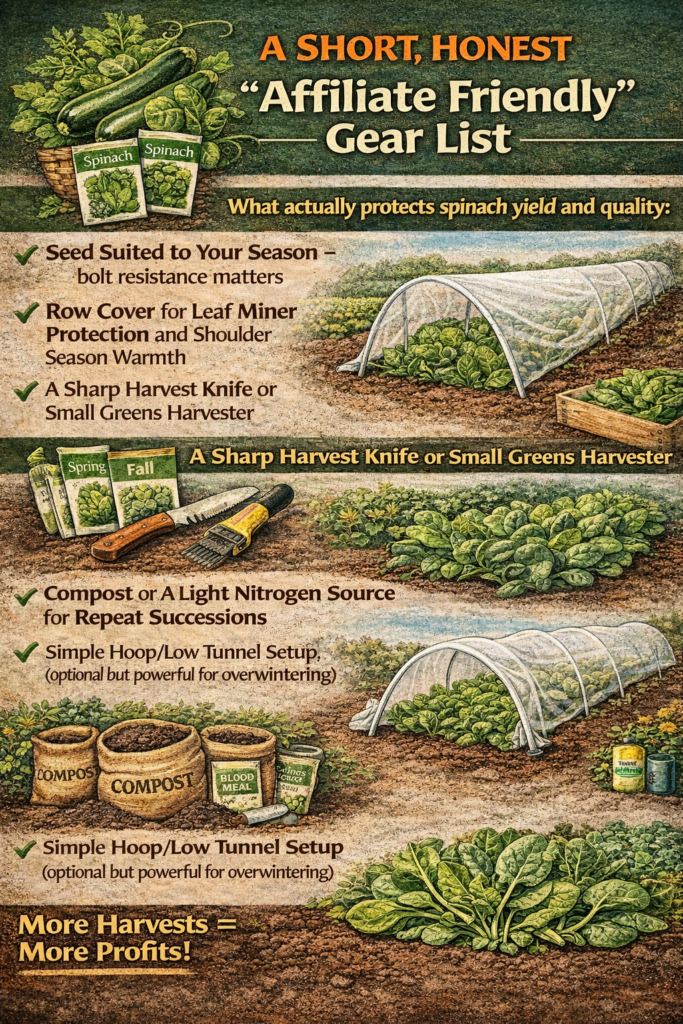
- seed suited to your season , bolt resistance matters
- row cover for leaf miner protection and shoulder season warmth
- a sharp harvest knife or small greens harvester
- compost or a light nitrogen source for repeat successions
- simple hoop/low tunnel setup , optional but powerful for overwintering
Spinach is a quiet workhorse. Treat it like a schedule crop, keep it cool, keep it fed, harvest efficiently, and it can deliver serious yield per square foot, especially in the seasons when other crops aren’t earning their keep.
References
- UVM Extension — Vegetable and Berry Crop Yield Estimates for New England (spinach yield ranges).
- UMass Amherst — Spinach fact sheet (fresh market and processing yield ranges; bolting notes).
- Oregon State University — Spinach (Oregon Vegetables).
- New England Vegetable Management Guide — Spinach (harvest timing; harvest methods).
- Oklahoma State University Extension — Cool Season Greens Production (bolting conditions; variety considerations).
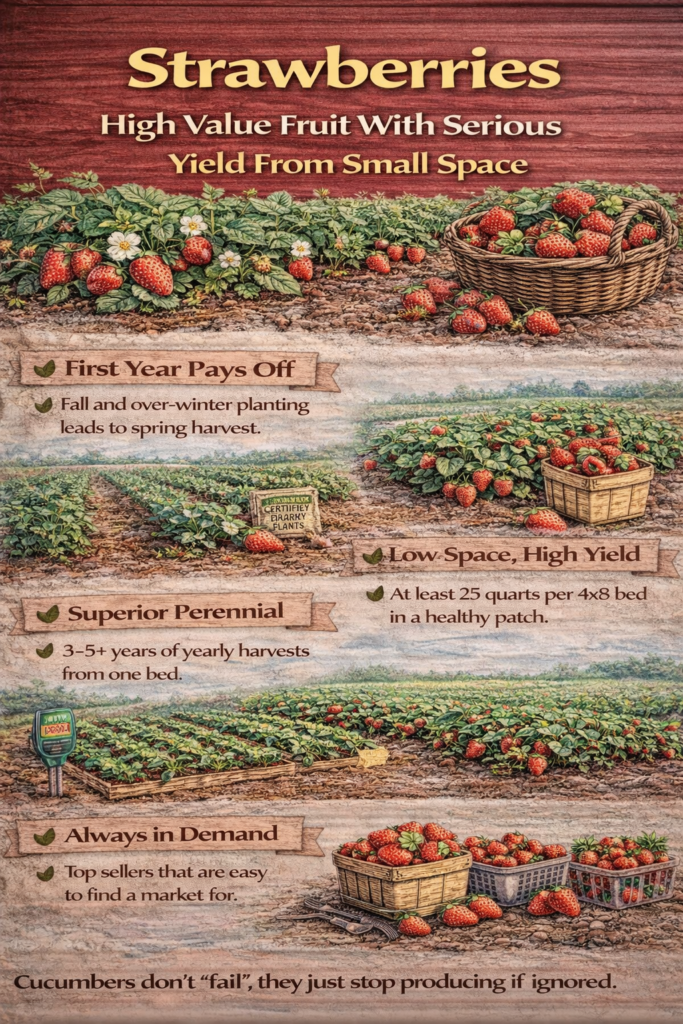
10. Strawberries – High Value Fruit With Serious Yield From Small Space
Strawberries earn their “high yield” reputation in a different way than greens or potatoes. They’re not just productive by the pound, they’re productive per square foot of customer demand. People will drive across town or across counties for good berries, and they’ll pay for them.

On the yield side, a healthy, well managed planting of June bearing strawberries is commonly expected to produce ~8,000–12,000 lb/acre per year, with wide variation based on weather and management. If you step up to an annual plasticulture system , raised beds, plastic mulch, drip irrigation, many guides describe yields around ~16,500 lb/acre under good management, and some regions report 10–12 tons/acre, about 20,000–24,000 lb/acre in productive plasticulture plantings.
And yes, California is a different universe. USDA referenced summaries note extremely high yields there, one reported figure: ~68,000 lb/acre in 2017, largely because the harvest window is long and conditions are ideal in key regions. For most small farms outside that climate, the smarter takeaway is simple: you don’t need California yields to make strawberries worth it. You need clean fruit, consistent picking, and a system that fits your labor.
Start Here: What Success Looks Like
Strawberries pay when you match production to your market and keep plants healthy.

- System chosen to match your sales model: U-pick vs farmstand vs wholesale
- Plant health: strong crowns, steady moisture, balanced fertility
- Labor plan: frequent picking and fast handling
- Longevity plan: renovation for perennial systems or intentional replanting for annual systems
Strawberries aren’t “set and forget.” They reward growers who design the system first then manage it consistently.
Why Strawberries Qualify as “High Yield” in Real Farm Terms
Strawberries produce heavily when you line up three things:
- A production system that matches your market
U-pick, farmstand, CSA add ons, wholesale, each one favors different varieties and bed systems. - Strong plants and steady growing conditions
Shallow roots mean strawberries respond fast to moisture swings and stress. - A plan to keep the planting productive
Either you renovate and carry beds forward June bearing matted rows, or you replant on purpose.
System choice matters more than almost any “secret fertilizer trick.”
The 80/20 Rules of Strawberry Yield
If you get these right, yield and quality usually follow:

- Choose the system first, then the variety
- Keep beds open enough to dry and pick easily
- Treat irrigation as a yield tool, steady moisture = steady berry size
- Renovate or replant intentionally, don’t drift into decline
- Protect what you grew, rot, birds, pests, and delayed picking steal yield fast
Strawberry yield isn’t what grew in the field. It’s what you picked, packed, and sold.
Step 1: Choose the System First, Then the Variety
Your system determines yield potential, fruit cleanliness, and labor needs.
Matted row (June-bearers)
- great for U-pick and lower cost perennial production
- can carry for multiple seasons if renovation is done well
- runners fill in the row, so long term row management matters
Plasticulture
- higher setup cost and more active management
- typically higher yield potential and cleaner fruit
- drip under plastic keeps moisture controlled and harvest cleaner
- day neutral systems are often chosen when you want an extended “berries for months” season
Step 2: Get Spacing Right So You Don’t “Grow Disease”
A packed strawberry bed can look productive, until it isn’t. Overcrowding raises humidity in the canopy, slows drying, increases rot pressure, and makes harvest harder.
- Matted rows: manage runners and row width so the bed stays pickable and healthy; renovation is part of spacing control.
- Plasticulture: higher density is part of the design, but it works because beds are shaped, water is controlled, and canopy/traffic are managed.
Good spacing is yield protection. It’s also harvest efficiency.
Step 3: Treat Irrigation Like a Yield Tool
Strawberries have shallow roots and don’t tolerate water stress well. Plasticulture guides emphasize drip irrigation, and many growers also use fertigation, feeding through drip to keep growth steady without overloading nitrogen.
The goal is simple:
steady moisture = steadier fruit size + fewer “small berries at the end.”
Step 4: Renovate June Bearing Beds Fast
If you’re running June bearers in a perennial matted row system, renovation isn’t optional busywork. It’s what helps plants rebuild and set up next year’s crop.
Common renovation themes include:
- mowing when appropriate
- weed control
- cultivation/narrowing rows
- fertilization
- irrigation support after renovation
There’s also a clean business decision here:
- Renovate if the bed is healthy and still worth carrying.
- Rotate/replant if disease pressure, weeds, or weak plants are already dragging yield down.
Step 5: Protect the Harvest You Already Grew
Strawberry yield isn’t “what set fruit.” It’s “what you sold.”
Protecting marketable yield often comes down to:
- staying ahead of rot pressure with clean picking and fast handling
- bird protection where needed , netting can save a season
- keeping harvest frequent so ripe fruit doesn’t sit too long
- managing pests before they damage fruit quality and pack out
A great strawberry season is often won in the harvest routine.
The High Yield Strawberry Checklist
Before planting
- system chosen , matted row vs plasticulture/day neutral
- market plan confirmed , U-pick vs farmstand vs wholesale
- irrigation plan ready
During production
- moisture kept steady, avoid stress swings
- bed density managed, airflow + drying
- fertility kept balanced, steady growth, not excessive nitrogen
After harvest
- renovate June bearing matted rows promptly or replant intentionally
- rotate out weak/diseased beds instead of carrying problems forward
During harvest
- pick frequently
- cool/handle quickly
- protect against birds/rot so pack out stays high
A Short, Honest “Affiliate Friendly” Gear List
What actually protects strawberry yield and fruit quality:

- strong plants, healthy crowns matched to your system
- drip irrigation components and fertigation ready setup if used
- plastic mulch / fabric + bed shaping tools for plasticulture
- straw mulch for many matted row June bearing systems
- harvest flats/totes + quick cooling plan
- bird netting where pressure is high
Strawberries are high value because demand is strong and high yield because the right system can produce a lot from a small footprint. Choose the system that fits your market and labor, keep plants steady and healthy, and protect harvest quality, and strawberries can become one of the best “small space, big return” crops on the farm.rating one, especially when prices are high and customers expect perfect fruit.
References
- University of Minnesota Extension — June bearing yield estimate (8,000–12,000 lb/acre) and system distinctions.
- Penn State Extension — matted row yield average (~10,000 lb/acre; wide range).
- Southern Regional Strawberry Plasticulture Production Guide – plasticulture yield assumption (~16,500 lb/acre; ~1.1 lb/plant) and drip/fertigation context.
- NC State Extension — plasticulture productivity (10–12 tons/acre) and plant density comparison.
- Arkansas Extension (UAEX) — plasticulture vs matted row productivity and management intensity.
Summery Table for 10 Best High Yield Crops for Small Farms
| Crop | Typical Yield (lbs/acre)<br>Good conditions | Notes for Small Farms |
|---|---|---|
| Tomatoes | ~30,000 lbs | Long season, continuous harvest; support vines for best results. High market demand. |
| Potatoes | ~25,000 lbs | Heavy producer underground; stores well. Seed tubers and soil mounding required. |
| Bell Peppers | ~20,000 lbs | Multiple pickings per season; prefers heat. Choose high yield, disease resistant hybrids. |
| Cucumbers | ~20,000 lbs | Fast growth, multiple crops a year; trellis for space efficiency. Great for fresh market or pickling. |
| Sweet Corn | ~8,000 lbs (≈12,000 ears) | High planting density; needs rich soil and water. Popular seasonal crop – sells quickly. |
| Lettuce (Leaf) | ~24,000 lbs | Quick turnover, 30-60 days ; can plant spring and fall. Grow in succession for continuous yield. |
| Carrots | ~26,000 lbs | Direct seeded root crop; requires deep, loose soil. High total weight and stores well. |
| Zucchini | ~30,000 lbs | Extremely prolific summer squash; pick often. Even a few plants yield heavily. |
| Spinach | ~12,000 lbs | Cool season leafy green; rapid growth and multiple harvests. Plant densely for baby greens. |
| Strawberries | ~10,000 lbs | High value per lb; yields over multiple months especially with day neutral varieties. Needs careful management of plants. |
Sources: Yield estimates adapted from university extension data and crop guides. Actual yields will vary by region, variety, and farming practices.
As you can see, these crops offer substantial yields, but hitting the high end of the range requires good farming practices. Let’s look at some general tips to help achieve higher yield crops on your small farm.
Maximizing Yields on Small Farms – General Tips and Best Practices
Even with high yielding crop choices, how you grow them makes a big difference. “Yield” isn’t just about genetics, it’s also about soil, water, and care. Here are some proven strategies to help you attain a higher yield of crops in a sustainable way:
Optimize Soil Health
Healthy soil = healthy, high yield crops. Conduct soil tests and amend your soil with organic matter, compost, cover crops, manure to improve fertility and structure. Rich soil provides the nutrients needed for maximum yields. Also, maintain proper pH for each crop, most veggies prefer ~6.0-7.0 . Healthy soil holds water well and fosters strong root systems, directly boosting yields.
Use High Yielding Varieties and Quality Seeds
Whenever possible, choose high yield crop varieties or hybrids known for productivity and disease resistance. Certified seeds or vigorous transplants will establish faster and yield more. For example, high yielding varieties of crops developed during the Green Revolution massively increased output globally. On your small farm, planting modern cultivars or proven heirlooms in your area that are bred or selected for high yield will give you an edge. Always buy from reputable suppliers to get good germination and true to type plants.
Efficient Plant Spacing and Crop Planning
Plan your garden layout to maximize space. Use techniques like intercropping and succession planting. Intercropping , growing complementary crops together can optimize light and soil usage, e.g., planting lettuce or radishes between rows of slower growing corn or broccoli. Succession planting , replanting another crop or the same crop after one harvest is done ensures your land isn’t sitting idle. Intensive methods like square foot gardening or biointensive spacing aim to get the highest yield per square foot by minimizing unplanted spaces. However, be careful not to overcrowd to the point of competition or increased disease, find the sweet spot for each crop.
Water Wisely and Consistently
Water stress can drastically reduce yields, so an efficient irrigation system is invaluable. Drip irrigation and soaker hoses deliver water directly to roots, reducing waste and avoiding wet foliage. This not only saves a precious resource but also keeps plants healthier and producing at their peak. Mulching around plants helps retain moisture and keep soil temperature stable, which further supports steady growth. In essence, provide ample water during critical growth and fruiting stages, but do it smartly to avoid runoff or fungal problems.
Integrated Pest and Disease Management
Pests and diseases can decimate what would have been a high yield. Adopt Integrated Pest Management (IPM) practices: monitor your crops regularly, encourage beneficial insects like ladybugs and lacewings, use crop rotation to break pest cycles, and consider physical barriers row covers, netting when needed. If you keep plants pest-free and healthy, they can put their energy into yielding well rather than just surviving. Similarly, remove diseased foliage or infected plants promptly to prevent spread. Consider planting trap crops or companion plants that deter pests naturally. The goal is a thriving crop with minimal losses, which directly translates to higher harvest numbers.
Extend the Growing Season
Employ season extension techniques to get more production in a year. Tools like greenhouses, high tunnels, hoop houses, or row covers allow you to plant earlier in spring, continue later into fall, or even grow through winter for some hardy crops. By adding weeks or months to your farm’s productive period, you can raise an extra succession of crops e.g., a late fall spinach or an early spring carrot crop that wouldn’t be possible outdoors. More growing time = more harvests. Even simple methods like using plastic mulch to warm soil or cold frames to protect seedlings can give you a jumpstart on planting and thus a longer season of yields.
Farm Planning and Record Keeping
Keep records of what varieties you plant, when you plant, and the yields you obtain. Over time, this helps identify which crops give you the best returns and which practices improve yield. You might find, for example, that a particular tomato variety gave you 20% more yield than others, or that the second succession of beans yielded less due to pest timing, valuable insights for future planning. Optimizing your crop mix and schedule based on past results will gradually increase your overall farm yield efficiency. Planning also includes ensuring you have crop rotations in place to maintain soil health , don’t plant the same family in the same spot each time, which prevents yield decline due to soil borne diseases or nutrient depletion.
By implementing these strategies, even small farms can achieve higher yield of crops, getting the most out of every bed and every season. Remember that experience also counts, as you fine tune methods for your specific soil and microclimate, yields often improve. Now, let’s address some frequently asked questions about high yield farming to clarify key points and help you plan your next steps.
Final Thought
Small farms can be powerhouses of production by focusing on these 10 Best High Yield Crops for Small Farms and applying smart techniques. By selecting the right crops and high yielding varieties of crops, and giving them excellent care, you’ll maximize your harvest even on limited acreage. High yields can translate to better food self sufficiency, more profit at markets, and greater food supply for your community. Remember to keep records, observe what works best on your farm, and continuously improve your practices, farming is a learning journey, and each season you’ll get better at coaxing more bounty from your land.
By implementing the strategies and crop choices outlined in this article, even a beginner farmer can achieve impressive results. Now it’s your turn: start planning your next planting with these high yield crops in mind. Which of these will you try on your farm? Maximize your yields, enjoy a bountiful harvest, and don’t forget to share your success stories or ask questions in the comments. Happy farming…
Frequently Asked Questions about 10 High Yield Crops for Small Farms
1) What does “high yield” really mean on a small farm?
High yield means you get more harvest from the same space. That can happen in three ways:
High pounds per area – potatoes, carrots
Repeat harvest over weeks – tomatoes, peppers, cucumbers, zucchini
Fast turnover / multiple successions – lettuce, spinach, greens
2) Which high yield crops are best for beginners?
For most beginners, the easiest “high return for effort” crops are:
Zucchini – fast, heavy producer
Lettuce/salad greens – quick harvest, repeat plantings
Potatoes -reliable bulk crop, stores well
Cucumbers – fast and productive if harvested often
Carrots – high yield, but needs good bed prep and thinning
3) How can I increase yield without using expensive inputs?
The biggest low cost yield multipliers are:
Consistent watering + mulch – prevents stress and quality loss
Succession planting – keeps beds producing all season
Proper spacing + airflow – reduces disease and extends harvest
Harvesting on time and often – especially zucchini, cucumbers, peppers
Healthy soil with compost/organic matter – better roots = better yield
4) Why do my plants look healthy but yield is low?
This usually comes down to one of these:
Too much nitrogen – big leaves, fewer fruits common with tomatoes/peppers
Poor pollination – cucumbers, zucchini, corn
Inconsistent moisture – cracking, blossom end rot, small fruit
Overcrowding – more disease, smaller fruit, fewer harvests
Late harvesting – plants slow down when fruit gets oversized
5) What’s the fastest way to get more harvest per year from the same bed?
Use succession planting + season extension:
Plant quick crops – lettuce/spinach every 1–3 weeks during cool seasons
Replace finished crops immediately – pull, compost, replant
Use simple tools like row cover or low tunnels to start earlier and finish later

Thesis Link : https://saulibrary.edu.bd/daatj/public/uploads/BAU200601_19-Pp_5.pdf
- Best Backpack for Work, Travel, College, and Everyday Use - May 24, 2026
- Best Soil Test Kits for Lawns and Gardens - May 16, 2026
- Best Farm Loans in USA – How to Get Approved Fast in 2026 - April 29, 2026

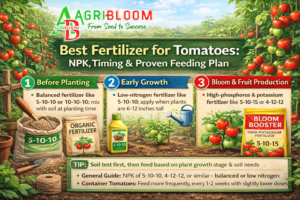


[…] Read more Best Time to Travel to Puerto Rico – When to Go 10 Best High Yield Crops for Small Farms – Grow More, Earn More […]